Through booking rules, we can specify custom JavaScript methods, that can be used to run validation checks, before creation or update of a bookable resource booking record. Based on the result of the validation checks we can either warn the user or cancel the booking create or update event.
Booking rules are triggered when a resource is booked or a bookable resource booking record is either created or updated using the schedule board, schedule assistant, or booking form.
The booking rules are not triggered if the booking form has business process flow enabled. We can also disable the booking rule to be triggered on the save of the booking form by enabling the setting – msdyn_DisableProcessBookingRulesOnSaveBookingForm
Let us see it in action.
Below is our JavaScript method to be used as a Booking Rule.
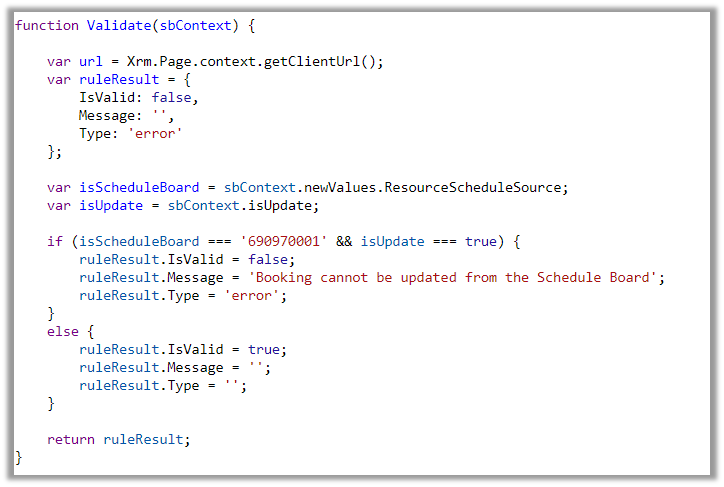
function Validate(sbContext) {

    var url = Xrm.Page.context.getClientUrl();
    var ruleResult = {
        IsValid: false,
        Message: '',
        Type: 'error'
    };

    var isScheduleBoard = sbContext.newValues.ResourceScheduleSource;
    var isUpdate = sbContext.isUpdate;

    if (isScheduleBoard === '690970001' && isUpdate === true) {
        ruleResult.IsValid = false;
        ruleResult.Message = 'Booking cannot be updated from the Schedule Board';
        ruleResult.Type = 'error';
    }
    else {
        ruleResult.IsValid = true;
        ruleResult.Message = '';
        ruleResult.Type = '';
    }

    return ruleResult;
}
To create a Booking Rule, navigate to Resources >> Booking Settings >> Booking Rules inside the Dynamics 365 Field Service app and create a new booking rule, specifying the web resource and the method inside it.

Let us try to update a booking from the schedule board.
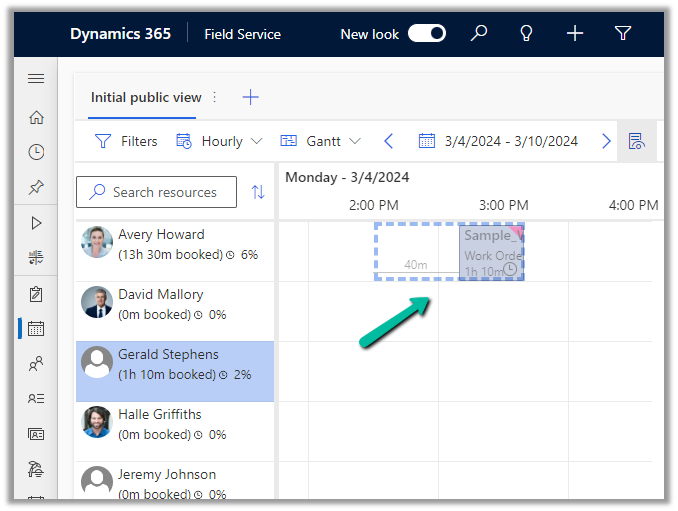
This will trigger our booking rule and will pass the context object, which contains details like whether it is a create or update event, and details around old values and new values for start time, end time, resource details, etc. for that booking.
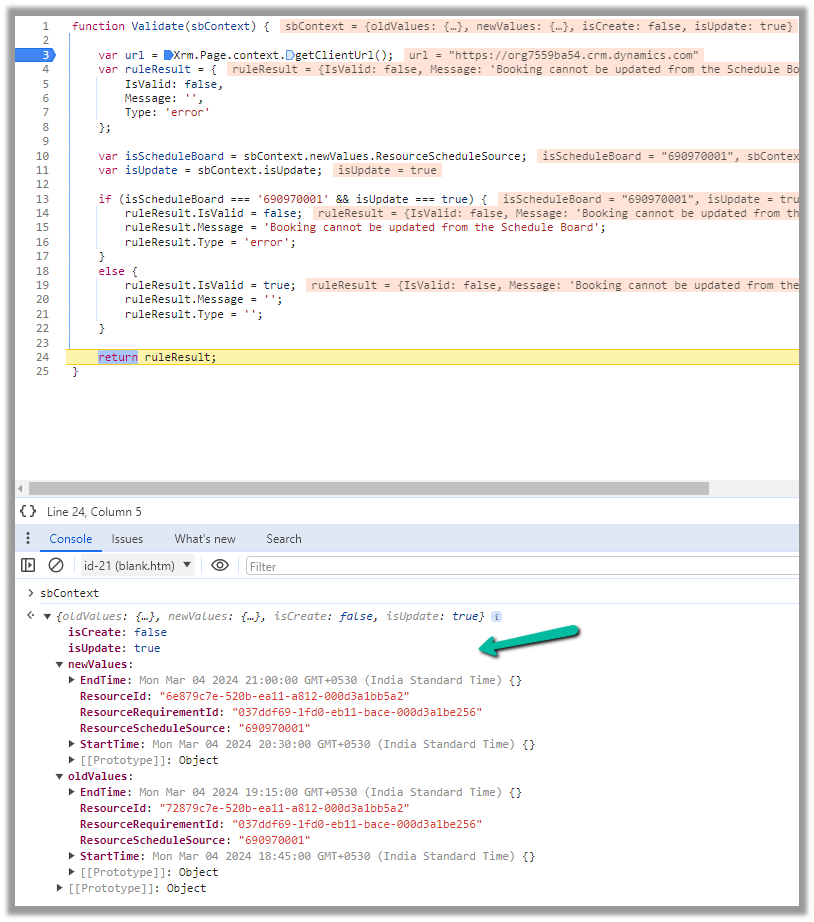
We can use these values passed in the context, fetch more details about the corresponding resource or work order, have our validation logic defined there, and finally pass the ruleResult object.
If we want to cancel the event, we can set IsValid as false, specify the error message, and set Type as an error in the ruleResult object. Similarly, if it passes the validation, we can set IsValid as true.
This is how the error message shows up, and the event is canceled inside the schedule board.

Below we can see the same booking rule being triggered from the Booking Resource Booking form.

We can deactivate the booking rule record created if we do not want it to trigger.
Get all the details here – Booking Rule
Hope it helps..