There is a small enhancement added to the Lookup Control as part of Release Wave 2.
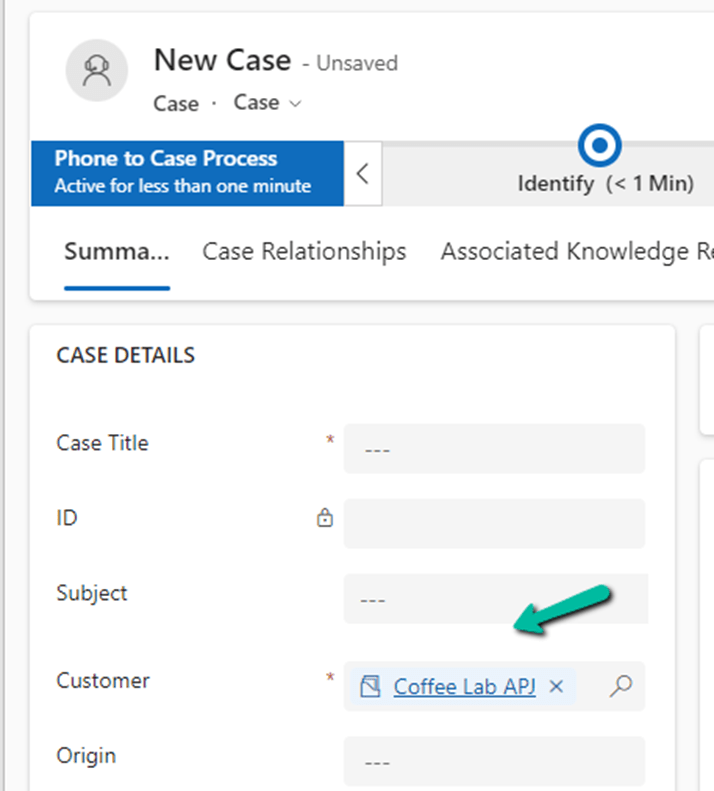
After performing a search for a specific record inside the Lookup Control dropdown menu, e.g. we have performed a search on “co*” on the Customer Lookup for Case.

We can press Enter to have the first item in the list selected.
Get more details
Hope it helps..
Advertisements