Recently we got the below error while trying to assign the record.
Unable to save. This form can’t be saved due to a custom setting.
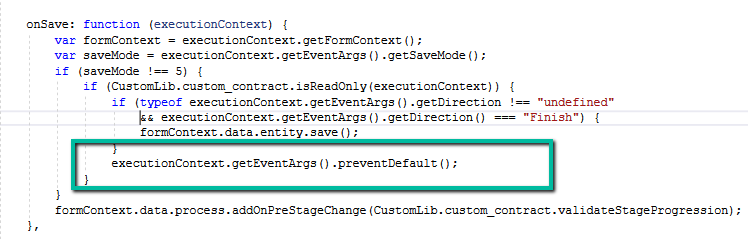
Turned out we had certain conditions in the OnSave event for the form, and if the record satisfies those conditions we were canceling the save event using
MultiSelect OptionSet (Choices) fields in Dataverse provide a flexible way to store multiple values within a single field. However, querying and filtering these fields require different techniques depending on the approach used.
In this blog post, we will explore various ways to filter records based on the Skills field (cr1a7_skills), which has the following values:
Name
Value
C#
255780000
Java
255780001
Python
255780002
We have the Skills (choices) field in our Contact table.
The query is to fetch all the contact records where skills includes C# or Java.
Filtering Using FetchXML
FetchXML allows filtering MultiSelect Option Set fields using the contain-values operator.
Using QueryExpression, we can apply the ContainValues condition to filter Multi
var query = new QueryExpression("contact");
query.ColumnSet.AddColumns("fullname");
query.Criteria.AddCondition("cr1a7_skills", ConditionOperator.ContainValues, 255780000, 255780001);
Filtering Using OData (Web API)
OData allows filtering MultiSelect Option Set fields using the ContainValues function.
If you’re using the SQL4CDS tool in XrmToolBox, you can filter MultiSelect Option Set fields using LIKE conditions.
SELECT contactid,
       fullname
FROM   contact
WHERE  statecode = 0
       AND (cr1a7_skills = '255780000'
            OR cr1a7_skills LIKE '255780000,%'
            OR cr1a7_skills LIKE '%,255780000,%'
            OR cr1a7_skills LIKE '%,255780000'
            OR cr1a7_skills = '255780001'
            OR cr1a7_skills LIKE '255780001,%'
            OR cr1a7_skills LIKE '%,255780001,%'
            OR cr1a7_skills LIKE '%,255780001'
            );
Filtering Using LINQ (C#)
For LINQ queries, MultiSelect Option Sets must be processed as OptionSetValueCollection.
        if (myServiceClient.IsReady)
        {
            using (var context = new OrganizationServiceContext(myServiceClient))
            {

                var skillValues = new List<int> { 255780000, 255780001 };

                var allContacts = context.CreateQuery("contact")
                .Where(c => c["cr1a7_skills"] != null &&
                            (int)c["statecode"] == 0)
                .ToList();

                var filteredContacts = allContacts
                    .Where(c => ((OptionSetValueCollection)c["cr1a7_skills"])
                                .Select(osv => osv.Value)
                                .Any(skill => skillValues.Contains(skill)))
                    .Select(c => new
                    {
                        ContactId = c["contactid"],
                        FullName = c.Contains("fullname") ? c["fullname"].ToString() : string.Empty
                    })
                    .ToList();

                var result = filteredContacts;

            }
        }
In Microsoft Dataverse, calculated columns are a powerful way to derive values dynamically without the need for manual updates. However, one challenge is that plugins do not trigger directly on calculated column changes since these values are computed at runtime and not stored in the database.
Since calculated columns use/depend on other fields, we can register a plugin on the change of those dependent fields. If a calculated column Total Amount is based on Quantity and Unit Price, then we can trigger the plugin on the Update event of Quantity and Unit Price.
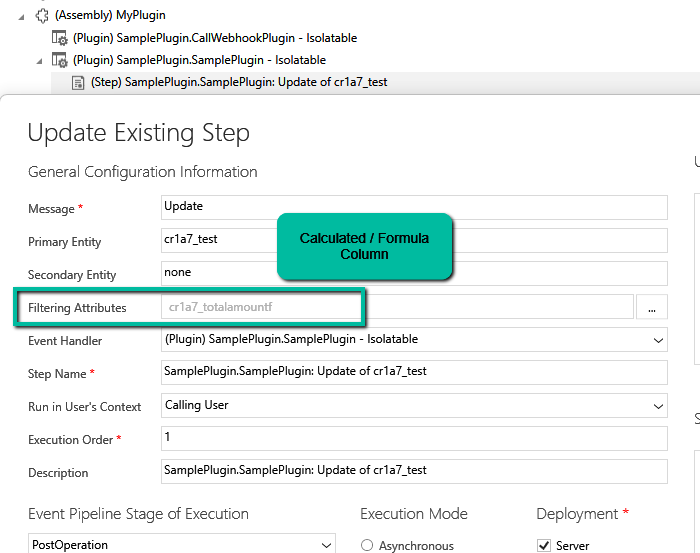
Let us see it in action, we have the below plugin registered in the update event.
On specifying the Formula / Calculated column as a Filtering attribute, our plugin doesn’t get triggered.
Here we updated the Unit Price, which changed the Total Amount, but we do not see any trace log generated.
Now we have updated the filtering attribute to be Quantity and Unit Price the field used by the Calculated column.
We updated both the Quantity and Unit Price and see the log generated i.e. plugin triggered.
The trace log –
While plugins can’t directly trigger on the calculated column changes, this workaround ensures we still get the desired automation.
While testing one scenario we observed one of the plugins (asynchronous) was not updating the record as expected.
Checking the System Jobs, we saw the below error.
The async operation was skipped because the org is in “Disable Background Processing” mode.
Well, this was because we had recently created this environment by copying our UAT environment and had forgotten to disable the Admin mode / enable Background operations.
We all know how frustrating it can be to dig through records just to find key details. With AI-generated record summaries, users can instantly access important information—saving time, reducing effort, and boosting productivity.
We can now create AI-powered record summaries for any table in Power Apps using a simple, guided prompt builder. We get to choose the fields and details that matter most, ensuring users see the right information briefly. There’s even an online testing option to fine-tune the summary before rolling it out. Once set up, the record summary will be readily available in forms, making information access effortless.
To enable it inside the Power Platform Admin Center, select an environment and navigate to
Environment >> Settings >> Features >> AI insights cards
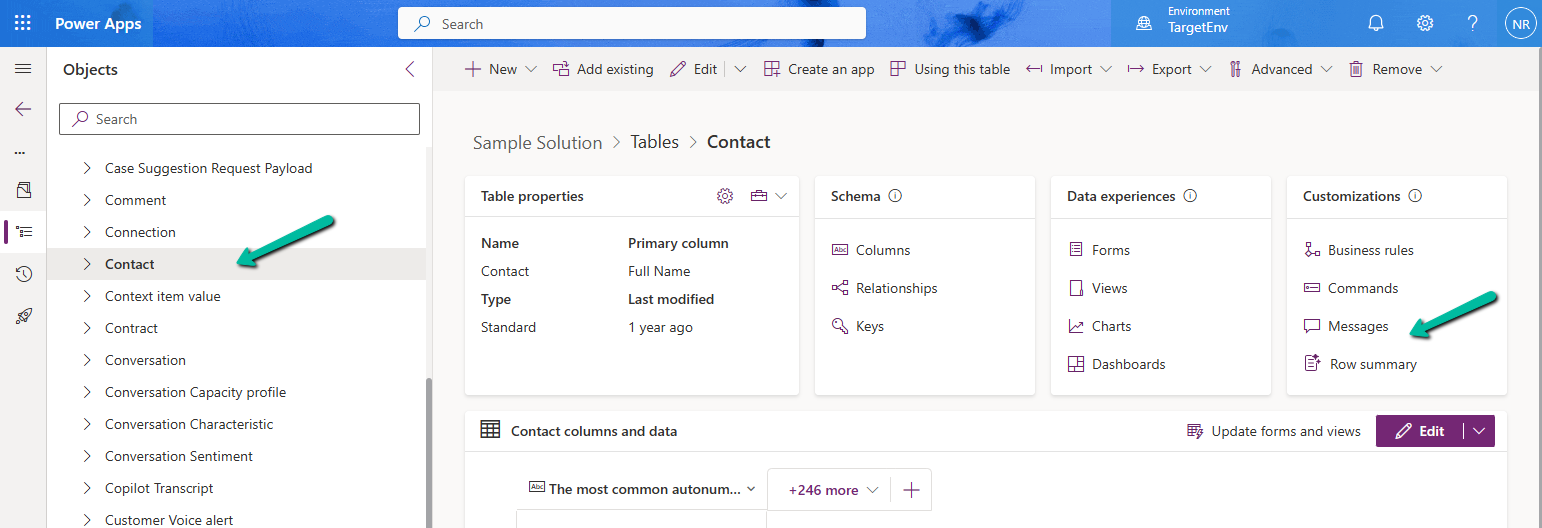
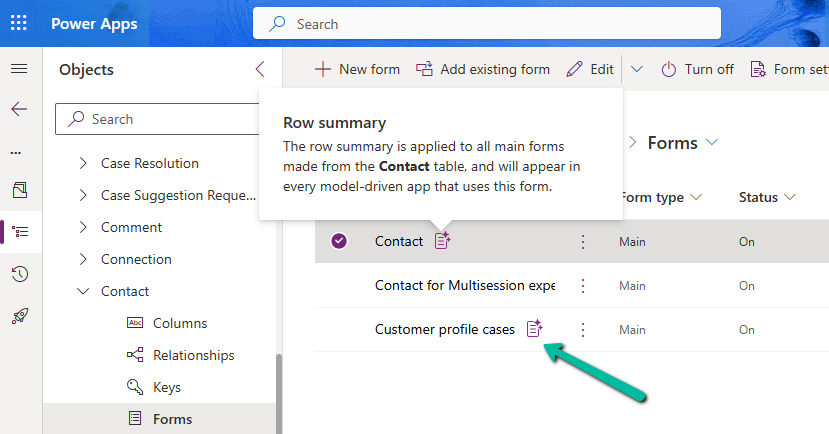
Inside Maker Portal, select the table, and from the Customizations section select the Row summary option.
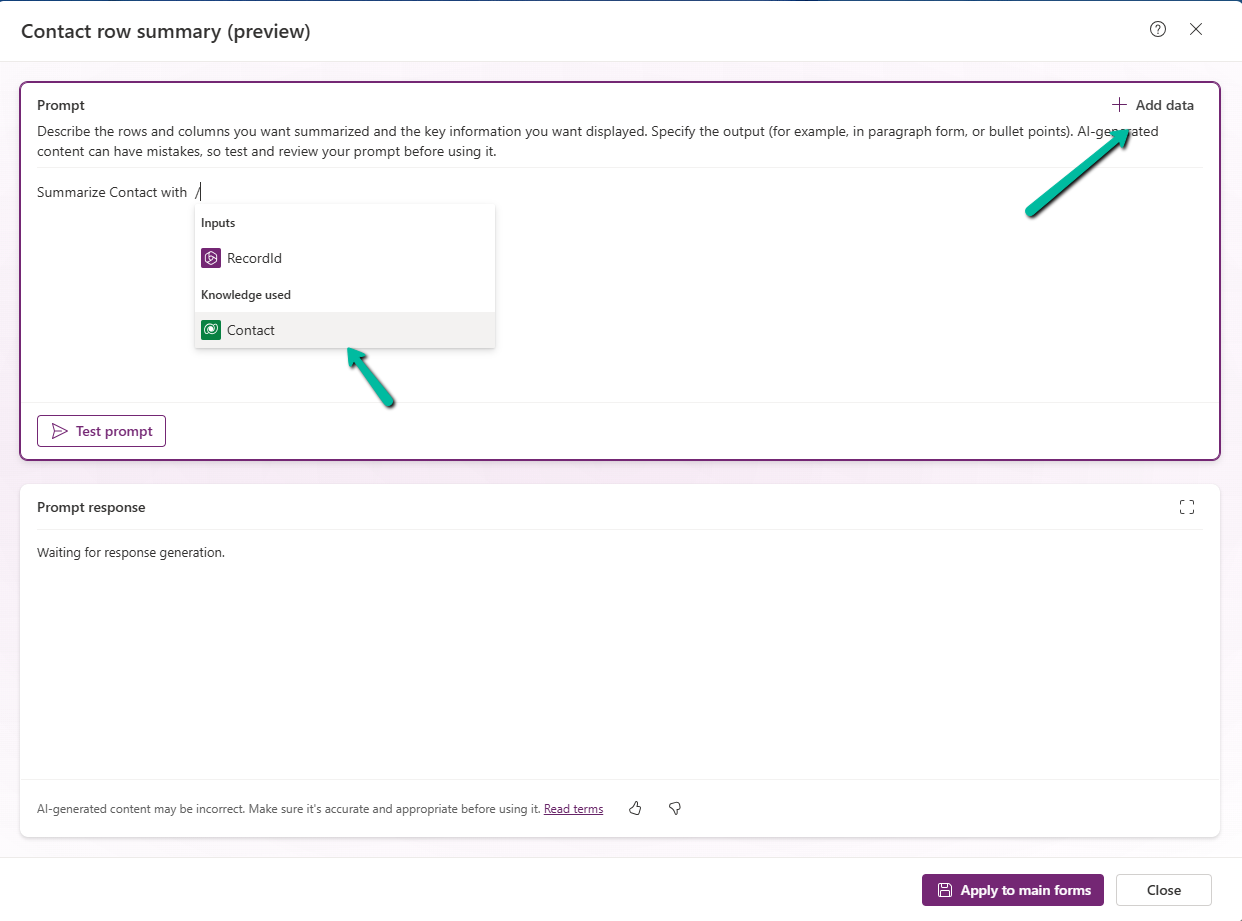
In the Prompt box, we can specify the columns we want to include as part of the summary.
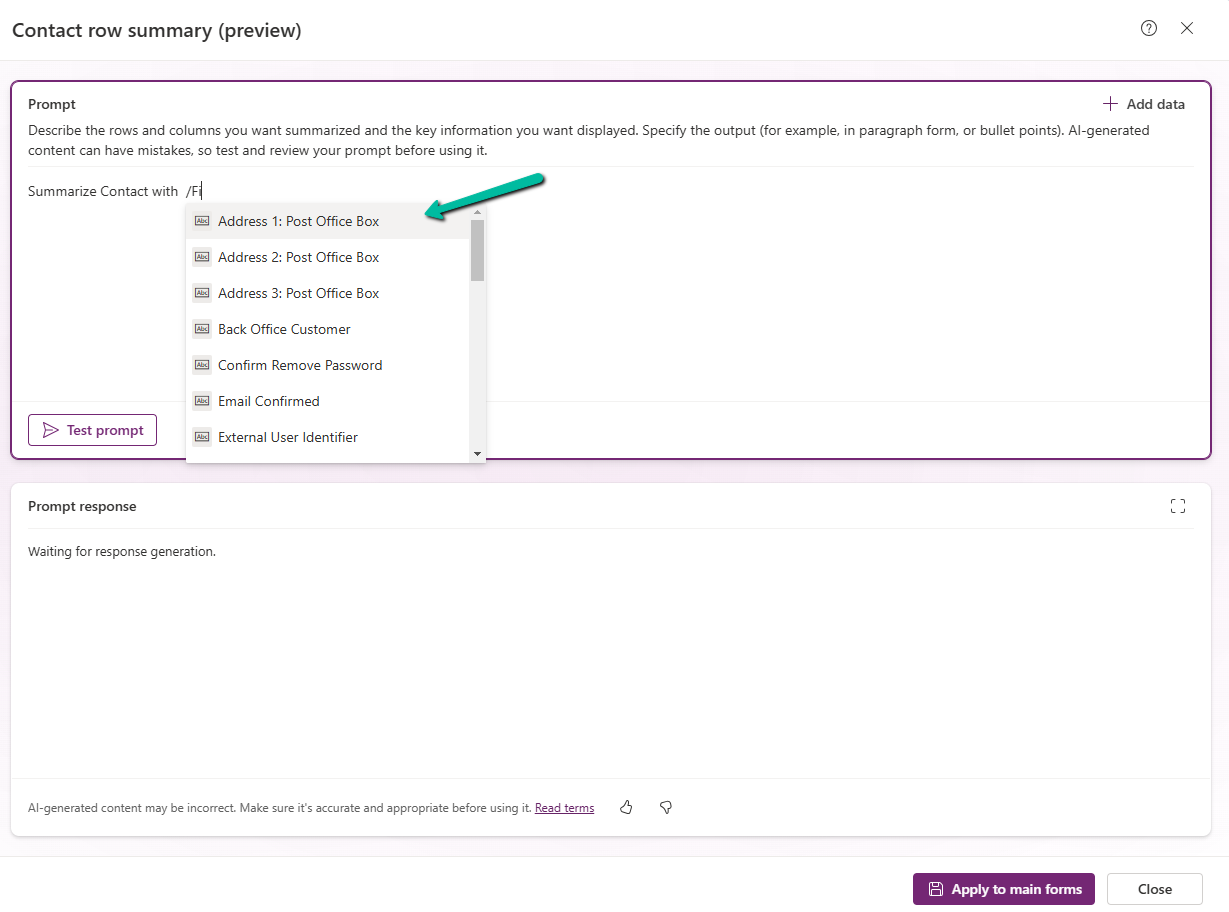
We can click on +Add data to do so can type the name of the field after “/”
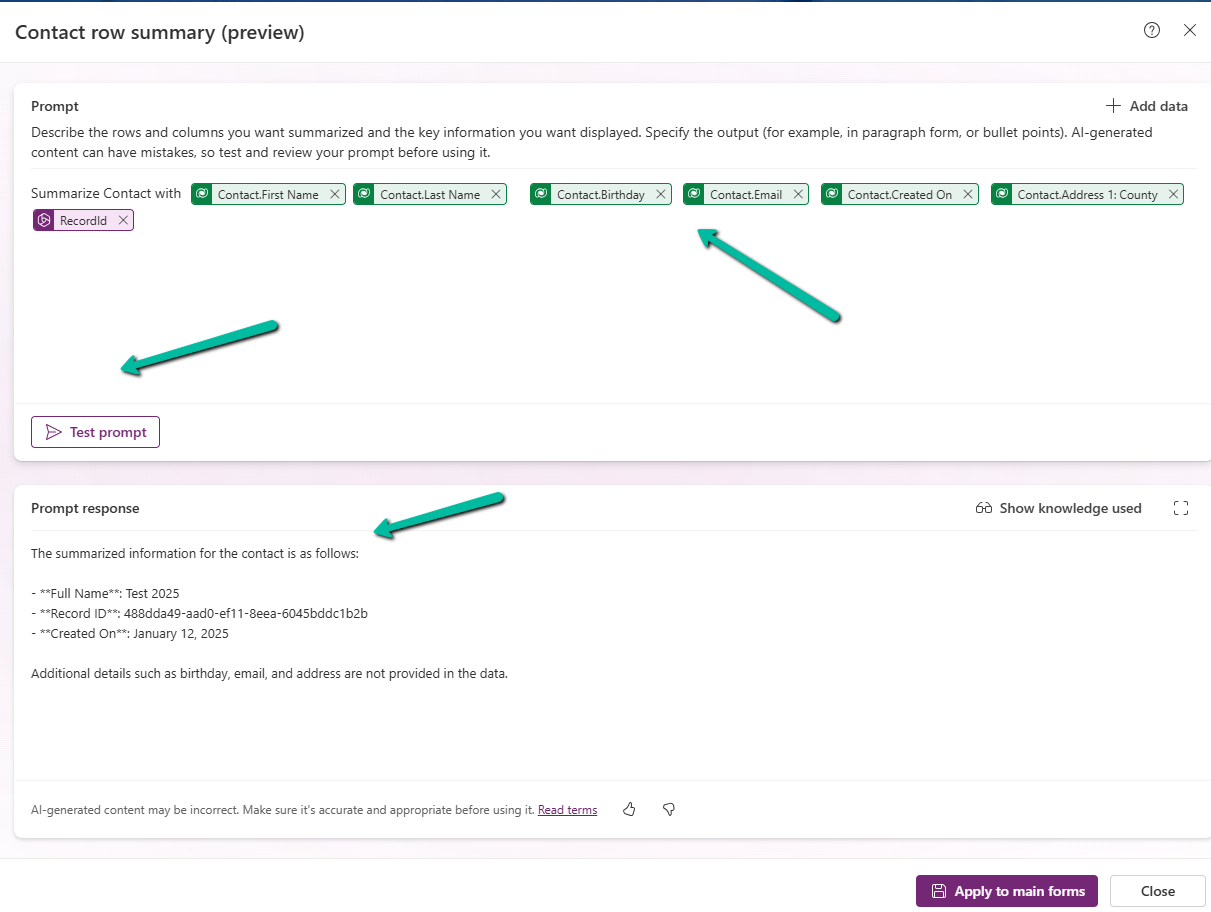
After specifying the fields, we can click on the Test prompt to see the response. And can fine tune it further.
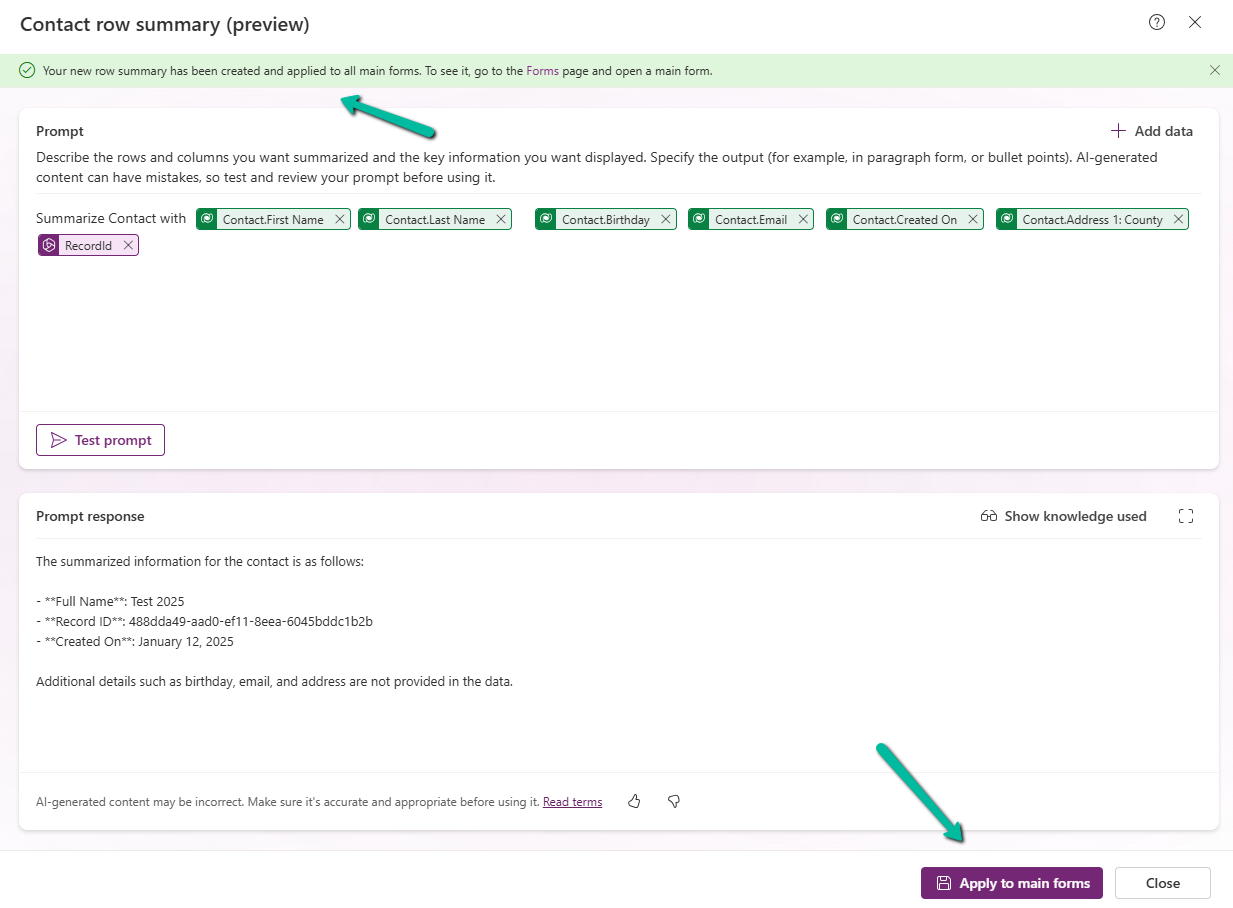
Clicking on Apply to main forms applies to all the main forms for the table.
We can see the icon added next to the main forms.
The Row summary toolbar allows us to show, hide, and edit the summary.
Publish the changes.
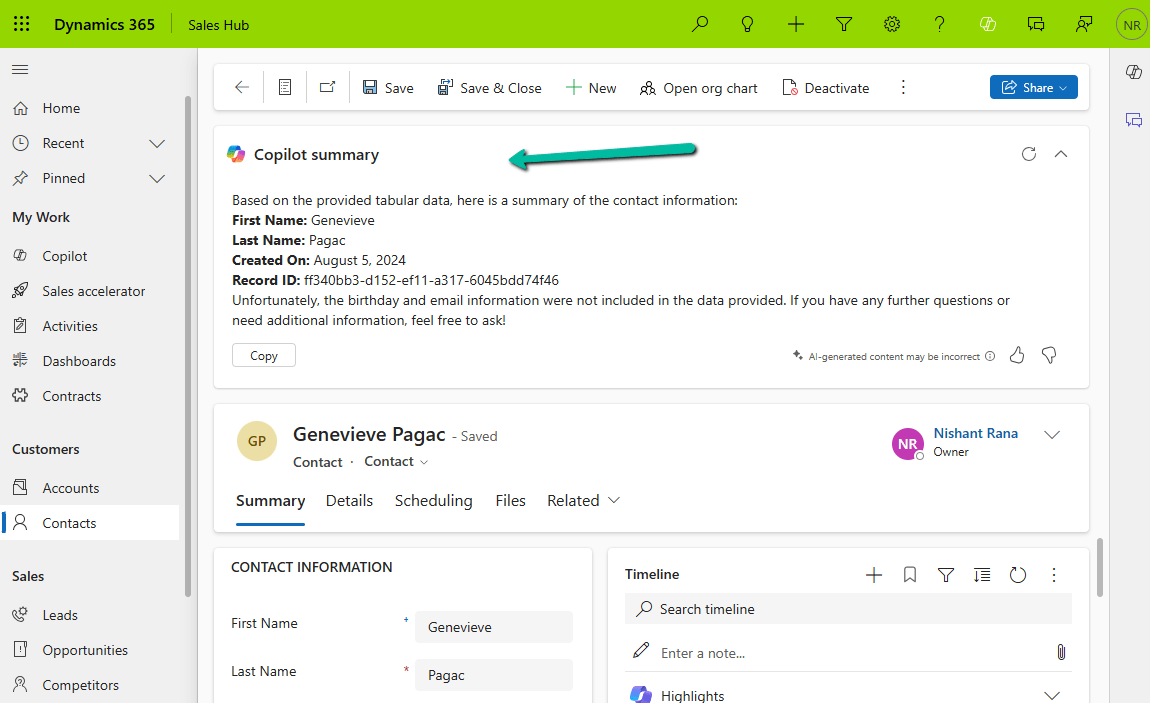
Below we can see the summary generated for the Contact’s main forms.
In Dynamics 365, there are instances when we need to dynamically change the labels of option set fields based on specific conditions. For example, we might want to update the label of the “Priority” field option from High to Critical when a case is marked as escalated (Is Escalated = True).
Below is the sample code we can use for it. The code will be registered on the OnLoad for Form and OnChange of Is Escalated field.
	function SetLabel(executionContext)
	{
		 var formContext = executionContext.getFormContext();
		 var isEscalated = formContext.getAttribute("isescalated");
		 var optionSetControl = formContext.getControl("prioritycode"); // field is in header and not in form
		 var optionHigh = 1; // high
		 var newLabel = "Critical";

		 if(optionSetControl && isEscalated.getValue() == true)
		 {
			var options = optionSetControl.getOptions();
            for (var i = 0; i < options.length; i++) {
                if (options[i].value === optionHigh) {
                    optionSetControl.removeOption(optionHigh);
                    optionSetControl.addOption({
                        text: newLabel,
                        value: optionHigh
                    });
                    break;
                }
            }
		 }
	}
On opening the form, we can see the Priority’s value High changed to Critical in case Is Escalated = Yes.
var formContext = executionContext.getFormContext(); = This retrieves the form context from the execution context, which is essential to interact with the form’s attributes and controls.
var isEscalated = formContext.getAttribute(“isescalated”) = The isescalated attribute is used to determine whether the case is escalated.
var optionSetControl = formContext.getControl(“prioritycode”);
The current options are retrieved using getOptions().
The option with the value 1 (High priority) is removed.
A new option with the updated label “Critical” and the same value is added.
However, one interesting thing to note is the Header still shows the old value High, it seems there is no supported way to change the label in case if the field is used in the Header.