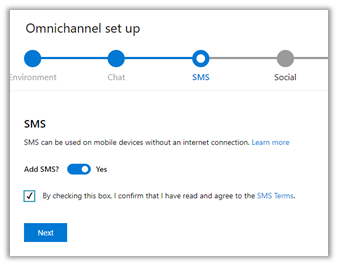
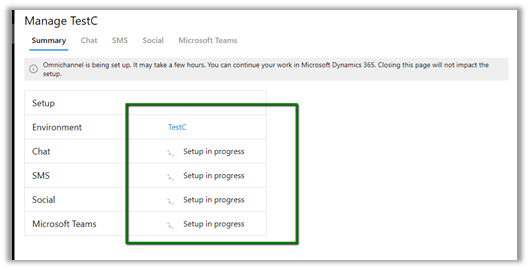
In the previous post we saw how to provision the Omnichannel for Customer Service, below are some of the basic steps we will follow to set up Chat channel
Posts on Omnichannel for Customer Service (Dynamics 365)
- Assign Omnichannel security roles to users.
- Create Queue(s) and add the users to the queue.
- Create a Work Stream of type Live Chat.
- Create a new Chat Widget using the Live Chat Work Stream.
- Specify pre-chat survey in Chat Widget which will be used for routing rules.
- Specify Routing Rules in Live Chat Workstream.
- Embed the Chat Widget snippet code in the portal.
- Assign Omnichannel security roles to users
There are 3 security roles specific to Omnichannel.
- Omnichannel administrator
- Omnichannel agent
- Omnichannel supervisor
Here we have assigned the Omnichannel agent role to the users.

- Create Queue(s) and add the users to the queue
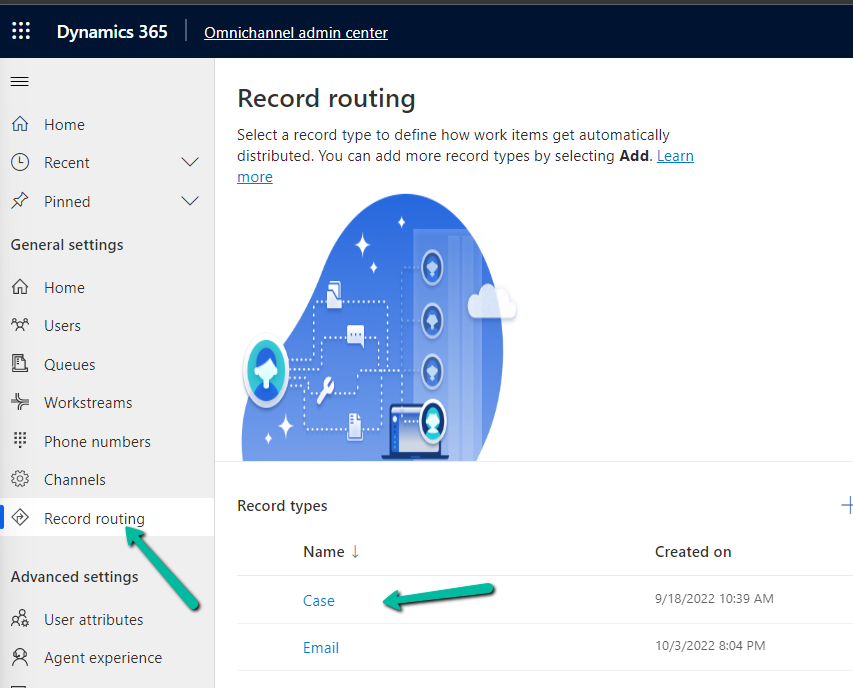
Within the Omnichannel Administration portal, navigate to Queue.
We have created a complaints queue and added “test user 2” to it.

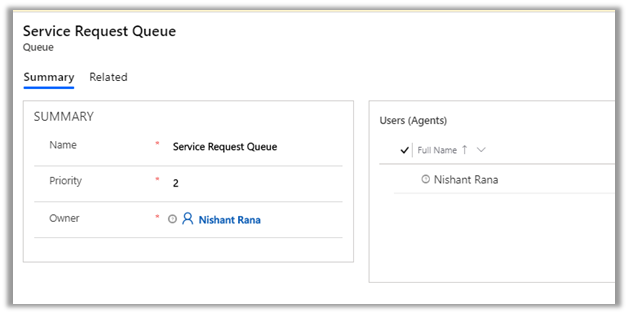
Similarly, we have created another queue for inquiries i.e. Service Request queue with priority 2 and added user “nishant rana” to it.
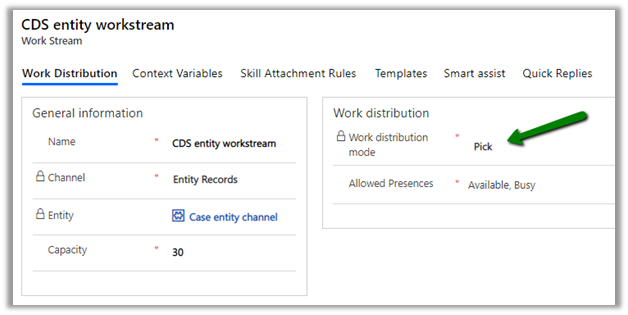
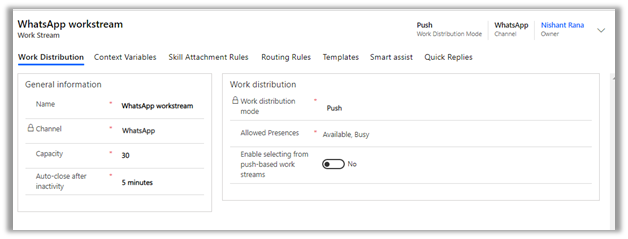
- Create a Work Stream of type Live Chat
We have created a workstream of channel type Live Chat with default values for other options.

- Create a new Chat Widget using the Live Chat Work Stream
Navigate to Channels à Chat and create a new chat.
Here we have created a new chat widget specifying the work stream we had created earlier. Note the code snippet section which will be used to embed the widget in the portal.

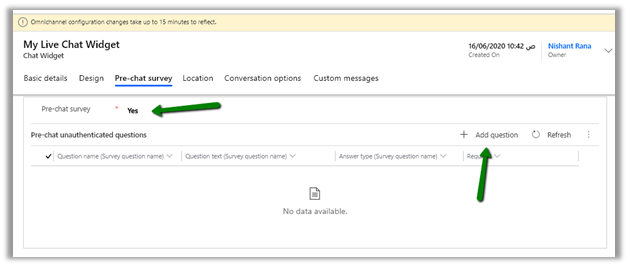
- Specify Pre-chat survey in Chat Widget which will be used for routing rules in the workstream
Navigate to Pre-chat survey tab in the widget and set Pre-chat survey as Yes.
Click on Add question to capture user’s response to be used within routing rules.
Below in the question we are asking user’s choice for either Enquiry or Complaints.

- Specify Routing Rules in Live Chat Workstream.
Open the My Live Chat WS work stream created earlier, select the Routing Rules tab.
Click on Add to add the routing rule.

For Request Type equals to “Enquiry” route it to “Service Request Queue”

Similarly create a new routing rule item record, for Request Type equals to “Complaints” route it to “Service Request Queue”

We now have 2 routing rules defined for our 2 queues in the workstream.

- Embed the Chat Widget snippet code in the portal
Navigate to the widget created earlier and copy the code snippet.

Here we are embedding it in the Chat Widget Code – Content Snippets in Portal.
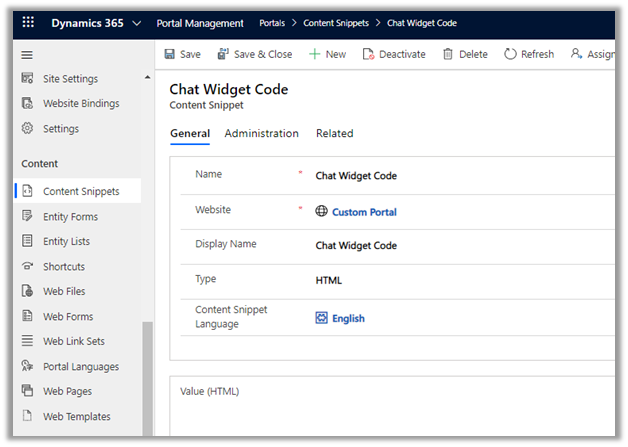
Clear the cache in the portals if needed.

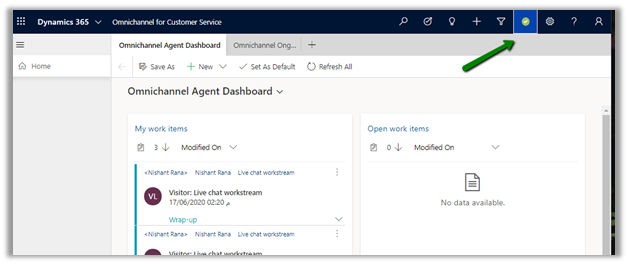
Login to the Omnichannel for Customer Service app with the agent’s login.
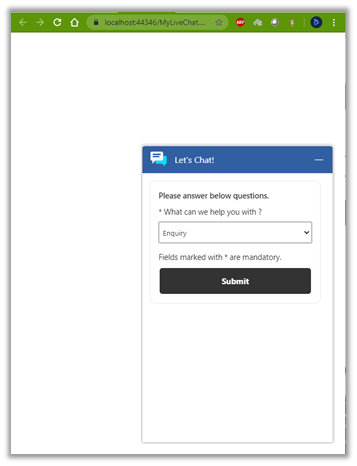
In the portal, customer has selected Enquiry and clicked on Submit to start the chat.

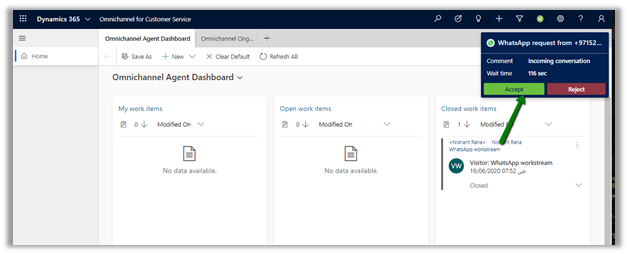
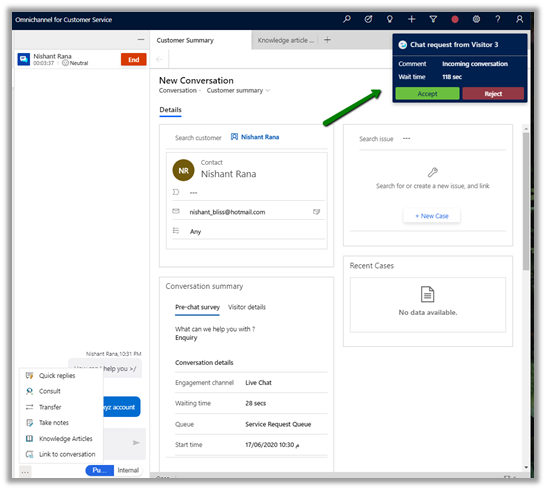
The agent receives the notification.

Accepting the notification opens the conversation window for the agent.

Agent can start communicating with the customer.

Different options that are available for the agents.

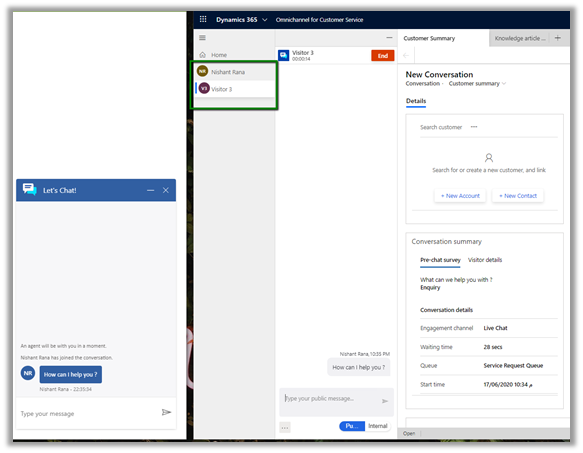
Below we have embedded the chat widget code in an HTML page and have started the conversation by selecting Enquiry as the option.
The agent will receive the notification, while he is still having a conversation with the other customer. This is governed by routing rules and capacity defined for the agent and the work stream.
Below we can see the agent in conversation with both the customers.
Thus, we saw how easy it is to set up the chat channel in Omnichannel for Customer Service.
Refer below blogs to learn in-depth about the Omnichannel
https://neilparkhurst.com/2020/05/29/omnichannel-for-customer-service-collection/
https://thecrm.ninja/omnichannel-for-dynamics-365/
along with Microsoft Docs
https://docs.microsoft.com/en-us/dynamics365/omnichannel/omnichannel-customer-service-guide
Hope it helps..