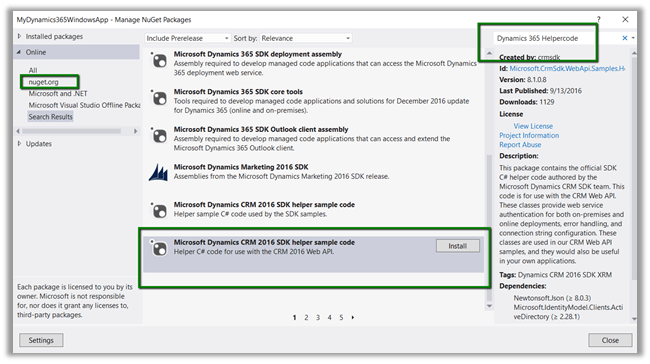
- Create a console application add Newtonsoft and Active Directory Authentication Library. Or we can add the below Helper Sample Code package which will add the above libraries.
- Add reference to System.Net.Http

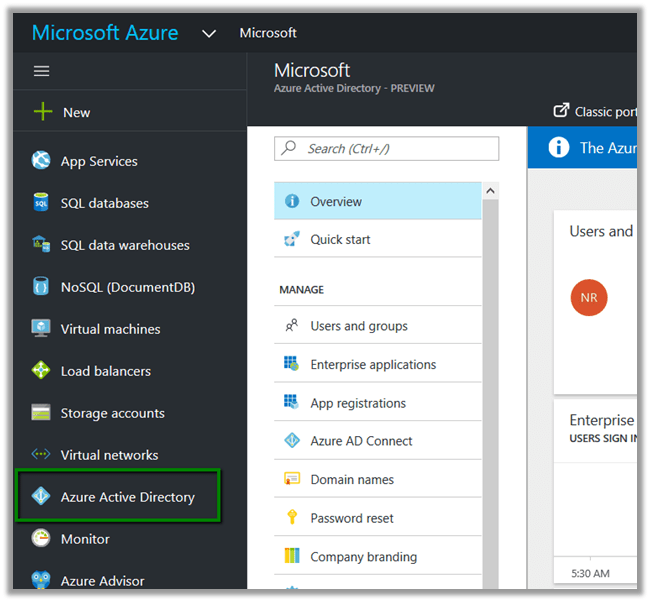
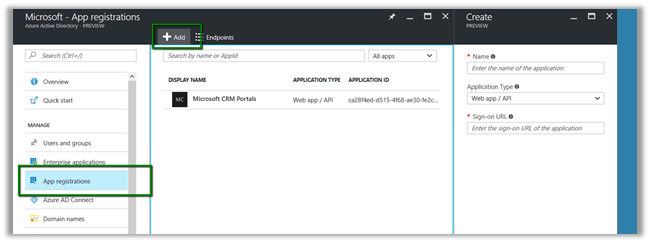
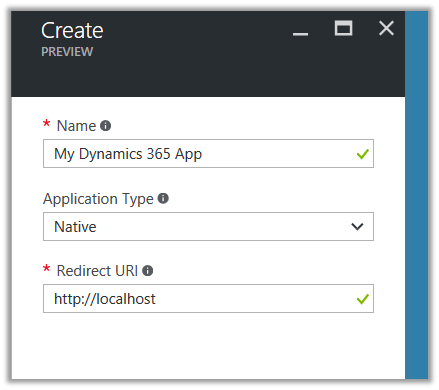
- Register the app
- Sample Code
using System;
using System.Net.Http;
using System.Net.Http.Headers;
using System.Threading.Tasks;
using Microsoft.IdentityModel.Clients.ActiveDirectory;
using Newtonsoft.Json;
using Newtonsoft.Json.Linq;

namespace Dynamics365ConsoleApp
{
internal class Program
{
// username and password
private const string UserName = "sapnarana@nishant365.onmicrosoft.com";
private const string Password = "mypassword";
// Crm Url
private const string Resource = "https://nishant365.crm8.dynamics.com";
// Application's Client Id
private const string ClientId = "d08b641c-2dc8-4f33-8a57-b1573da88a22";
// Redirct Uri specified during registration of application
private const string RedirectUri = "http://localhost";
// Authroiztion Endpoint
private const string Authority = "https://login.windows.net/nishant365.onmicrosoft.com";

private static AuthenticationResult _authResult;

private static void Main(string[] args)
{
// without prompt
var authContext = new AuthenticationContext(Authority, false);
var credentials = new UserCredential(UserName, Password);
_authResult = authContext.AcquireToken(Resource, ClientId, credentials);

// with prompt
AuthenticationContext authContext = new AuthenticationContext(authority);
authResult = authContext.AcquireToken(resource, clientId, new Uri(redirectUri));

Task.WaitAll(Task.Run(async () => await GetFullNameSystemUsers()));
}

private static async Task GetFullNameSystemUsers()
{
var httpClient = new HttpClient
{
BaseAddress = new Uri(Resource),
Timeout = new TimeSpan(0, 2, 0)
};
httpClient.DefaultRequestHeaders.Add("OData-MaxVersion", "4.0");
httpClient.DefaultRequestHeaders.Add("OData-Version", "4.0");
httpClient.DefaultRequestHeaders.Accept.Add(new MediaTypeWithQualityHeaderValue("application/json"));
httpClient.DefaultRequestHeaders.Authorization = new AuthenticationHeaderValue("Bearer",
_authResult.AccessToken);

var retrieveResponse =
await httpClient.GetAsync("api/data/v8.1/systemusers?$select=fullname");
if (retrieveResponse.IsSuccessStatusCode)
{
var jRetrieveResponse =
JObject.Parse(retrieveResponse.Content.ReadAsStringAsync().Result);

dynamic systemUserObject = JsonConvert.DeserializeObject(jRetrieveResponse.ToString());

foreach (var data in systemUserObject.value)
Console.Write(data.fullname.Value);
}
}
}
}
For in depth understanding please refer the following post
Hope it helps..