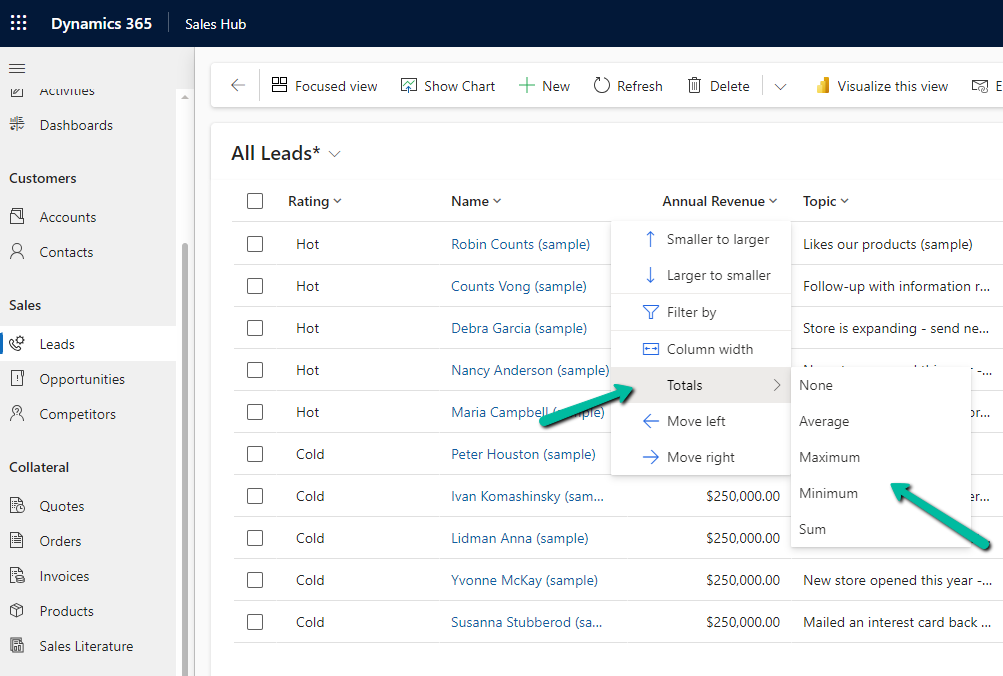
With Release Wave 2, we can see the below features added to Grid.
The option to Group By, Column Width, Move Left and Move Right.
Group By (Rating) –
Move Left and Move Right as expected will move the selected column accordingly. Not only that we can also Drag and Drop the columns, here we have dragged the Rating column as the 1st column.
Column Width – allows us to specify the preferred width of the column.
Totals > None, Average, Maximum, Minimum, Sum.
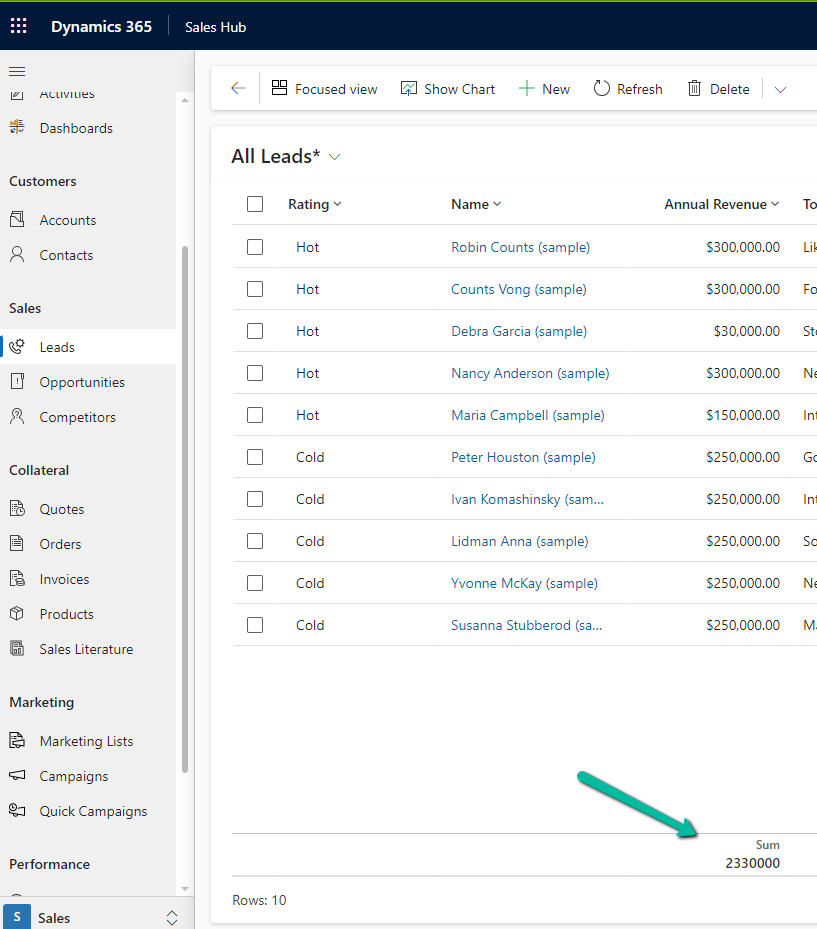
For the numerical column, Annual Revenue in this case we get the option to calculate the total
Selecting Total > Sum, adds a row at the bottom, showing the total sum
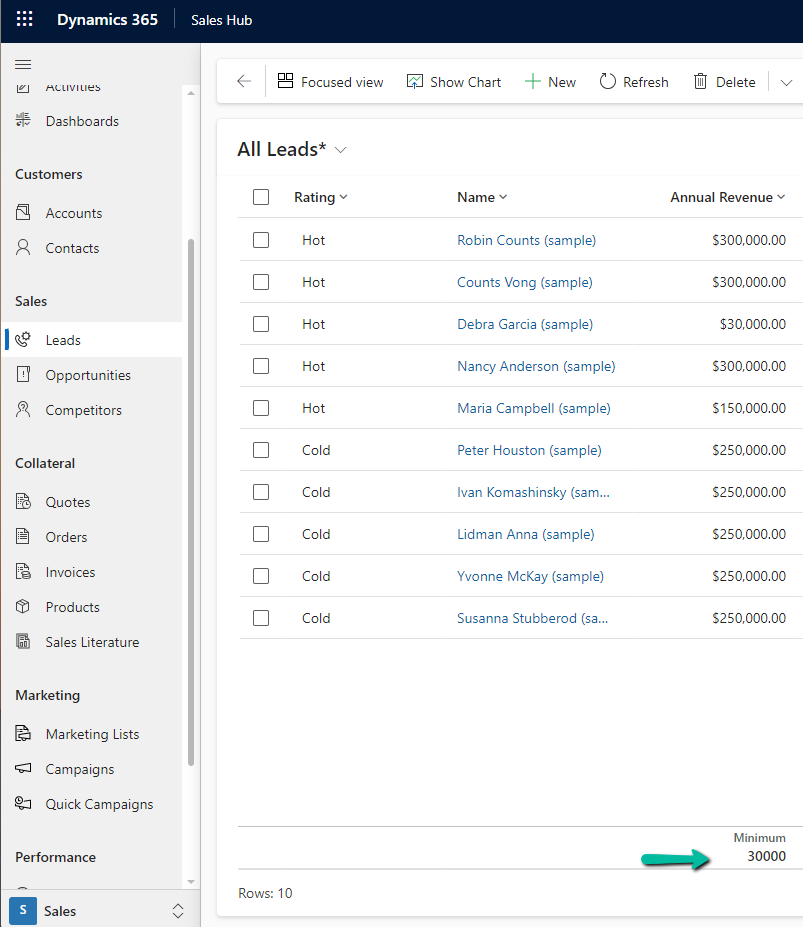
Similarly selecting minimum shows the minimum value.
We have the following 2 custom tables having a 1 – N relationship.
Project (1-n) Artefact.
The relationship behavior is Custom with Cascade All for all the actions except Delete.
User 1 is the System Administrator and Test User 1 has the Field Service Admin role but doesn’t have any roles that give him access to the project or artefact table.
We can see the tables are not showing up for Test User 1 in the app unlike User 1 with the System Admin role.
Now let us assign a custom security role – Test Sharing to test user 1 that gives him OrganizationLevel rights on the Project table.
As expected, Test user 1 now has Projects appearing in the app, and as he doesn’t have any rights on the Artefact table, he cannot see it in the form or the app.
Now user 1 shares the Project 1 record with test user 1. Remember we have set Share as Cascade All in the relationship between Project and Artefact.
But still, because the user doesn’t have any privileges on Artefact, it doesn’t appear for Test User 1 on the form as well as the app.
Now let us update the Test Sharing Role and add Read Permissions – User Level for the Artefact table.
Now Test User 1 can see the Artefacts in the related records as well as the App.
We can observe 2 things here –
Although Test User 1 only has User-level Access to the Artefact, he can still see the Artefact records created by User 1, as the parent Project record is shared with Cascade All–Share in the relationship behavior.
And as Test User 1 has only Read access he can only view the artefact records shared.
Here if we update the Test Sharing role to provide Write access at User Level, the user will be able to edit the records.
Also right now if User 1 creates the Project 2 record with the related P2 A2 artefact record, Test User 1 will only have access to the Project 2 record because of Organization Access but not to the P2 A2 artefact record as he has only has the user-level access.
Let us now update the Relationship Behaviour between Project (1-n) Artefact, and set Share to Cascade None.
Let us share the Project 2 record with Test User 1 now through the User 1 account.
As expected even after sharing the Project 2 record, Test User 1 does not have access to the P2 A2 artefact record as we had updated the relationship behavior as Cascade None for Share.
The first check that the user needs to pass is the Privilege Check, which checks if the user has the required privileges for that table before the Shared Access check
While trying to set the Start Location / End location to the Resource Address for Bookable Resource, we might get the below error
Exception Message: The latitude or longitude for the User record associated with this resource is invalid. Please provide a valid latitude and longitude and then set the start and end location for this resource again.
Here as the error message specifies we need to specify the latitude and longitude value for the corresponding resource type record associated with the Bookable Resource.
In the case of Contact, we can use the Geo Code option, and specify the address to populate the Latitude and Longitude details.
In the case of a User record we do not see the Geo Code option so there we can manually specify the values for it.
Now we will be able to update the Start / End Location as Resource Address in our Bookable Resource record, without getting any error.
Recently we were bulk updating our records, which would trigger an asynchronous plugin registered on its update. We were using the wonderful Bulk Data Updater (XrmToolBox) plugin for it. We realized if we are updating too many records at once say e.g. 100 Batch Size (total 5K records to be processed), we are getting below exception.
The plug-in execution failed because no Sandbox Hosts are currently available. Please check that you have a Sandbox server configured and that it is running.System.ServiceModel.FaultException`1[Microsoft.Xrm.Sdk.OrganizationServiceFault]: The plug-in execution failed because no Sandbox Hosts are currently available. Please check that you have a Sandbox server configured and that it is running. Microsoft.Xrm.RemotePlugin.Grpc.ExceptionHandlers.SandboxFabricHostCommunicationException: Error communicating with Sandbox Host
We than updated the Execution settings to process with a Batch Size of 5 with an interval of 60 seconds. This fixed the issue for us.