Using LUIS AI in Microsoft Bot Framework – Part 1


Let us continue with our previous posts on using Microsoft Bot Framework

In this post, we will add natural language processing to our Bot Application through LUIS i.e. Language Understanding Intelligent Service.

LUIS intercepts the User requests and converts it to comparable action for the bot.

The 3 most important aspects of LUIS Framework are

  • Intents – Identifies what actions you want your bot to take.
  • Entities – What things your bot is taking action on.
  • Utterances – Identifies phrases that links intents and entities.

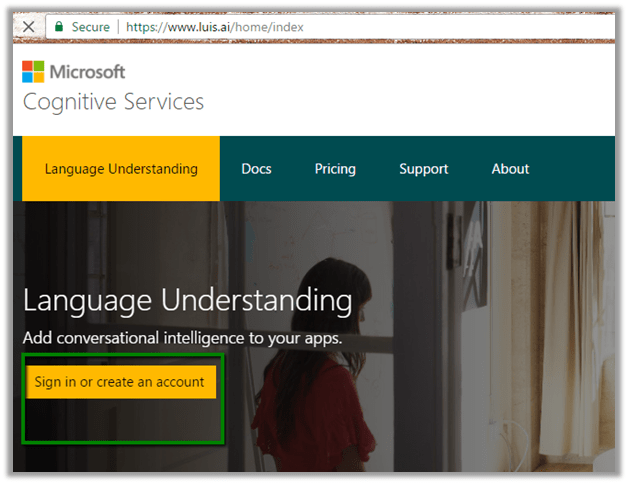
Go to LUIS web site and Sign in

https://www.luis.ai/

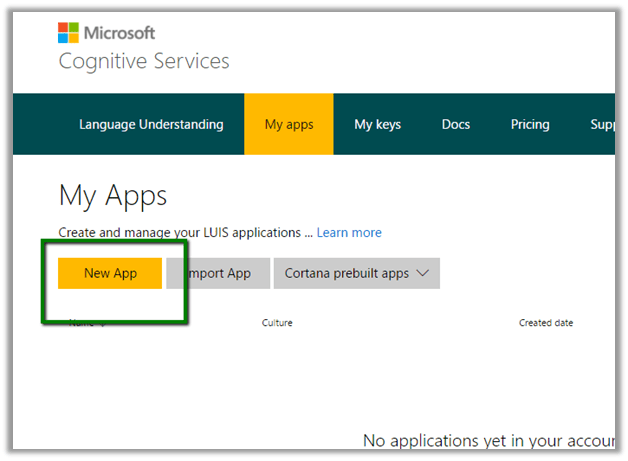
After completing the sign up and finishing other details. Click on My apps link and select New App to create and register the app.

Provide the Name and culture as English and click on Create button.

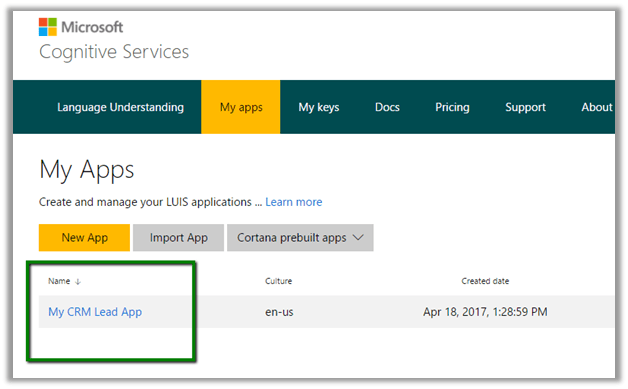
Now as our app is created, we will now create the intent.

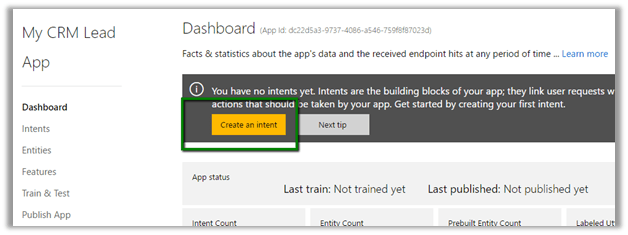
Go to the Dashboard of the app and select Create an intent.

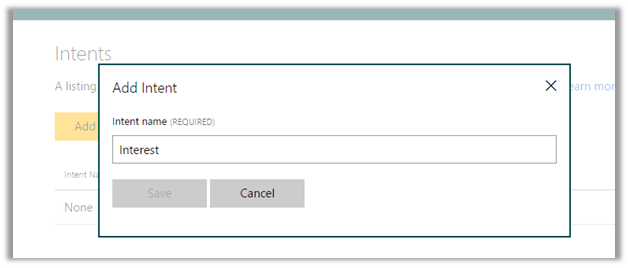
Here we will create “Interest” as our first intent. Next, we define Utterances that points/associates to our intent.

Here we have defined want, interested and like as utterances associated to Interest.

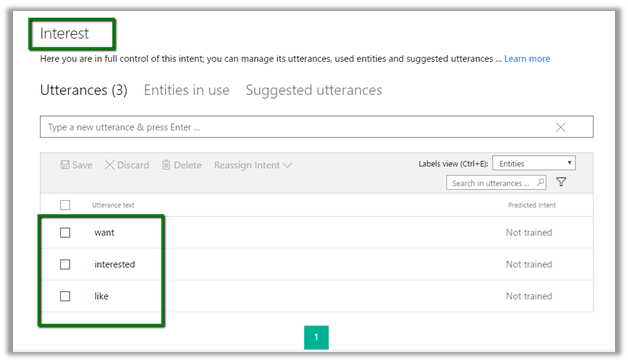
So, for e.g. if we have following statement or response it will all point to the Interest intent.

  • I am interested to know about the product.
  • I want to know about the product
  • I like to know about the product.

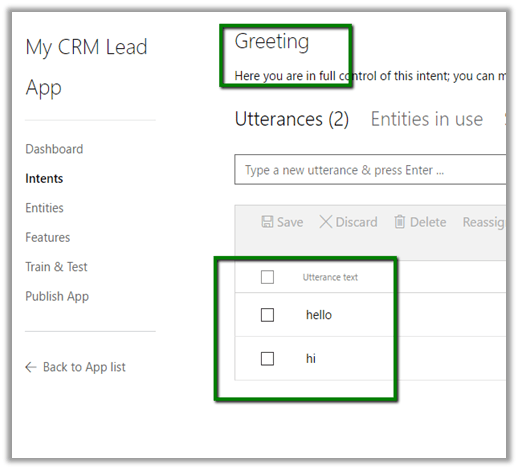
Let us create a new Intent named Greeting and associate 2 utterances Hi and Hello to it.

Once we are done specifying our Intents the next important step is to Train and Test the application.

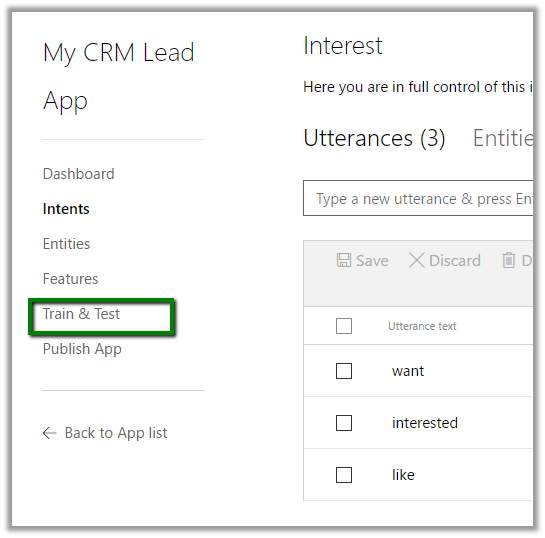
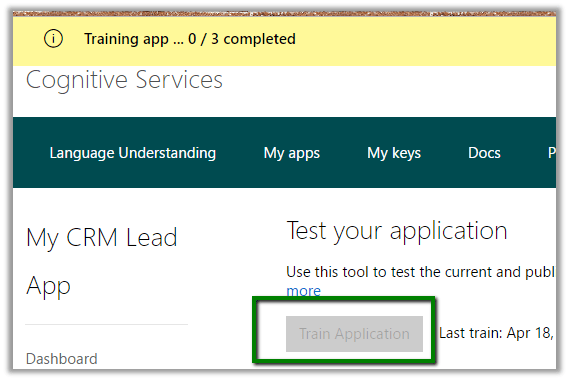
Select Train and Test and click on Train Application button.

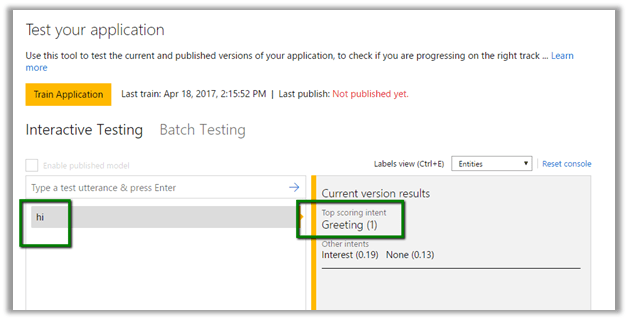
Once the training is completed, we can make use of Interactive Testing interface to do the testing of our utterance and their score.

For e.g. hi utterance had full score i.e. 1 with Greeting intent and 0.19 and 0.13 with the other intent like Interest and None respectively.

Similarly, with “want” utterance we had .77 score for Interest intent.

Next, we test with meeska utterance for which we get the score of .66 with None Intent as this utterance is not associated to any of the intent we had defined nor it is understood by the application.

Now as we are done with testing let us publish it.

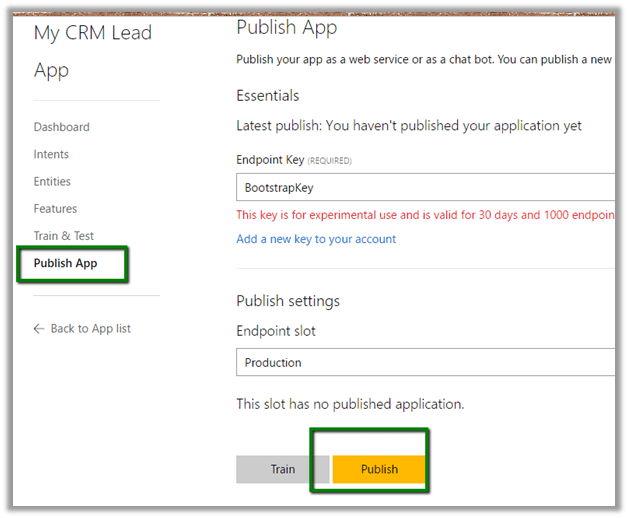
Once published, it will provide us with Endpoint URL.

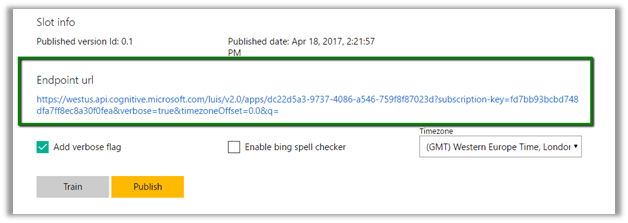
We can append the text to the query string q in the above URL to get the JSON result. (as testing)


Now let us play around with Entity.

Select Entities link and click on Add custom entity button.

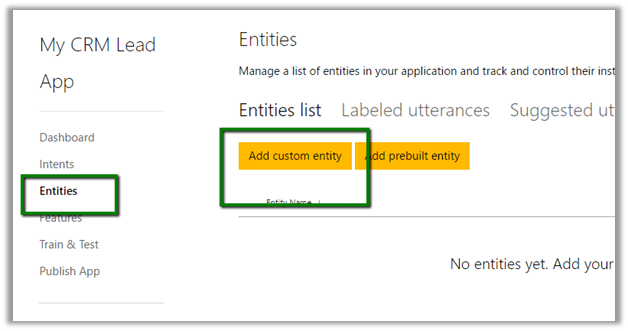
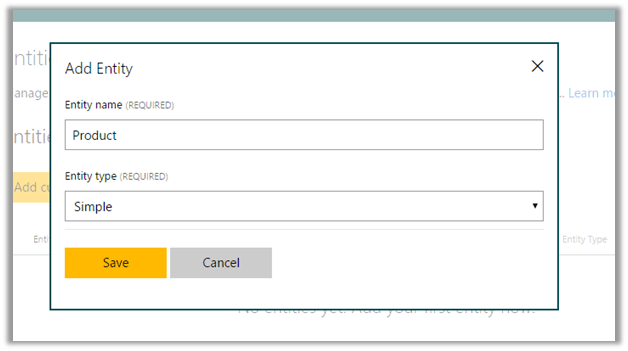
Here we are adding an entity named Product.

Now create one more intent that we will associate to this Entity Product named QueryProduct.

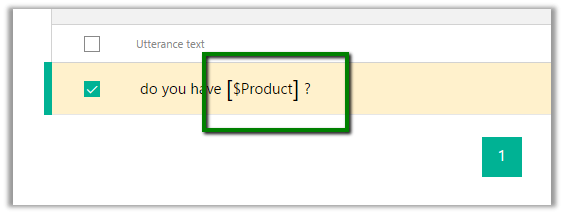
Let us add a new utterance, “do you have product1?” and here we will associate the product1 word with the Product entity.

To do so left click on the Product1 word, and select Product from the drop down.

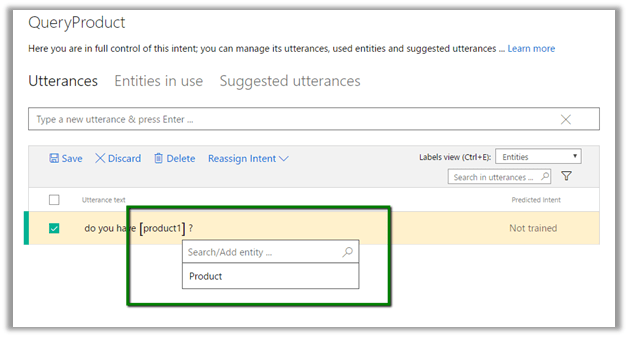
This associates “Do you have [[xyz]]?” with Product entity.

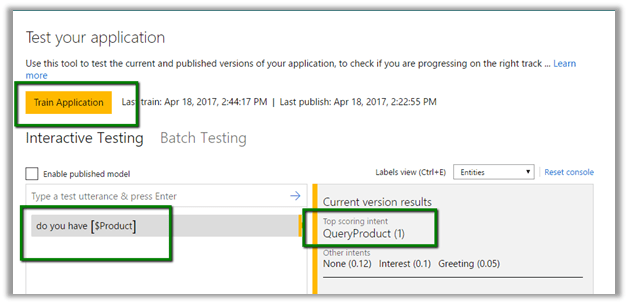
We can quickly test it. Type any utterance like “Do you have x?” and in the result, we can see it being associated to QueryProduct1 intent with full score (1).

Now as we are done with all our configuration, training and testing, we need to train and publish the application again to have all the changes reflected.

In the next post we’d update our bot application to incorporate LUIS AI to it.

Hope it helps..

Using FormFlow in Microsoft Bot Framework (Creating lead in CRM)


Let us continue with our previous posts on using Microsoft Bot Framework

Getting Started with Microsoft Bot Framework.

Using Dialogs in Microsoft Bot Framework

To better understand the FormFlow refer to the below article.

https://docs.botframework.com/en-us/csharp/builder/sdkreference/forms.html

Here we will update our Bot Application to use the FormFlow instead of Dialog.

As FormFlow are bound to a model, we will create a model class first.

Create a new folder named Model and a new class named LeadModel in it.

The class has an enum for selecting Product Type. It defines property for capturing Name and Description.

Here we define a static method named BuildForm that returns the IForm of type LeadModel.

The message defines the initial message that will be shown to the user and oncompletion we are defining a callback method that will be called on completion which we will be using to create lead record in CRM.

Next update the MessageController.cs to call this Lead Model instead of dialog which we did in our previous post.

The conversation between the Bot and the User.

The lead record created in CRM.

Source Code –


using Microsoft.Bot.Builder.FormFlow;
using System;
using Microsoft.Bot.Builder.Dialogs;
using System.Threading.Tasks;
using Microsoft.Xrm.Sdk.Client;
using Microsoft.Xrm.Sdk;

namespace Bot_Application1.Models
{

public enum InterestOptions { Product1 = 1, Product2 = 2, Product3 = 3};

[Serializable]
public class LeadModel
{
public InterestOptions Product;
public string Name;
public string Description;
public static IForm<LeadModel> BuildForm()
{
return new FormBuilder<LeadModel>()
.Message("Welcome to the CRM bot !")
.OnCompletion(CreateLeadInCRM)
.Build();
}
private static async Task CreateLeadInCRM(IDialogContext context, LeadModel state)
{
await context.PostAsync("Thanks for showing your interest we will contact you shortly.");
Entity lead = new Entity("lead");
lead.Attributes["subject"] = "Interested in product " + state.Product.ToString();
lead.Attributes["lastname"] = state.Name;
lead.Attributes["description"] = state.Description;
GetOrganizationService().Create(lead);
}

public static OrganizationServiceProxy GetOrganizationService()
{
IServiceManagement<IOrganizationService> orgServiceManagement =
ServiceConfigurationFactory.CreateManagement<IOrganizationService>(new Uri("https://nishantcrm365.crm.dynamics.com/XRMServices/2011/Organization.svc"));
AuthenticationCredentials authCredentials = new AuthenticationCredentials();
authCredentials.ClientCredentials.UserName.UserName = "nishant@nishantcrm365.onmicrosoft.com";
authCredentials.ClientCredentials.UserName.Password = *****";
AuthenticationCredentials tokenCredentials = orgServiceManagement.Authenticate(authCredentials);
return new OrganizationServiceProxy(orgServiceManagement, tokenCredentials.SecurityTokenResponse);
}
}
}


using System.Net;
using System.Net.Http;
using System.Threading.Tasks;
using System.Web.Http;
using Microsoft.Bot.Builder.Dialogs;
using Microsoft.Bot.Connector;
using Microsoft.Bot.Builder.FormFlow;
using Bot_Application1.Models;

namespace Bot_Application1
{
[BotAuthentication]
public class MessagesController : ApiController
{
/// <summary>
/// POST: api/Messages
/// Receive a message from a user and reply to it
/// </summary>
public async Task Post([FromBody]Activity activity)
{
if (activity.Type == ActivityTypes.Message)
{
// call MyDialog
// await Conversation.SendAsync(activity, () => new Dialogs.MyDialog());

// Call our FormFlow by calling MakeRootDialog
await Conversation.SendAsync(activity, MakeRootDialog);

}
else
{
HandleSystemMessage(activity);
}
var response = Request.CreateResponse(HttpStatusCode.OK);
return response;
}

internal static IDialog<LeadModel> MakeRootDialog()
{
return Chain.From(() => FormDialog.FromForm(LeadModel.BuildForm));
}

private Activity HandleSystemMessage(Activity message)
{
if (message.Type == ActivityTypes.DeleteUserData)
{
// Implement user deletion here
// If we handle user deletion, return a real message
}
else if (message.Type == ActivityTypes.ConversationUpdate)
{
// Handle conversation state changes, like members being added and removed
// Use Activity.MembersAdded and Activity.MembersRemoved and Activity.Action for info
// Not available in all channels
}
else if (message.Type == ActivityTypes.ContactRelationUpdate)
{
// Handle add/remove from contact lists
// Activity.From + Activity.Action represent what happened
}
else if (message.Type == ActivityTypes.Typing)
{
// Handle knowing tha the user is typing
}
else if (message.Type == ActivityTypes.Ping)
{
}

return null;
}
}
}

The next posts in this series

Hope it helps

Configuring Live Assist (Preview) for Dynamics 365.


Let us see how we can configure Live Assist step by step.

First, go to Applications tab of the Dynamics 365 Administration Center.

Select Live Assist for Dynamics 365 and click on Manage.

Click on Accept to give permission to the app.

Select the Dynamics 365 Instance and provide your email id, accept the terms and conditions and click on Submit.

This configures the Live Assist on the specified Dynamics 365 Instance and also sends the email to the email id specified.

Once the configuration is done, we can see the new Live Assist section added in our Settings area.

There we can click on Admin URL of Live Assist for further configuration.

Clicking on it opens the Admin Center.

Click on Confirm and Authorize.

The Dashboard of the admin center.

The Get Started page.

Code Snippet that we can use to enable Live Assist in web site.

Live Assist adds a new panel on the right inside CRM.

To test it we can make use of Demo Site provided along with Live Assist.

The agent within CRM can click on Conversation Icon and “Grab a chat” to start conversation.

Now suppose we want to configure our CRM Portal to use it. For this we need to copy the code snippet provided earlier. Go to the Header web template of our Web Site and paste the JavaScript code to our Header’s source code.

This enables Live Assist in the portal.

Communication between the CRM user and the Portal user.

The helpful links and video

https://neilparkhurst.com/2017/04/09/cafex-live-assist-my-initial-install-with-usd/

https://blogs.technet.microsoft.com/lystavlen/2017/03/16/live-assist-for-dynamics-365-first-look/

Hope it helps..

Setting Regarding of a record in Automatic Record Creation and Update Rules in Dynamics 365


Hi,

While implementing a scenario i.e. automatic case creation on phone call create using Automatic Record Creation and Updating Rules, we found that whenever we were setting the Regarding Object in the Phone Call activity, the case record was not getting created.

Create Case Rule Item –

Creating a Phone Call record using Case as Regarding object.

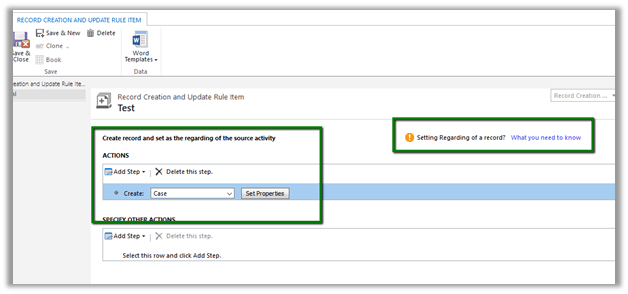
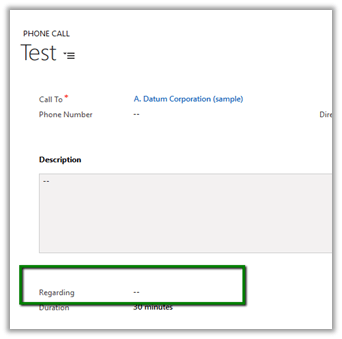
Workflow ran but the case record was not created.

Then we created phone call activity record without setting the regarding object. This time workflow ran and created the case record.

Basically, the workflow creates the case record and updates the Regarding Object in the Phone call record with this newly created case record.

However, if we check the Official documentation

https://www.microsoft.com/en-us/dynamics/crm-customer-center/set-up-rules-to-automatically-create-or-update-records-in-dynamics-365-customer-service.aspx#bkmk_RuleAndQueues

we have this mentioned

However, in our case we created a phone call record with case as regarding object and had case as the entity selected in the Create Record step, in this case also the Action were not executed.

Hope it helps..

Unknown Error or Resource not found for the segment ‘msdyn_FpsAction’ in Schedule Board in Field Service in Dynamics 365.


Hi,

Recently we configured the portal trial instance and installed Partner Field Service portal in it .

However, while trying to access Field Service à Schedule Board, we were getting the below errors

Eventually it turned out that the issue was caused because of the certain processes being in draft state.

The post which helped in fixing this issue

https://glinks.co.uk/2017/01/06/field-services-schedule-board-unknown-error/

Hope it helps..

Configure Product Recommendations using Recommendations API in Dynamics 365


For configuring Product Recommendations first we need to enable the preview –

Go to Settings – Administration – System Settings – Previews

Select Yes and Click on OK.

As a next step, we need to create Cognitive Services for Recommendation API and connect it to CRM.

Go to Portal

https://portal.azure.com

Search and select Cognitive Services Accounts

Click on Add

Select Recommendation API and provide other details and click on Create.

From Overview, note down the Endpoint which will be used to configure the connection in CRM.

From Keys, copy value of the Key which will be used for configuring connection to CRM.

In CRM, go to Settings – Administration and click on Azure Machine Learning Recommendation Service Configuration.

Specify the value for the URL and Key we had noted down earlier, save the record and click on Test Connection to test the connection.

On Successful connection, we’d see Success message for Last Connection Status. Click on Activate to enable the connection.

Now we need to define\build the model for recommendations. For this go to Settings – Product Catalog and click on Product Recommendations.

We’d see a recommendation model with default values

The model will have Basked Data Entities already defined. We can edit\add new\ delete these existing configuration records for Basked Data Entities. Basked Data Entities recommendations are based on which products appear together.

For e.g. in below Opportunity record we can see 27 inch and 12 inch monitor opportunity products appearing together. It will look for all such line items records.

Similarly we have recommendation entities records configured which we can update.

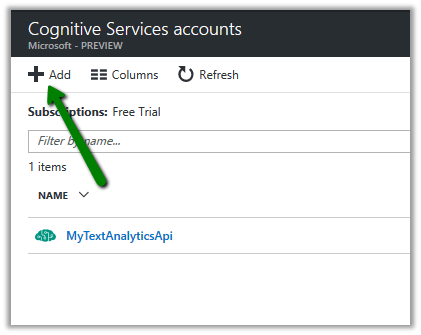
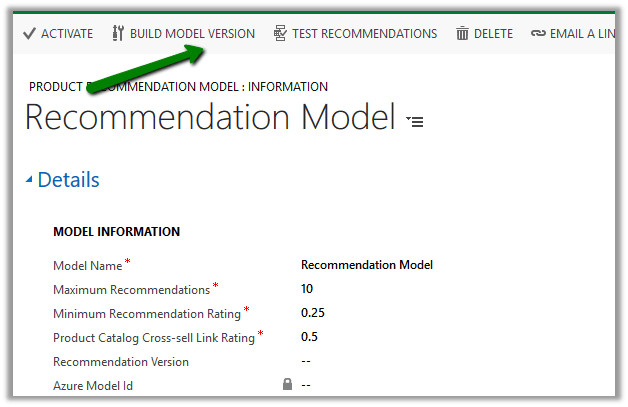
Once done with the configuration, we need to click on Build Model Version to build the model.

It will create a corresponding model version record.

We can check its progress by refreshing it.

Here the model that we had defined has successfully build and it took around 6 minutes.

We can click on the Model Version to open the record to get the further details.

Next step would be to check the recommendations. For this click on Test Recommendations.

Pop up opens wherein we can select the Products and model version and click on Show Result to see what are the product recommendations.

Once satisfied with the test result, click on Activate to enable the recommendations.

We might get the below message in case we do not have good enough data in our system.

To see it in action, open an existing opportunity record , go to product sub grid and select a product and select Suggest Products.

A dialog box opens up that shows the Cross-Sell products and other details.

Get all the details here

https://technet.microsoft.com/library/56b35229-72f8-46ca-bebf-eae023f633c2.aspx

Hope it helps..