Managed Environments is a new feature added in the Power Platform Admin Center to simplify the administration of the platform. It is in Preview currently.
To enable it, select a particular environment and click on Enable Managed Environments.
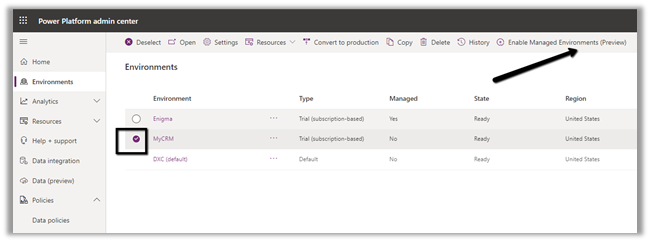
We will need either Global Admin, Power Platform Administrator, or Dynamics 365 Administrator AD roles to enable the Managed Environments.

Through Managed Environment, we can specify who can receive the Weekly
Digest i.e., a weekly email summary of resource usage in the environment, apart from Dynamics 365 and Power Platform Admin. (it can be managed through PowerShell also)
Limit the sharing of the canvas apps to the security group and max number of users.
New Environment filters for the Managed Environment with regards to data policies.
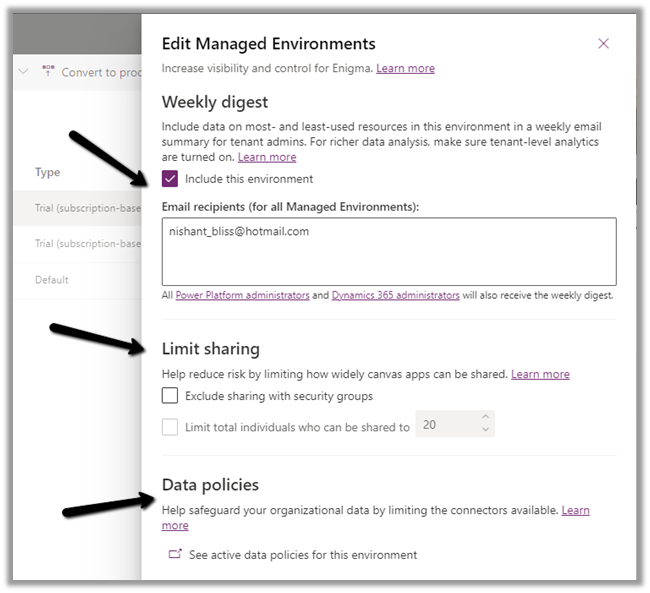
For the Weekly Digest, we need to enable the tenant-level analytics from Power Platform Admin Center, click on the settings gear, and enable it from the Power Platform settings window.

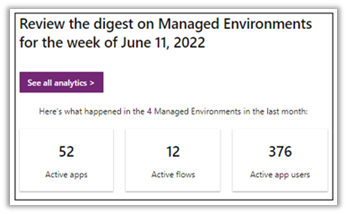
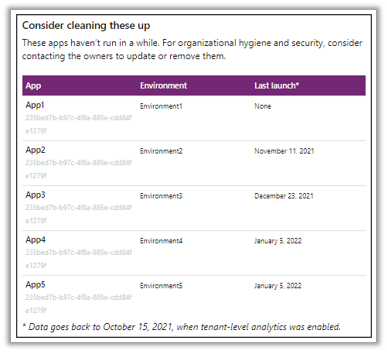
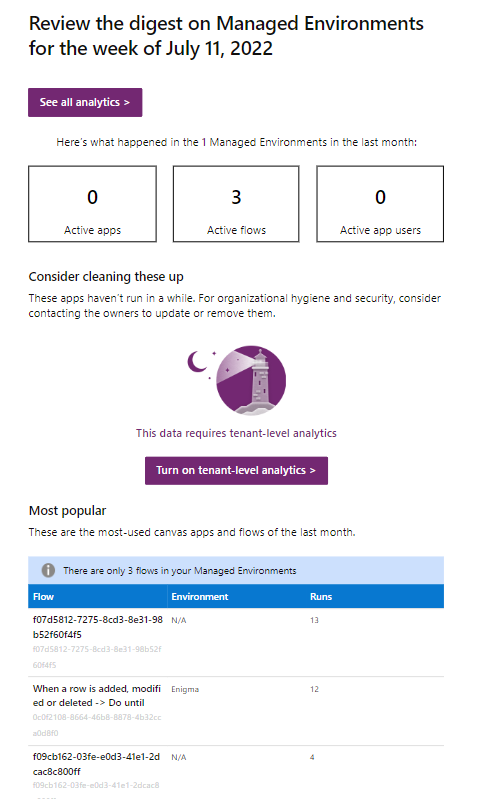
Below are the information provided in the Weekly Digest –
Total Apps, active flows and active app users in the past month in the managed environments.
Details of the apps that haven’t been launched for a long time.
Details of the most popular apps and flows of the last month.

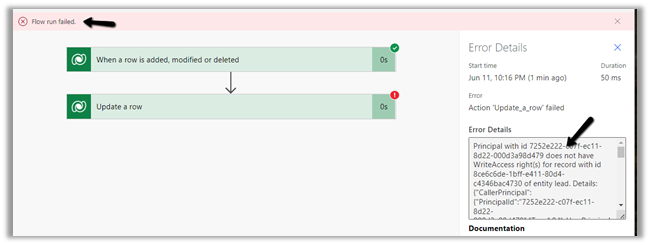
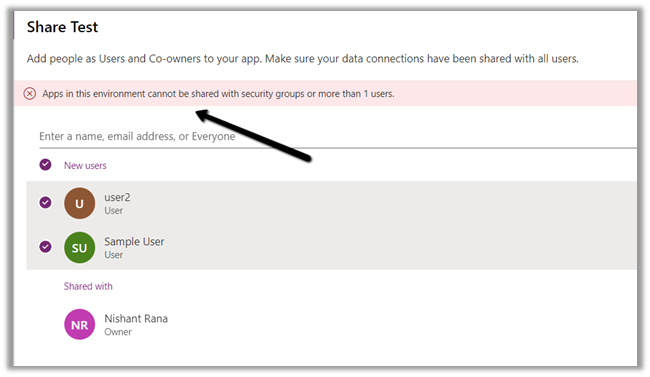
Through Limit Sharing we can configure sharing with security groups as well as the max number of users with whom the app can be shared with. Here just for testing, we have set it as 1.

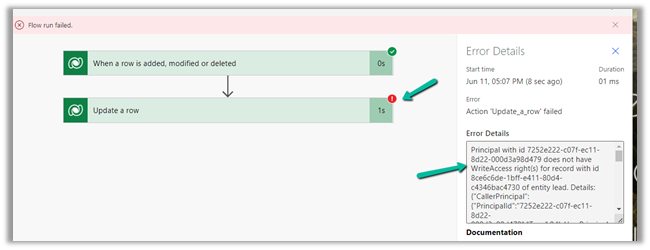
On trying to share the canvas apps with more than one user we will get the below error
“Apps in this environment cannot be shared with security groups or more than 1 user.”
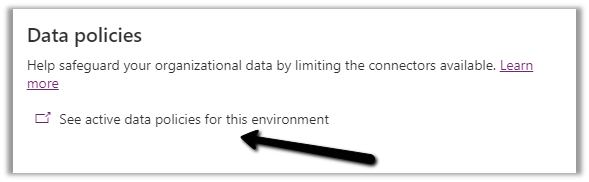
The Data policies option adds the additional filter on the Data Policies page to show the details for the selected environment.
Click on the See active data policies for this environment
Below we can see the Environment filter added.
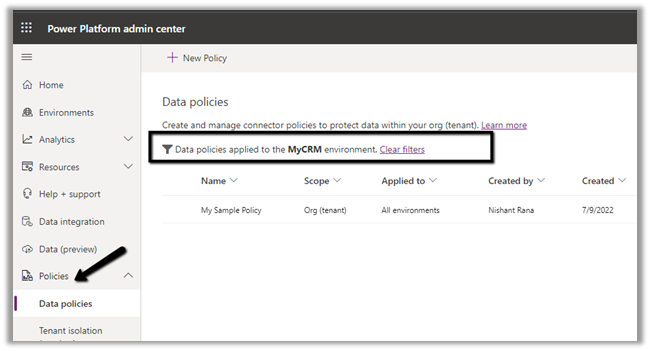
Get all the details here
Below is the mail we received for one of our trial tenant, which had hardly anything in it.
Hope it helps..