How to – Work with Git Branches in Visual Studio 2019


Continuing our previous posts, let us now see how we can work with branches within Visual Studio 2019.

Branches give the option to isolate the work from the original code base, this way we could have a developer(s) working on bug fixes, new features etc. which then can be merged back to the master branch later.

Open the Branches page in Team Explorer and click on the New Branch option.

Here we have created a new branch name MyFirstBranch from the master branch, and have also selected the option Checkout branch to work with that branch.

Create Branch creates the new branch as shown below.

To navigate to the branches page of Team Explorer, we can also use the Status bar of Visual Studio

Now let us make some changes in the program.cs file in the new branch created.

Do Commit and Push
All

From the team explorer, Branches page, we can see that the new branch has been added in the remote repository after commit.

To merge changes back from this new branch to the master branch, click on the master branch and select Merge option in the Branches page

  • Merge from Branch: MyFirstBranch
  • Into current branch: master.

As we have selected the option Commit changes after merging click on Merge pushes and sync the changes in the master branch in the remote repository as shown below.

We also have the options of deleting the branches as shown below, if they are not required anymore.

In this post, we saw how to work with Branches and how to merge it back to the base code.

Hope it helps..

Advertisements
Advertisements

How to – Perform basic Git operations with Visual Studio 2019


In the previous post,

https://nishantrana.me/2019/10/21/getting-started-with-git-repository-in-visual-studio-2019/

we learned how to setup and  get started with Git Repository in Visual Studio 2019.

In this post, we will learn how to perform some of the basic operations like commit, push, fetch, pull, etc. and how to merge the conflicts.

Let us open the solution created in the last post and make some changes

Here we have updated Program.cs and added a new class file Helper.cs


To commit these changes, we can either go to Team Explorer – Home – Changes page or click on the edit icon in the status bar of the Visual Studio.

After we have added our commit comments, we are presented with 3 different options

Commit All Commit will make a record of the changes in the local repository.
Commit All and Push Commit the changes locally and push the changes to the remote repository.
Commit All and Sync Commit the changes locally, fetch the changes from the remote repository and finally push the changes to the remote repository

We can also use the Stage option to break the commit into smaller stages

We will be presented with similar options for Commit Staged as in the case of Commit.

Perform Commit Staged and Push for both the changes.

We can see both the updates in our remote git repository

Other developers or team members who need to work in the project can Clone the project in Visual Studio 2019.

Provide the Repository location URL along with the local path.

Now suppose the developer 1 makes the below changes to the program.cs and does commit all and push.

The other developer 2, can click on Fetch in the Synchronization page to see any incoming commits.

Clicking on the commit shows the details of the changes as shown below.

Developer 2 can click on Pull to merge commits to the local master branch.

fetch Download the changes from remote repository
merge Applies the changes fetched to a branch in the local repository
pull fetch + merge

Now suppose developer 1 has changed the message and commit + push the changes to the remote repository.

And also, in parallel developer 2 has also updated the same message and has clicked on Commit and Push.

As both have made changes and referencing to the same line of code, the developer 2 gets the failure message when he tries to push his changes to the remote repository.

Message in the output window à

Developer 2 here can click on Fetch to see the changes

Developer 2 clicks on Pull to merge the changes and can see the conflict.

Clicking on Conflicts gives Developer 2 the option to Merge, Take Remote or Keep Local the changes.

Selecting the Merge option allows developer 2 the option to specify the merge.

Clicking on Commit Merge to merge the changes, followed by appropriate Commit operation to push the changes to the repository.


This resolves the conflict.

Thus, in this post, we learned how to perform basic operations like Push, Pull, Fetch, etc. and how to merge and resolve the conflicts using Visual Studio 2019.

Hope it helps..

Advertisements

How to – Getting started with Git Repository in Visual Studio 2019


Let us go through the steps to set up a Git Repository in Visual Studio 2019.

Open Visual Studio 2019

Go to Tools à Option and Set Git as source control plugin (if not set)

To create a new Repository, select Home àProjects and New Repository.

Provide the path and click on Create.

Click on the repository created to open it in the Team Explorer.

Click on Changes, which shows the files added as part of the creation of the Git Repository.

Click on Commit Staged to add the files to the local repository.

To sync it to the remote repository, we can click on Sync.

Now to add the solution to the Git Repository, back in the Home page of team explorer, click on New for the Solutions.

Follow through the Wizard. Here we have added a new solution of type Console Application to it.

Again, go back to Changes and click on Commit All.

To see the history, go to Home – Branches page, right-click on the master branch and select View history.

It shows the details of the 2 commits done locally in the local git repository.

Now to push the changes to Remote Repository

Click on Sync.

Click Publish Git Repo

Provide the URL of the Remote Repository.

Here we have created a new repository.

https://github.com/

Copy its URL.

Specify the URL and Publish the changes to the remote repository.

After successful publishing, we can see the files added in our remote GitHub repository

In Team Explorer – Home – Branches we can see the remote branch created.

To work with an existing remote repository within Visual Studio 2019, we can go to start page, select Clone or check out code option.

Either provide the URL or sign in to the GitHub account and choose the repository to clone.

Within Team Explorer also we can Clone the repository by using the Clone option

In this post, we saw how we can create a local repository, add the solution to it, publish it to the remote repository.

Hope it helps..

Advertisements

Single Instance / Organization Considerations in Dynamics 365 Customer Engagement / Dynamics CRM


Let us start from the scenario that the enterprise has decided to use Microsoft Dynamics CRM /365 CE as a preferred customer relationship solution for their organization.

For a large enterprise and/or having multiple different departments, the first question that comes up is, do they need to have a single instance or organization or multiple instance or organization. Well, that decision is not that easy but one thing is for sure the decision should be made as early as possible in the project.

Well you could refer to these posts that could help us to make the decision

https://medium.com/capgemini-dynamics-365-team/does-enterprise-scale-dynamics-require-multiple-instances-f1931a443930

https://nishantrana.me/2019/07/23/single-organization-vs-multiple-organization-single-instance-vs-multiple-instance-key-points-to-consider-in-dynamics-365-ce-on-premise/

Now suppose we have made the decision to go with the single instance \ organization, so what are some of the key points we need to consider.

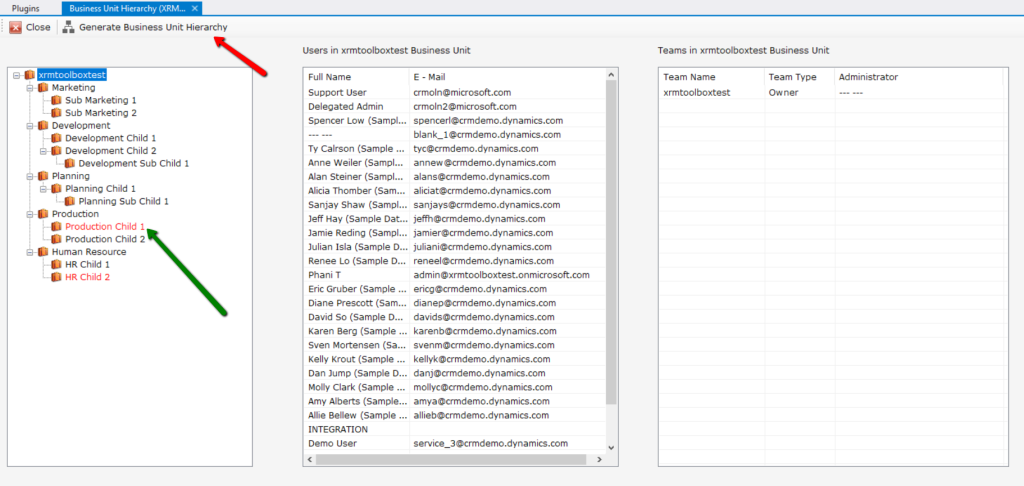
There could be multiple ways of implementing and defining the segregation layer as well as what needs to be shared from data and customization perspective among the different business units, the most important being the security model and the business unit structure being one of the key components of it.

Check out the below Webinar –

http://www.xrmcoaches.com/2017/07/free-webinar-friday-creating-your-dynamics-365-security-model/

also listen to the below podcast to get some guidance around the setting up the security model

http://crmmvppodcast.com/episode-19-setting-up-your-security-architecture-like-a-crm-mvp

In one of our projects, the way we segregated different departments, after defining the appropriate business unit structure, was by having the Business Unit lookup (custom field) in all the common entities that were being shared by the departments and populating that field accordingly, every time record is created either through User Interface or through code and to refer the same field in the customizations (plugin, workflow etc.) as and when applicable.

In the other project, we were referring to the Business Unit lookup field in the System User / Team Entity.

Well there could be multiple ways of doing the same with its own pros and cons.

But what if you have already implemented for one of the units and didn’t consider that the same instance would need to be extended to accommodate the different business unit(s).

Well, then it is time to modify a couple of things to make the Business Unit structure scalable (if it is not).

Let us go through the each of the main components one by one and how they can be segregated among different business units.

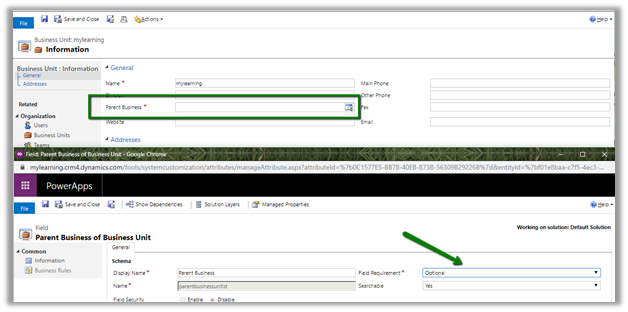
Wrong root business unit name?

Set Parent Business Unit lookup field as optional, open the Business Unit record and rename it.

Need to rename the organization?

For Online à

Navigate to Admin Portal, select the instance and click on edit and update the organization name and if required the URL as well as shown below.


For On-Premise à

  • Follow the below steps to update the Display Name

https://blogs.msdn.microsoft.com/darrenliu/2013/09/21/change-crm-organization-display-name/

  • Updating Organization Database Name

https://blogs.technet.microsoft.com/crmbipl/2008/01/14/how-to-change-crm-4-0-organizations-database-name/

Forms

Create separate new Main forms for different business units.

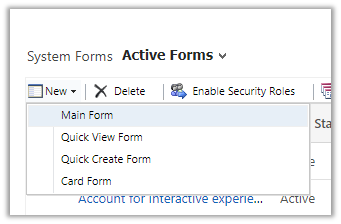
Enable appropriate security roles for the Form.

Views

Fields

Reuse the fields that are common instead of ending up creating a large number of fields.

Field security profiles can also be used if required when certain entity’s records are shared across the business unit and we want to hide the sensitive information.

Business Rules

Business rule can be configured to run on the scope of Form instead of the Entity.

Dashboards

For Dashboards, we can enable the security roles.

Workflows

  • Use scope fields to make sure the workflows fire appropriately.
  • Or put the first step to check for which business unit it is firing (depends on the segregation logic implemented)

Plugins

Have a field in the records to identify to which Business Unit it belongs to and check for this field as the first thing in the plugin or check for the Business Unit of the user under whose context the plugin is getting fired or use the secure \ unsecure configuration etc. it purely depends upon the way the segregation logic has been implemented.

SLAs

Use SLA lookup field to apply the SLA dynamically through plugin or workflow.

https://nishantrana.me/2019/07/24/apply-sla-choosing-the-sla-in-the-sla-lookup-field-for-the-sla-enabled-entities-in-dynamics-365-ce/

Business Process Flow

If there are multiple business process flow, make sure appropriate one is applied

Apply business process flow while creating an entity record.

https://www.powerobjects.com/blog/2019/04/24/business-process-flows-switch-bpf-dynamics-365-javascript/

There would be multiple other key points to be considered apart from the one listed above specific to each implementation; the above points are some of the things that can be taken as guidelines.

Lastly we must consider  creating different apps for different department \ teams\ users and add required solution components to it.

Design custom business apps by using the app designer

Please feel free to add comments and share your thoughts.

Hope it helps..

New features of Visual Studio 2019 – Code Clean up, Faster Debugging, Refactoring, Live Share


Earlier we covered below features

Let us have a look at the other new features, that are now part of Visual Studio 2019 (couple of features were available with VS 2017 as marketplace extension earlier)

Health Indicators
à With Health Indicators, which can be found at the bottom of files in Visual Studio 2019, we can quickly get a glance at how many errors and warnings are there in the file.

Code Clean up
à Along with health indicators, we can also see the icon of Code Cleanup, which allows us to apply fixes to the code.

Configure Code Cleanup settings let us define the fixes to be part of the profiles as shown below.

Code cleanup can also be run for the entire solution from Analyze à Code Cleanup

  • Debugger stepping is not 50 % faster in Visual Studio 2019 compared to Visual Studio 2017.
  • The Watch, Autos and Locals Windows are 70 % faster.
  • Font and Colors of Visual Studio 2019 can be customized through Tools à Options à Environment à Fonts and Colors


  • Indent for the parameters of the method can be specified easily


Result à


  • Signature for the parameters can be easily changed using the Change Signature dialog box

Result à

Now let us have a quick look at the most interesting feature i.e. Live Share

With Live Share, enables real-time Code Collaboration, using
we can easily share the source code/ terminal from our machine for code review or for technical help with the team members. Earlier the options were to check in the code in the repository and then asking others to get the latest or share the screen / have a meeting set up.

To get started,

Click on Live Share icon,

Select Copy Link

Here we are sharing it with one of the team members having Visual Studio Code. Live Share works with Visual Studio 2017 (with extension)/ 2019 and Visual Studio Code (with Extension) and any OS.

Click on Join Collaboration session and paste the link.

Both the users have the ability to move across the code, make changes together within their environment.

Debugging session can also be initiated/shared from both environments, without having the other user to install any specific packages/tools/plugins, etc.

Also with Live Share Extension Pack, we can add Chat and Audio Capabilities to Visual Studio Code

https://marketplace.visualstudio.com/items?itemName=MS-vsliveshare.vsliveshare-pack

That is not all, we have Live Share Whiteboard and Pomodoro extensions as well.

Check the below article that explains all the functionality of Live Share in detail

https://dev.to/lostintangent/visual-studio-live-share-in-pursuit-of-enjoyable-developer-collaboration-2nko

Hope it helps..

Business Unit Hierarchy – My First XrmToolBox Plugin


Check out – XrmToolBox Plugin to generate Business Unit Hierarchy by Phani

Phani Rajasekhar's avatarPhani Rajasekhar

I am very happy to announce that my first plugin “Business Unit Hierarchy” is listed in XrmToolBox now.

Thanks to Nishant Rana for giving me an idea to develop this.

This plugin is simple but very useful. Most of the times we navigate to so many windows to understand the BU hierarchy in our organization (I faced this situation many times) but with this plugin it is very easy to get the complete overview of BU Hierarchy. I plotted the BU Hierarchy in tree view presentation which is easy to understand for any user.

Here are list of steps to use this plugin

  1. Install “Business Unit Hierarchy” plugin from XrmToolBox Plugins Store.
  2. Connect to your organization.
  3. Open the plugin and click on “Generate Business Unit Hierarchy” button.

That’s it, Business Units of your organization will be loaded in a hierarchical structure like in the above screenshot. The BU’s that are…

View original post 46 more words