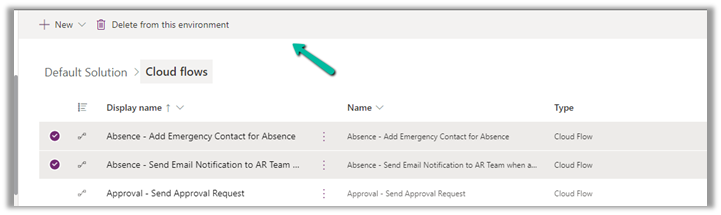
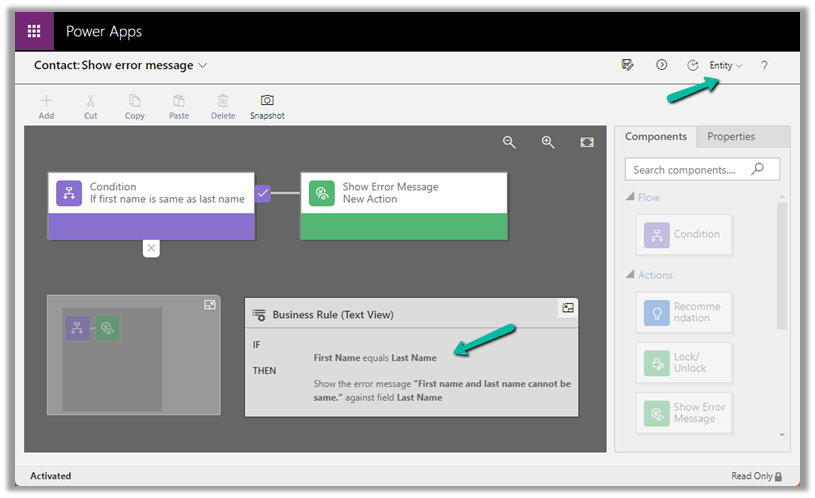
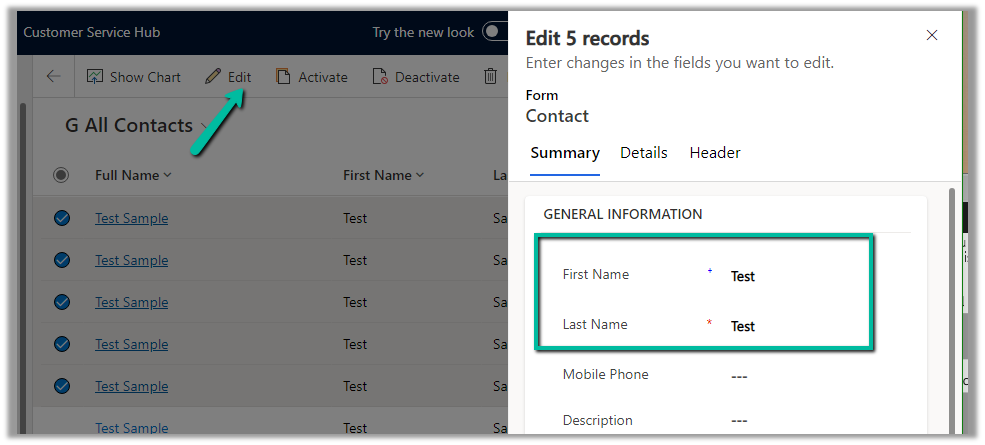
Let us see an example of a Business Rule with scope as Table (Entity) triggering on Bulk Edit as well as Data Import.
Below is our Business Rule – It shows the error message if the First Name is equal to the Last Name of Contact.
Here we are bulk updating the contact records and setting the last name same as the first name.
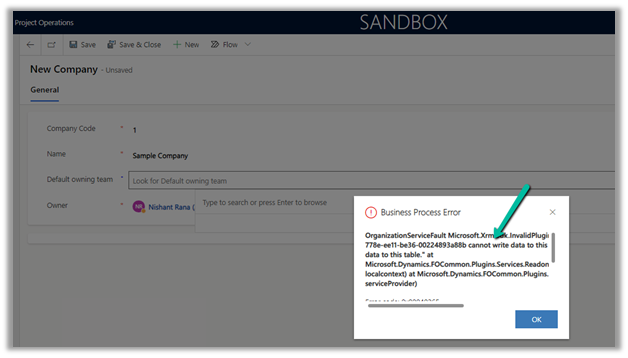
We can see the exception being thrown.
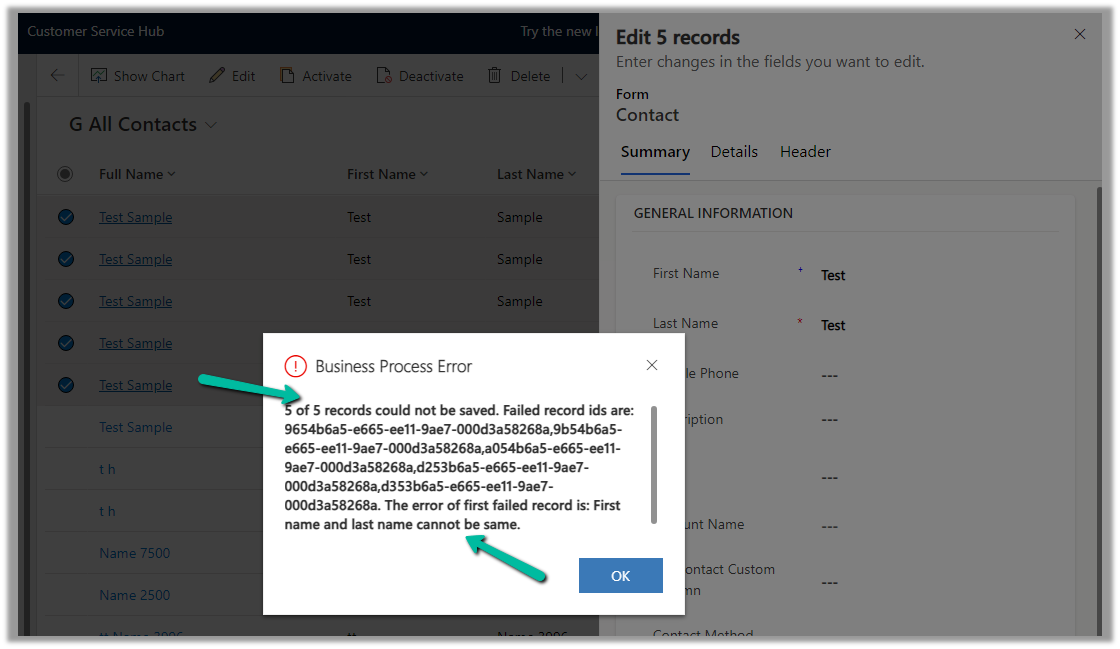
Below are the exception details –

Now let us try exporting/importing these records by setting the same value for both the first name and last name fields.
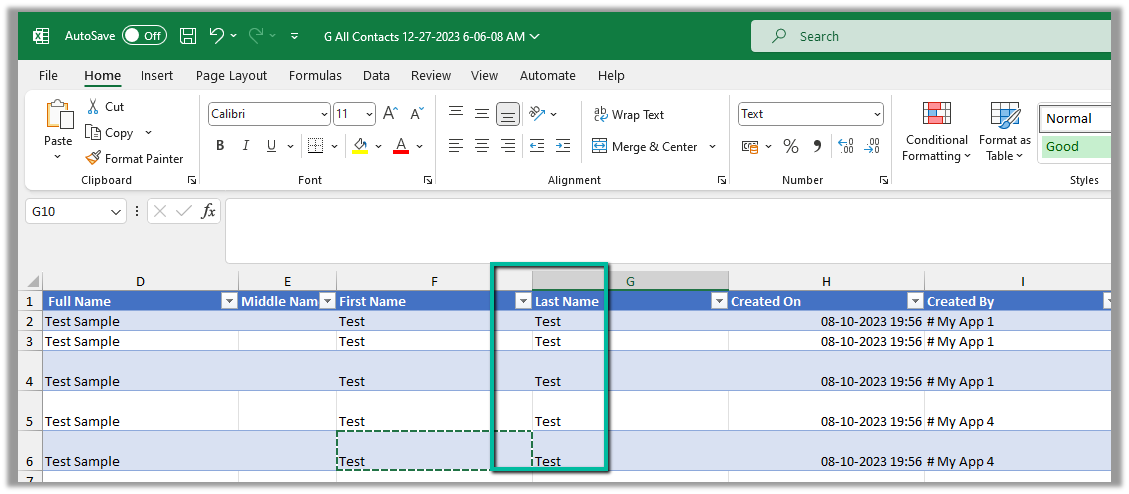
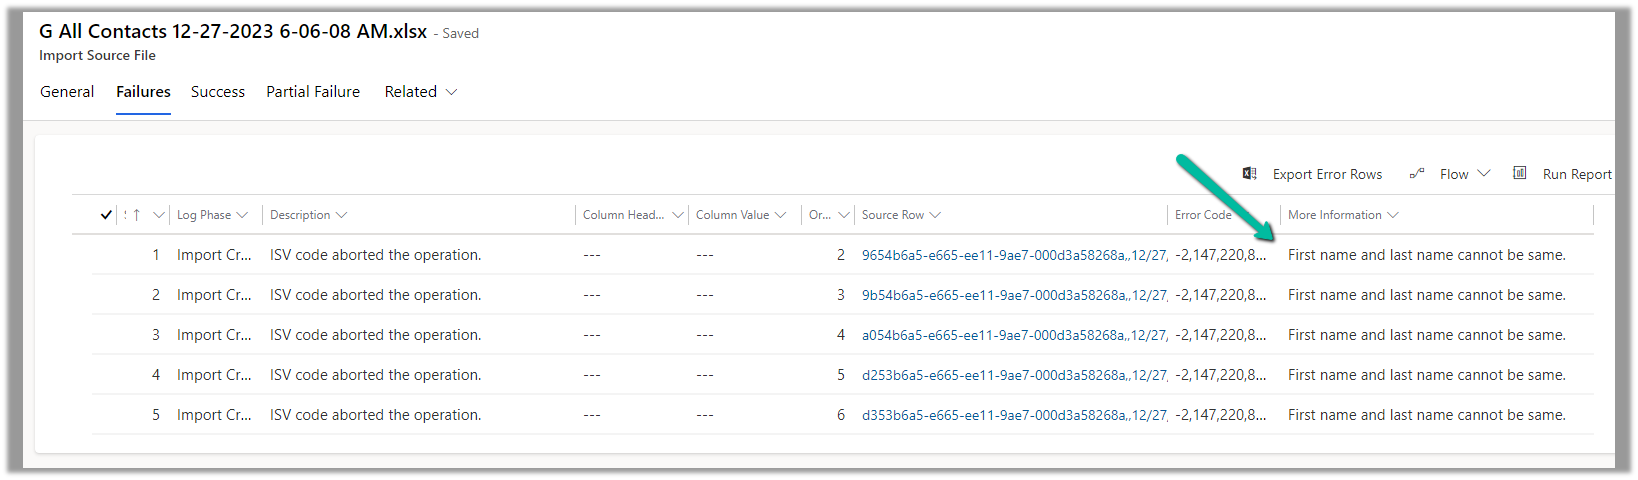
On Importing the Excel, we can see the records as partially failed.

We can see our error message in the Failures tab of the import record.
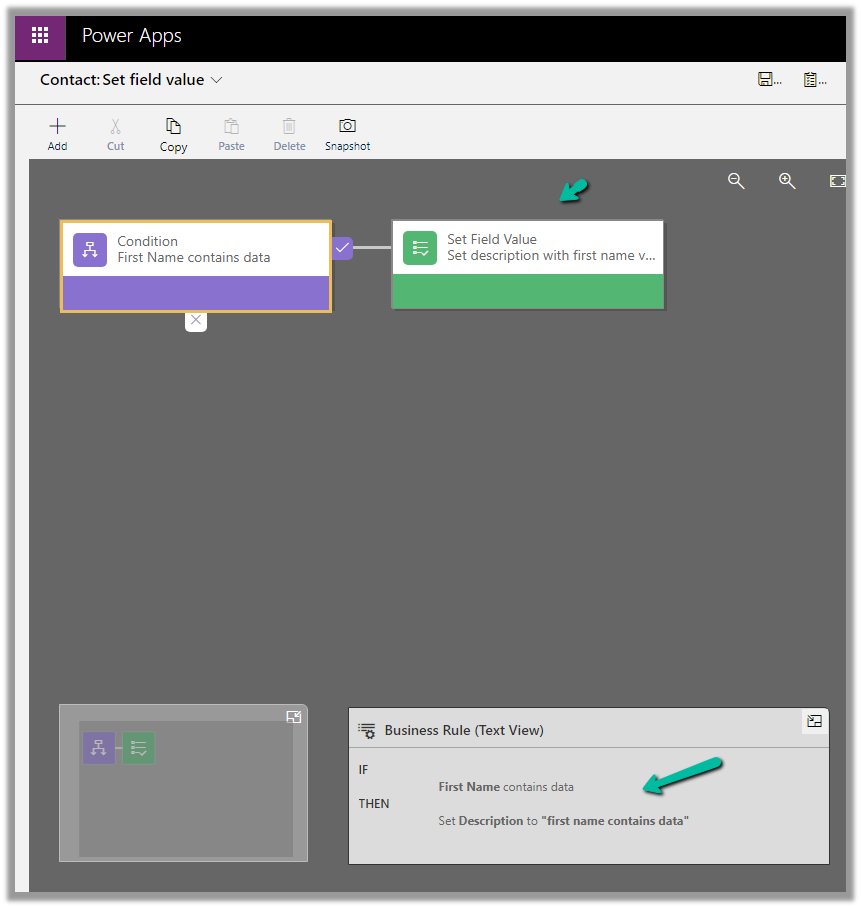
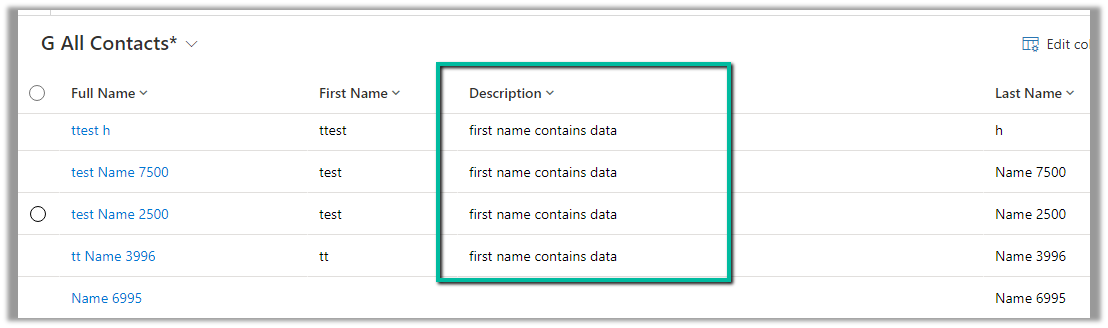
Similarly, let us check another Business Rule that sets’s description value based on the value of the First Name field.
Below we are bulk updating the contact record’s first name field.
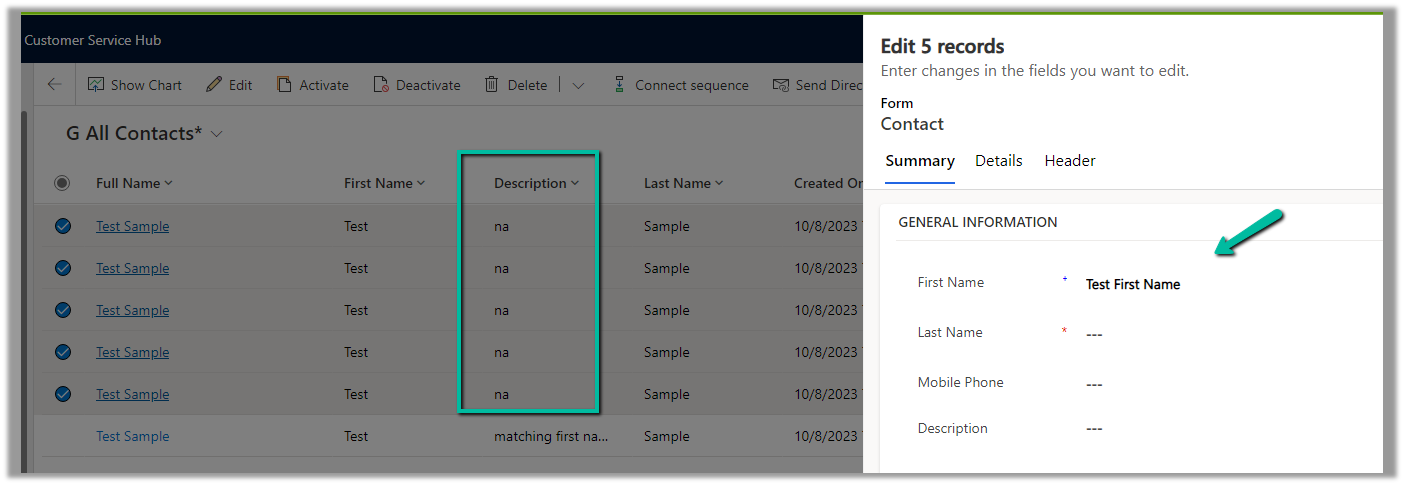
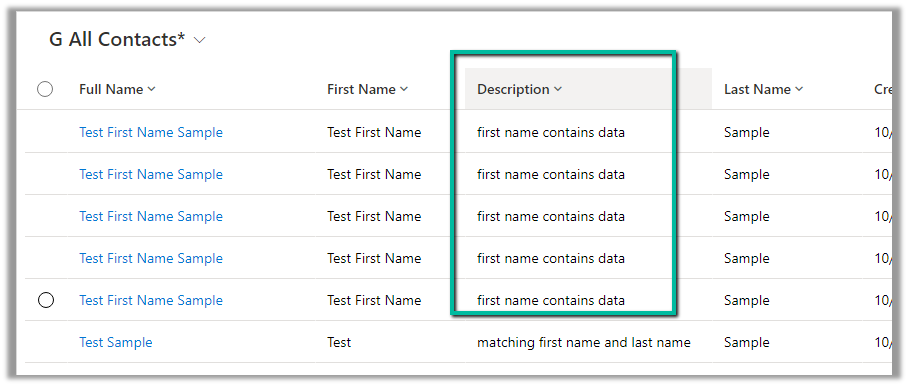
We can see the Description field updated.
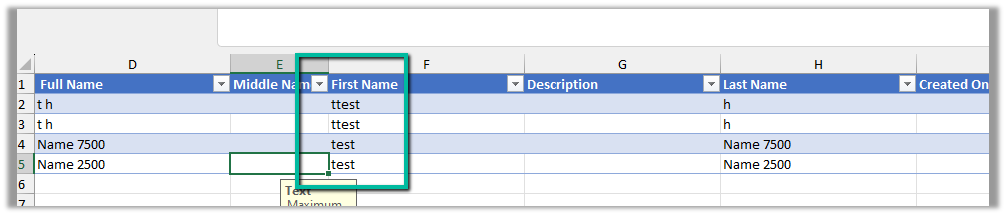
Now let us try the export and import of some of the records after updating its first name
Before –

After –
The import record status shows success

As expected that triggered the business rule
Hope it helps..
Also to the readers, THANKS and :-