Upcoming updates to Azure Synapse Link / Export to Data Lake Service – 2020 Release Wave 2


As we know – Export to Data Lake service enables continues replication of CDS entity data to Azure Data Lake Gen 2

Below are some the interesting update coming to it –

Configurable Snapshot Interval – currently the snapshots are created hourly– which will be configurable.

Cross Tenant Support – Currently Azure Data Lake Gen2 and CDS environment needs to be in same tenant. With the new update we will be able to use Azure Storage part of a different tenant.

Dashboard support that will show the count and visual trend of records especially helpful for large data sets.

Parquet format support – currently the CDS entity data is exported in .csv format, going forward with 2020 Release wave 2, the support for Parquet format will be added for improved efficiency terms of storage and performance.

Support for exporting Audit data that can be used for analysis and reporting.

Support for entities with attachments

Soft Delete – Deleting data from source but still keeping it in the Data Lake.

Get all details here –

https://docs.microsoft.com/en-us/power-platform-release-plan/2020wave2/cdm-data-integration/export-data-lake

Posts on Azure Data Lake

Hope it helps..

Advertisements

Snapshot in Azure Data Lake (Dynamics 365 / CDS) – Azure Synapse Link


In the previous post, we saw how to export CDS data to Azure Data Lake Gen 2

https://nishantrana.me/2020/09/07/export-data-from-common-data-service-to-azure-data-lake-storage-gen2/

Here let us have a look how the sync and snapshot work.

We have already done the configuration and have synced the Account and Contact entity.

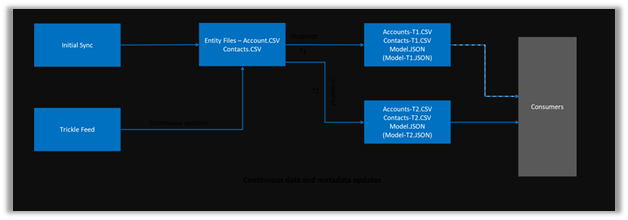
As the diagram depicts – there is initial sync followed by incremental writes for both entity data and metadata.

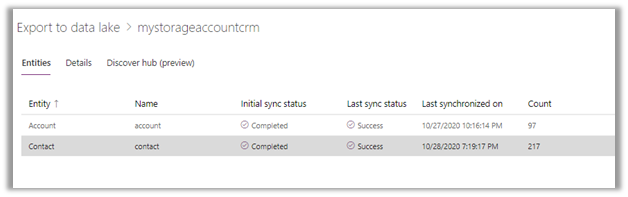
Below we can see we had initial sync completed for both contact and account entity, followed by an update in contact record which triggered another incremental sync – last synchronized on.

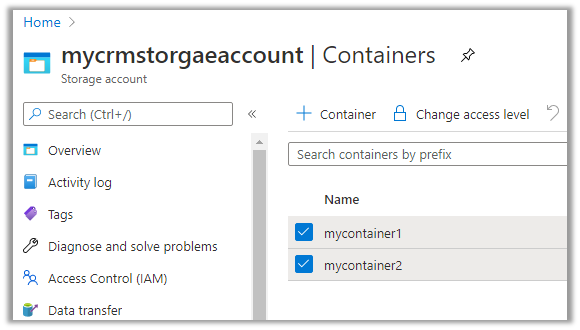
Within our storage container, we can see a folder created for each of the entities selected for sync.

As a part of initial sync or export, the entity data is written in CSV files

Changes in CDS are pushed to the CSV files continuously. (create, update and delete) along with a snapshot.

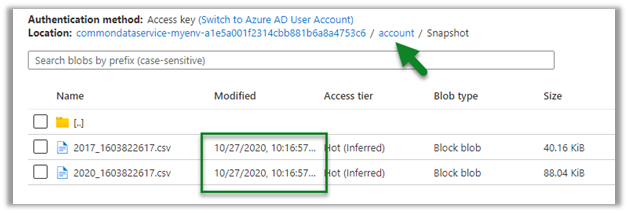
Within the Snapshot folder, we can see the snapshot added if there any change in the entity’s data.

Here for an account, we had no change.

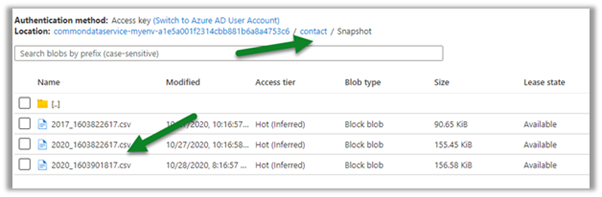
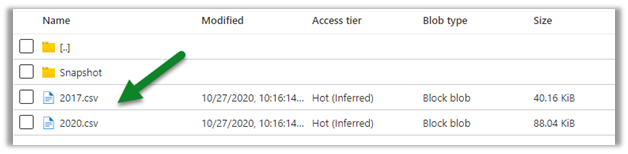
Now let us look at the contact entity, here we can see the update in the 2020.csv file.

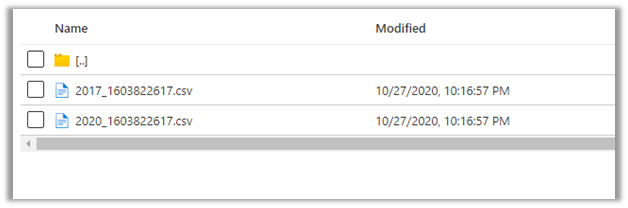
Let us look at the snapshot generated for contact; it shows no update as we have checked it within a 1-hour window of the update.

Snapshot is a read-only copy of data, which is updated at regular interval i.e. 1 hour, this ensures that the user is looking at a data which is not constantly getting refreshed.

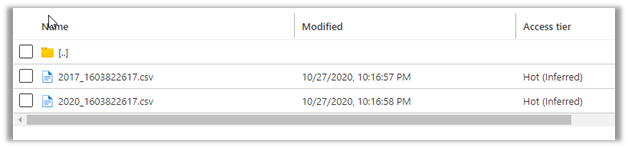
Refreshing after some time, we can see the new snapshot added for the Contact entity.

As expected, no new snapshot for the Account entity as there was no change.

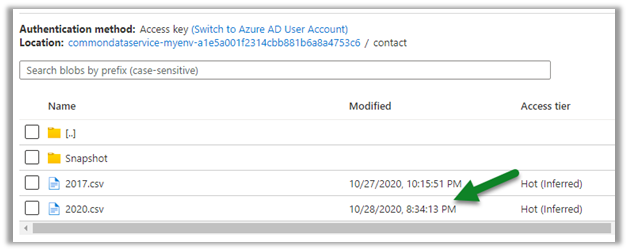
Let us create a new contact record, and see when we see the update in the CSV file and when does the new snapshot gets created.

We have created a new contact record around 8:30.

This was earlier before the update was made

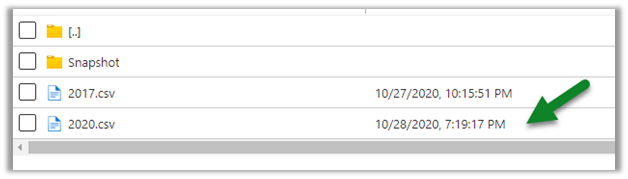
Within 5 minutes we can see the update in the CSV file

And as expected another snapshot at 9:16 exactly after one hour of the first snapshot.

Get all the details here

https://docs.microsoft.com/en-us/powerapps/maker/common-data-service/export-to-data-lake

Posts on Azure Data Lake

Hope it helps..

Advertisements

How to – Deploy and run SSIS package in Azure Data Factory


Before the SSIS package can be deployed to Azure Data Factory we need to provision Azure-SQL Server Integration Service (SSIS) runtime (IR) in Azure Data Factory.

In the previous posts, we had created an Azure data factory instance had used Azure SQL Database as the source.

Within Azure Data Factory in the Let’s get started page, select Configure SSIS Integration.

Specify the appropriate values to integration runtime.

Select Create SSIS Catalog option to deploy packages in SSISDB, provide Azure SQL Database server endpoint, and the admin credentials to connect.

Test the connection.

Specify advanced settings as appropriate.

This starts the creation of Azure-SSIS Integration Runtime.

Meanwhile below is our SSIS package that we would be deploying to Azure Data Factory.

It extracts a text file named contacts.txt from the blob source and loads it into destination blog storage.

Right-click the project  and select Deploy.

(Deploying individual package is not supported right now)

Select SSIS in Azure Data Factory.

Specify Server name and credentials and connect.

Click on Browse.

Create a new folder or select an existing folder and click on Ok

Once the validation is successful, click on Deploy and start the deployment.

After successful deployment, create a new pipeline in the Azure Data Factory, and drag the Execute SSIS Package activity

Connect to the package deployed.

Click on debug to trigger and test the pipeline.

On the successful run, we can see the contact.txt file extracted from mycontainer1 and loaded to mycontainer2.

Hope it helps..

Advertisements

Use Power BI to analyze the CDS data in Azure Data Lake Storage Gen2


In the previous post, we saw how to export CDS data to Azure Data Lake Storage Gen2.

Here we’d see how to write Power BI reports using that data.

Open the Power BI Desktop, and click on Get data

Select Azure > Azure Data Lake Gen 2 and click on connect.

To get the container URL,

Log in to the Azure portal and navigate to the container and click on Properties and copy the URL.

Replace the blob part in the copied URL with dfs

Below is the format of the URL.

https://accountname.dfs.core.windows.net/containername/

replace the account name and the container name.

In case you get the below error

Refer –

https://nishantrana.me/2020/09/08/error-we-dont-support-the-option-hierarchicalnavigation-parameter-name-hierarchicalnavigation-when-trying-to-load-table-in-power-bi-desktop-using-azure-data-lake-storage-gen-2-cdm-fo/

Select the CDM Folder View (beta)

Expand the CDM folder and select the entity.

In case if you get the below error

Refer

https://nishantrana.me/2020/09/08/error-we-dont-support-the-option-hierarchicalnavigation-parameter-name-hierarchicalnavigation-when-trying-to-load-table-in-power-bi-desktop-using-azure-data-lake-storage-gen-2-cdm-fo/

Once connected we can then create our Power BI report as shown below.

Check the below posts for creating a Power BI report with Dynamics 365 data as the source

https://nishantrana.me/2018/11/24/power-bi-and-microsoft-dynamics-365/

Posts on Azure Data Lake

Hope it helps..

Advertisements

Error – We don’t support the option ‘HierarchicalNavigation’. Parameter name: HierarchicalNavigation when trying to load table in Power BI Desktop using Azure Data Lake Storage Gen 2 CDM Folder view (beta)


While trying to connect to a table within Azure Data Lake Storage Gen2 through CDS Folder View

we got the below error

Users have reported this issue with the August 2020 Update of Power BI Desktop.

As suggested in the forums, downgrading to June 2020 Update fixed the issue for us.

Check out Export CDS data to Azure Data Lake Storage Gen2

Posts on Azure Data Lake

Hope it helps..

Advertisements

Fixe – Error – Access to the resource is forbidden while trying to connect to Azure Data Lake Storage Gen2 using Power BI Desktop


While trying to connect to Azure Data Lake Storage Gen2 through Power BI Desktop we got the below error

Came as surprise cause the user was had the owner role assigned to the container

It turned out we need to assign the Storage Blob Data Reader role to the user.

After assigning the role we were able to connect successfully.

Posts on Azure Data Lake

Hope it helps..

Advertisements