New features of Visual Studio 2019 – New Search Experience and UI changes


Visual Studio 2019 comes with a completely revamped, context-sensitive Search experience.

To change the Theme, search for keyword “Theme” and select the appropriate result.

It would open the respective screen, which allows us to quickly make the changes.

Similarly, to change the Font.


Also, observe the option to “Search online for ‘Font'”, which opens the search result in the browser. It appends the “Visual Studio 2019” keyword to the search term.

The search result is also context-sensitive,

For e.g. search results when a search is performed when the context is the file within a project.

The search results when Solution is selected inside Solution Explorer.

Recent results screen

With regards to UI changes, we now have the new Start Page

Clone or check out code lets us open the Git Repository quickly

Create a new project allows, search for the project template and filter it as well

The toolbar changes, top one is 2019 one and the bottom one is Visual Studio 2017. Project Name has moved to the right in the toolbar and it is now 2 rows. Quick Launch is now replaced with the Search box.

Automatic downloading updates.

The above useful changes are surely going to be loved by the technical community who always loved Visual Studio.

Hope it helps..

New features of Visual Studio 2019 – Export / Import Visual Studio Configuration Settings


Within Visual Studio Installer, we now have the option to export and import the configuration settings. These configuration settings can then be shared with the team to import, which makes sure that all of them have the same set of workloads installed in their Visual Studio environment.

Select the version of Visual Studio and click on Export Configuration.

Click on Review Details to check the workloads part of the configuration

Here we can see .NET desktop and ASP.NET workload to be part of it.

The content of .vsconfig file

To import it, click on Import Configuration.

Select vsconfig file and click on Review Details

Click on Modify to install the workload/components.

The installation begins and installs the required components.

Hope it helps..

Contextual Email communication in D365 CE Wave 2


priyeshwagh777's avatarD365 Demystified

2019’s Wave 2 release have really put things where they should be. Once I enabled Early Opt-in while writing this post, this is a great feature for Sales people I came across and couldn’t resist sharing with you all – Contextual Email Communication! So kindly wait until updates are automatically applied to your org or try the same in your Sandbox first.

Isn’t going exclusively to Activity/Email entity extremely off-putting? I mean, you navigate away from your record you were working on and that isn’t productive, is it?

That’s when Contextual Email window comes in really handy. Here’s how you enable it in your 2019 Updates.

App Settings in Sales Hub

  1. In your Sales Hub, navigate to App Settings.
    appSettings
  2. Among other settings, look for Enhanced email and flick the switch from off to On.
    switchOffswitchOn
  3. Then click Apply at the bottom right and you’re set!
    applyChanges.png

Contextual/Enhanced Email

Now, when you’re…

View original post 69 more words

Live Chat using ProProfs Chat in Dynamics 365 CE (CRM)


ProProfs chat is another live chat solution that integrates with both Dynamis 365 CE as well as CRM On Premise. Recently I wrote about PowerChat which is another live chat solution that works on both online and on premise version of Dynamics CRM.

In this post we’d see how quickly we can setup the integration and be up and running and also compare it with PowerChat.

Navigate to https://www.proprofs.com/chat/integrations/microsoft-dynamics/ to get the details and click on Try Chat Free to get started.

After creating the account, go to Integration option and select Microsoft Dynamics and set the toggle switch on.

Specify the Dynamics CRM URL, Dynamics CRM Account, on-premise or online and should lead, contact and case should be auto created or not.

Once enabled, go to Installation option and copy the code and paste it on the website or page.

As soon as the visitor starts the chat, the agent will receive the Invite.

The agent can see the details of the visitor like location, device etc.

The customer can end the chat and give rating as shown below.

The agent gets the notification that user has ended the chat.

As configured, we can see the case, lead and contact record created in Dynamics 365 CE, with description having the chat transcript.

To add agents, we can choose the Add Operator option

Routing order gives the option of specifying the sequence of operator accepting chats if chat routing is enabled. Similarly, visitor can select the operation they want to interact with as specified by Allow Operator Selection option.

For different business units having different websites/ pages, we would want them to be served by different operators, herein we can use Departments.

Department will have a code which we need to place under the ProfProfs Chat code to send chat to that specific department.

Also, for Admin, there are Reports available Summary, Rating, Operator, Timesheet, Visitor.

Theme settings à

Chat Window Settings à

Real Time Monitoringà

Comparing the ProProfs Chat with PowerChat with regards to Dynamics CRM integration à

  • PowerChat provides a managed solution that we import inside our Dynamics CRM, then we register through the configuration page of that solution to get started. In case of ProProfs there is no solution file. We register at their site.
  • PowerChat Users are Dynamics CRM Users and can chat with visitors from within Dynamics # CRM. In ProProfs Chat, the operators are not the crm users and their account needs to be created / added separately.
  • PowerChat allows different Chat Widgets to be created, to be used in different web pages or web sites. Agents can be associated to the Chat Widgets. In ProProfs Chat, there is concept of Departments to achieve the same.
  • PowerChat allows agents the option to create lead/ contact/case records manually during the chat. In ProProfs Chat, the lead /contact/ case records are auto created based on the configuration, we can select which records to be created.
  • PowerChat auto creates PowerChat Activity record for each chat which has all the details of the chat. ProProfs Chat doesn’t create any other records expect lead/contact/case inside Dynamics CRM.
  • They both have the option of configuring the chat windows, fields to be added, snippets to be reused during chat, multi agent support.
  • PowerChats is natively integrated with Dynamics CRM, so the CRM Users do not have to be working on 2 different applications. However, ProProfs brings in with it lot more features like routing chat to another operator, co-browsing, APIs support, Reports, Real Time Visitor monitoring etc.

Check the guide here to see all the features

https://chathelp.proprofs.com/home

Hope it helps..

Enable Live Chat in Microsoft Dynamics 365 CE (CRM) using PowerChat


PowerChat is the live chat solution / addon developed by PowerObjects that supports both Dynamics CRM On-Premise and Online.

Below we will look at how to set it up and what are the features it provides.

To get started

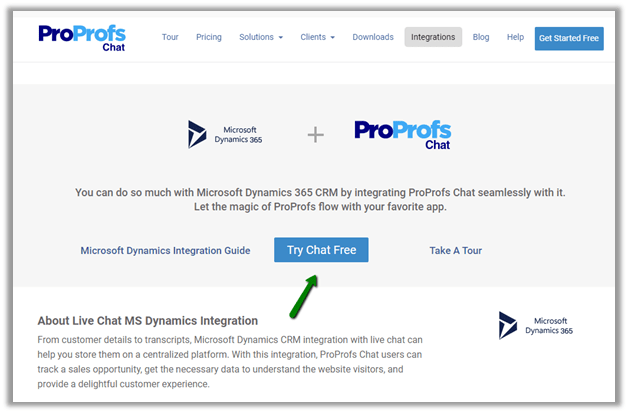
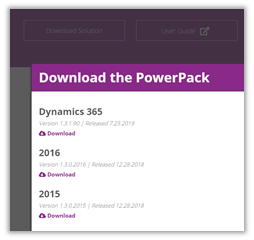
Download the appropriate solution

https://www.powerobjects.com/powerpacks/powerchat/

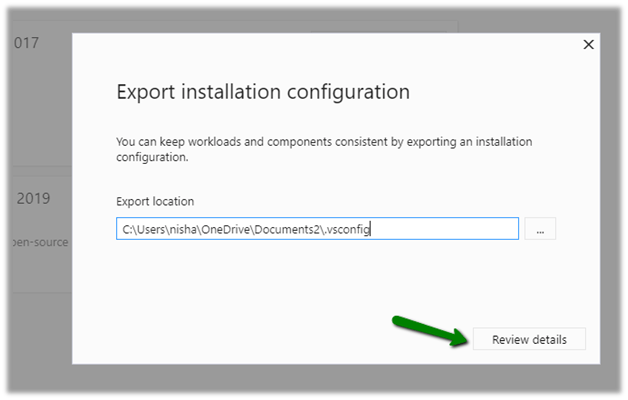
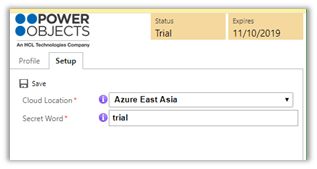
After successful import of the solution, next step is to register the solution. For this, open the solution and click on the configuration page, provide the required details in the Profile and Setup tab.


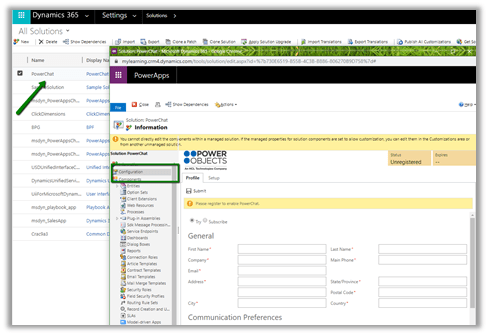
In Setup tab, provide the Cloud Location nearest to your deployment.

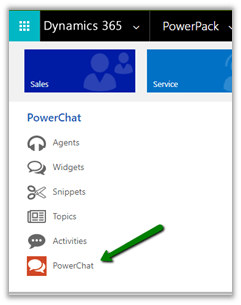
The PowerChat solution adds the following entities in the sitemap.

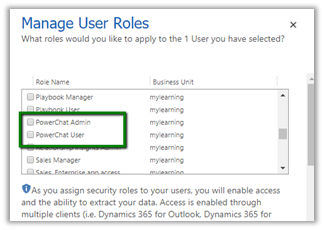
and the following security roles

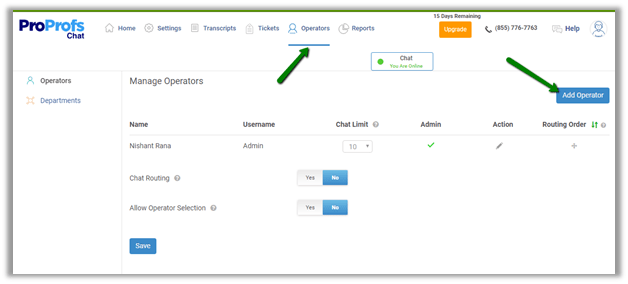
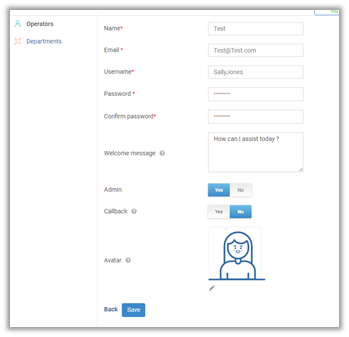
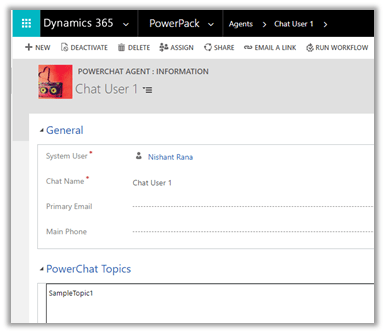
In Agents i.e. agent record we can specify the System User who would be working as agent and topics they are working on.

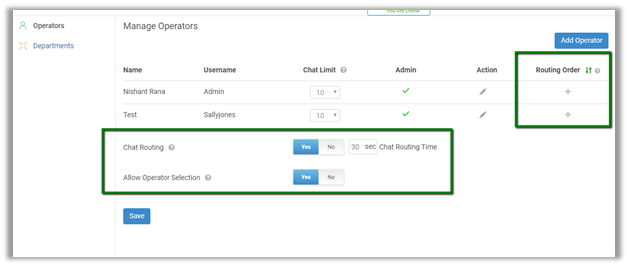
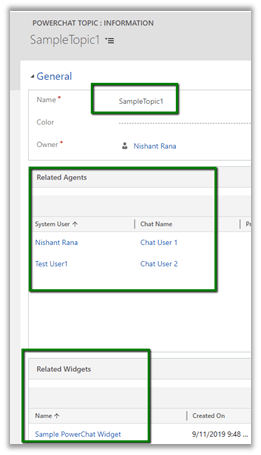
Topic, Agent and Widgets work hand in hand. We can have multiple topics defined in the system and for each topic we can define the agents who’d be handling that topic along with the widget that will be used for that topic.

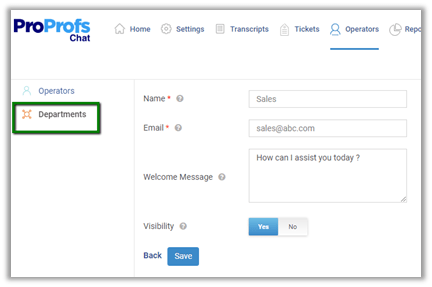
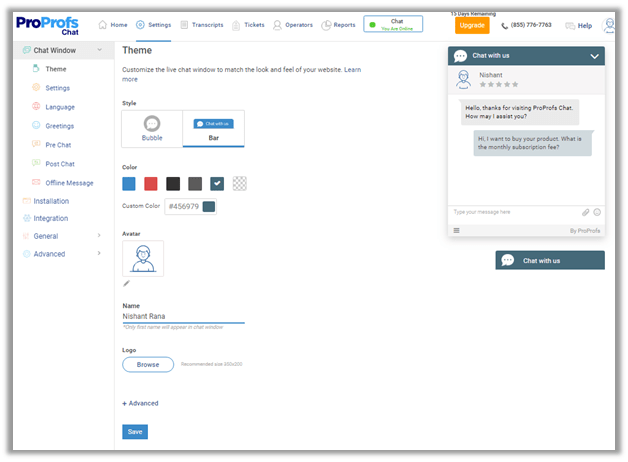
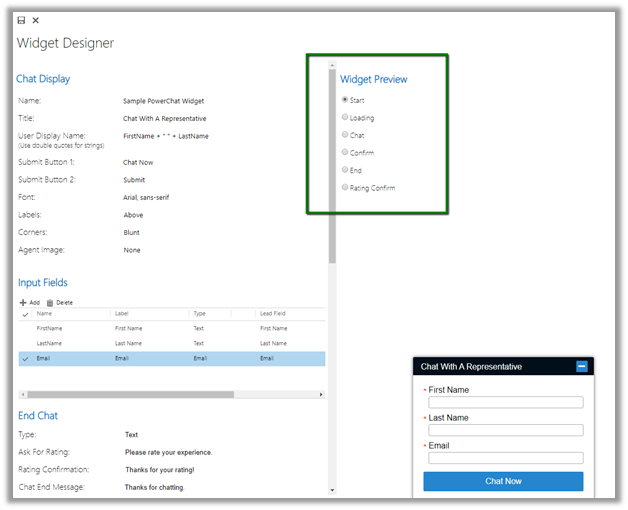
Widgets specifies the Chat Interface that would be deployed in the website. Clicking on Design opens the design interface for the widget.

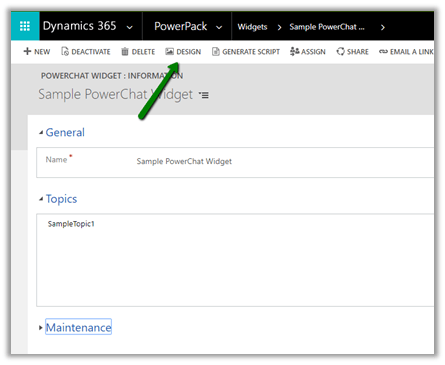
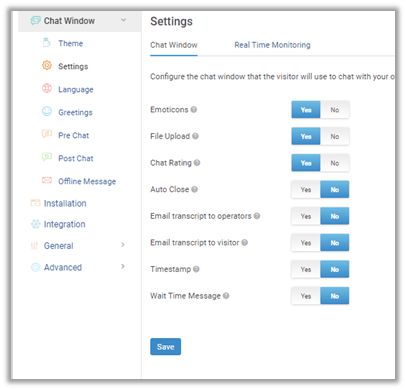
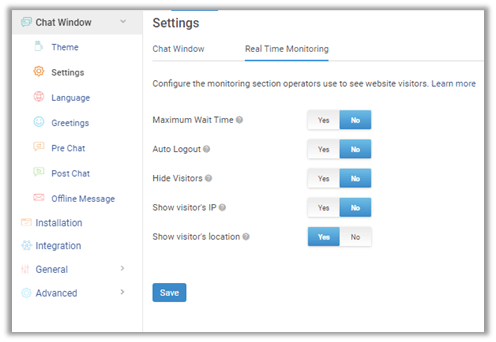
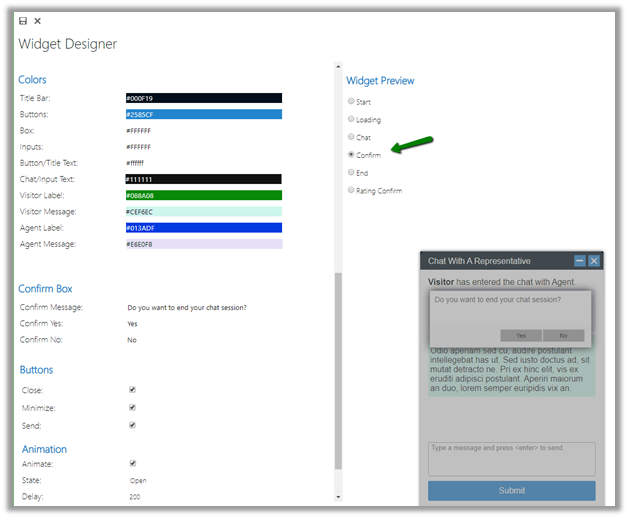
Below are some of the different options that can be configured for the chat widget.

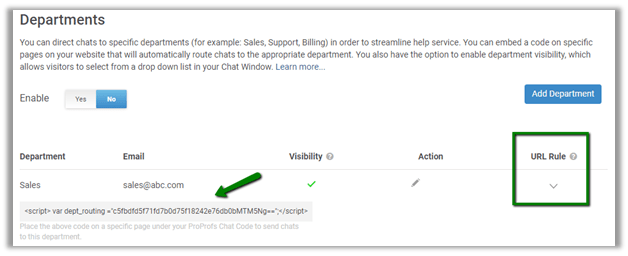
Once we are done with the configuration of the chat widget, we need to click on GENERATE SCRIPT ribbon button to get the script for the widget which we will be embedding to our websites.

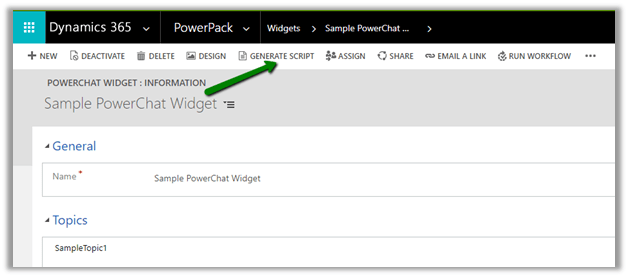
Below is the script generated à

Below is the sample website where we have embedded the above script

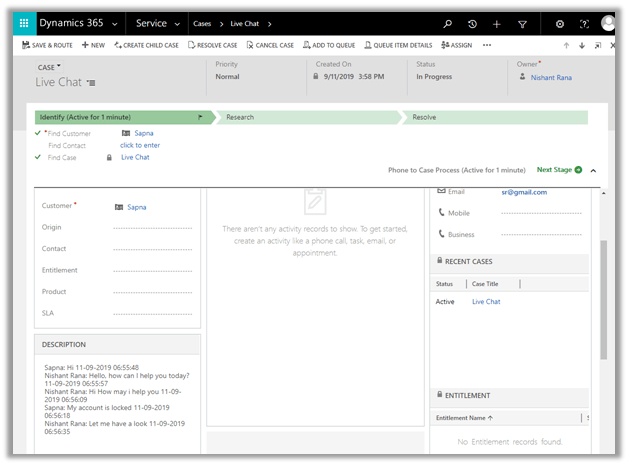
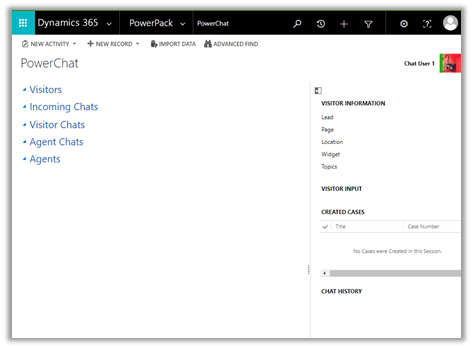
Back in CRM, users need to click on Power Chat and start the PowerChat for communication to begin.


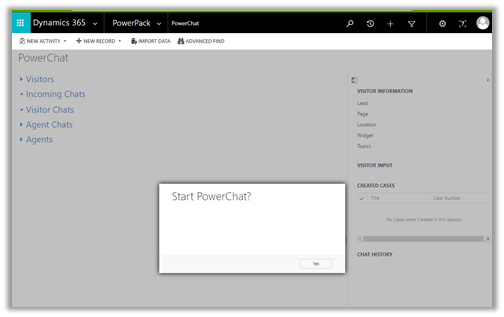
Power Chat interface à

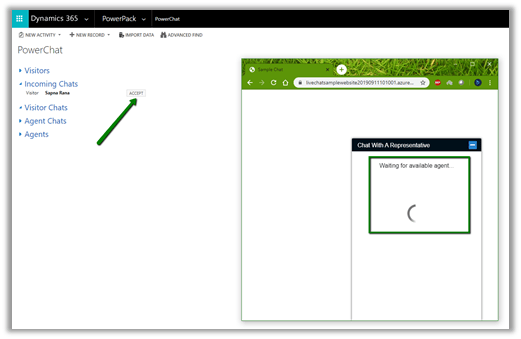
Once the user clicks on Chat Now button on the Chat window, the agent gets the notification to Accept the chat.

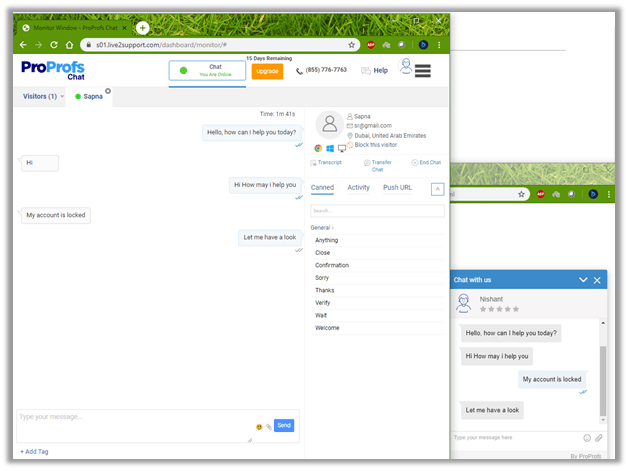
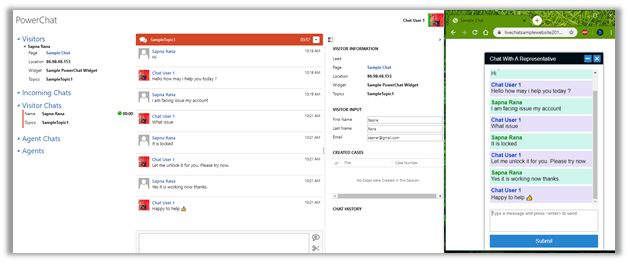
Below is how the communication looks like for the agent as well as the customer. The green bubble below is the timer that captures the duration of the chat.

The agent also has the option of creating the lead, contact and case record associated with the chat. Create Lead and Create Contact option creates the lead and contact record in the background using the information auto populated at the Visitor Input section on the right panel.

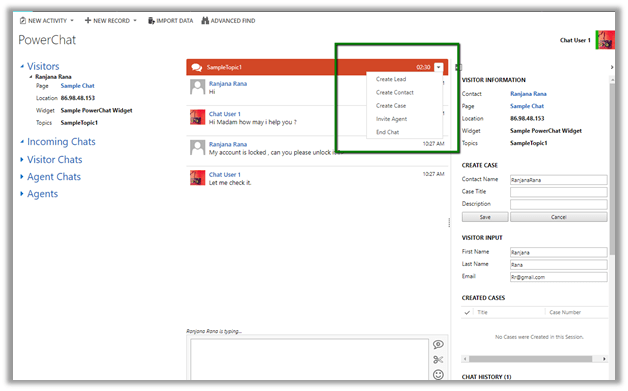
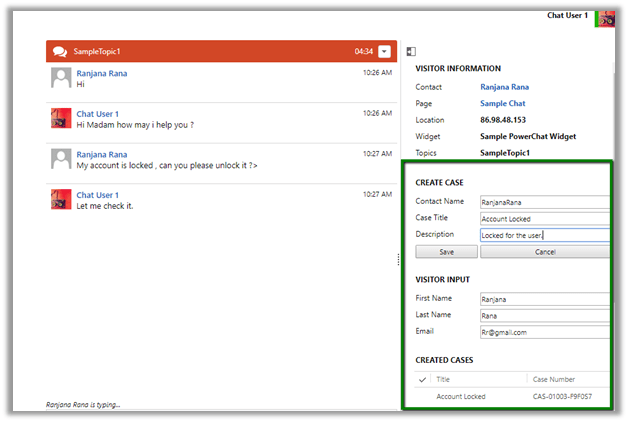
Create Case option allows agent to specify the Case Title and Description along with the Contact Name.

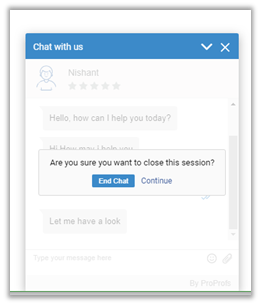
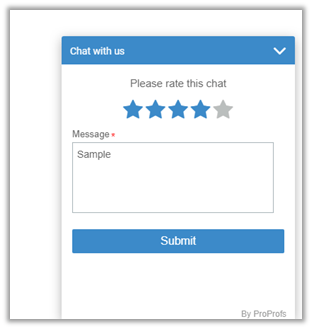
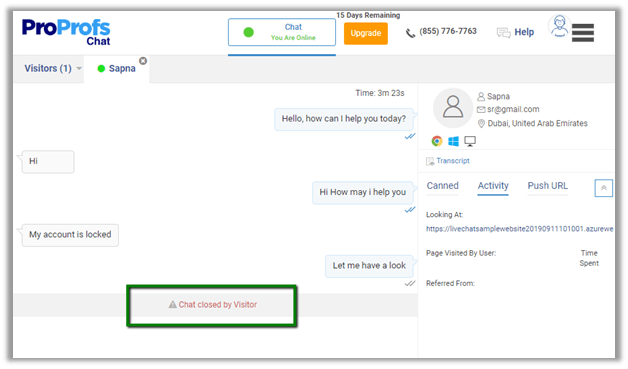
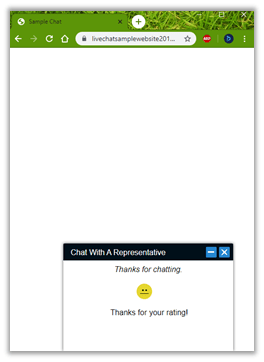
Agents and Customers both have the option to end the chat, the customer also have the option to rate the agent when they close the chat.

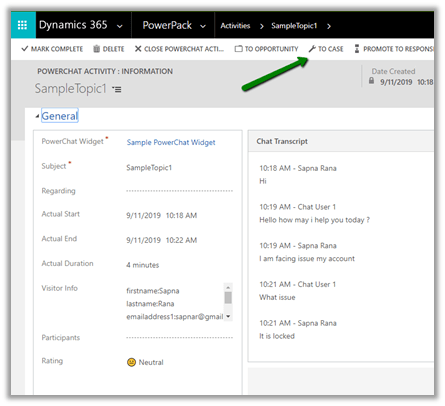
Every interaction creates PowerChat activity record in Dynamics CRM as shown below, which records the chat history, rating, duration etc. information about the chat.

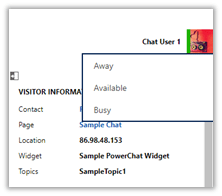
Agent can also set their status, if the agent is in Away or Busy status it will not receive the notification to accept the new chat.

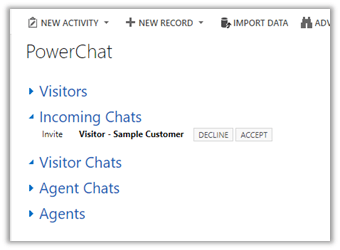
As we discussed earlier if we have multiple agents configures for same topic, they both will get the notification to accept the chat as shown below.

Also, Agent has the option of adding another agent to the chat.

The invited chat agent can either accept or decline the request.

Below is how the communication looks like when we have multiple agents working with the same customer. Both the users are communicating with the Customer at the same time as shown below.

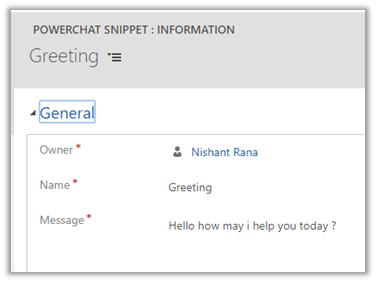
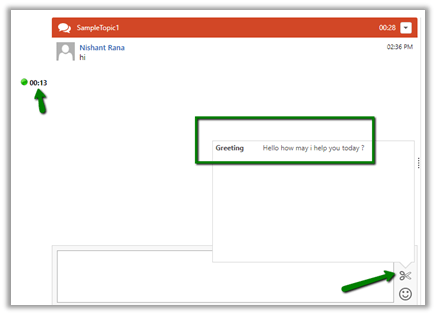
One more feature that agent has while interacting with the customer is to use the snippet, which basically defined predefined content which agents can use.

Thus, we saw how easy it is to configure the PowerChat and get started with Live Chat capabilities in no time.

Few months back we had also explored PowerApproval the approval solution for Dynamics CRM as part of PowerPacks add-on. Do check it out.

https://nishantrana.me/2019/01/02/implementing-multi-level-approval-using-powerapproval-in-dynamics-365-ce/

Hope it helps..

Out of preview – New Model-Driven form designer (WYSIWYG) in PowerApps


Finally the new model-driven designer is out of preview and available for general use

https://powerapps.microsoft.com/en-us/blog/announcing-the-general-availability-of-the-new-model-driven-form-designer/

Since I wrote about it last the few changes that we can see are

  •  New Field button that allows adding Lookup Fields. However I still don’t see the option of Option Set fields there.

Form

  • Grouping of Components Section

Form

  • Preview for the components

Form

Looking forward to see all the remaining features that are part of our classic Form Designer like addition of Business Rules, Show Dependencies, Enable Security Roles etc. to be part of the new designer.

Below are the previous blog posts that I wrote about the new model driven apps while it was still in preview –

https://nishantrana.me/2019/08/19/subgrid-quickview-linear-gauge-arc-knob-linear-slider-controls-added-in-new-model-driven-form-designer-wysiwyg-in-powerapps/

https://nishantrana.me/2019/08/05/sub-grid-added-to-the-new-model-driven-form-designer-wysisyg-in-powerapps/

https://nishantrana.me/2019/05/27/few-improvements-in-new-model-driven-form-designer-wysisyg-preview-in-powerapps/

https://nishantrana.me/2018/12/24/the-new-model-driven-form-designer-wysisyg-in-powerapps-for-model-driven-apps-dynamics-365-ce-preview/

Hope it helps..

Nishant Rana's Weblog

Everything related to Microsoft .NET Technology

Skip to content ↓