Was recently working on a comparison between using SSRS and/or Power BI for reporting for Microsoft Dynamics CRM, below are some of the points we came up
SSRS has always been Reporting Tool of choice for Microsoft Dynamics CRM and has been natively integrated with the application.
Microsoft Dynamics CRM offers Report Parameters for SSRS that are specific to CRM and can be used while writing custom reports using SSRS.
Microsoft Dynamics CRM provides CRM Pre-filtering feature using which user can use to create a context-sensitive report. Pre-filtering basically passes the specific record (or selected records) information on which report is to be run and renders the result after pulling the information from those record(s). These reports can be uploaded and run from inside the form or grid (list of records) or from the Reports Area within CRM.
Microsoft Dynamics CRM provides Filtered Views against which SSRS Report are written. Filtered views conform to the Microsoft Dynamics CRM security model so the data shown in an SSRS report using a filtered view would only contain the data the users can view and has access in CRM
SSRS Reports adheres to Security Model of Dynamics CRM. They can viewable by the Organization or Individual. Individual reports can be shared with other users within the system through the Sharing feature.
SSRS is an ideal solution for something to be printed, for e.g. operation documents like invoices, work order, etc. as it gives fine-grained control over location as well as formatting of each of the report components/controls.
SSRS has support for more advanced printing features such as footers, headers, watermarks, and page numbers. We can easily configure the margins and layout of your report to get it exactly the way you want.
It is easy to extract data as well as export the SSRS report to a different format like word, excel, CSV, pdf, XML, etc.
Delivery reports in multiple formats automatically (Scheduling via Subscriptions).
There are some limitations for CRM Online reporting which has mostly to do with limitations of Fetch XML.
Interactivity and Data Exploration is where Power BI wins over SSRS à
For interactivity and data exploration we can use parameters, drill-through reports or action links, however, comparing this to Power BI, it is very limited, if we click on a visual, all of the other visuals automatically cross-highlight or cross-filter.
Advanced Visualisation support in Power BI.
Because of the limited interactivity, SSRS is not ideal for data exploration. We have limited options for slicing and dicing the data. SSRS makes more sense when you know what you want the end result to look like. If you to play around with the data, you are much better off with Power BI.
Mobile support is much better for Power BI.
Support a large number of data sources.
In short, both the tool can be used and can co-exist as they fulfil a different set of requirements.
Would appreciate if you could provide your thoughts in the comments and some additional points.
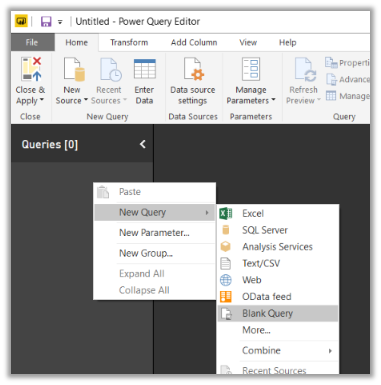
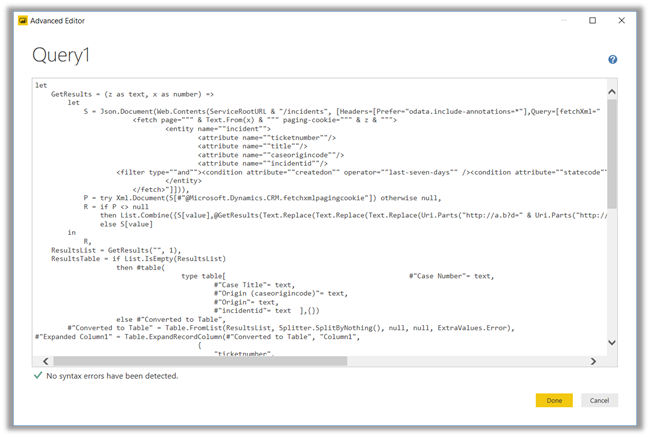
Just listing down the basic steps below for quick reference à
Install the Power Query (M) Builder plugin from XrmToolBox
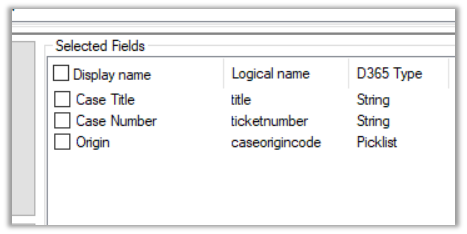
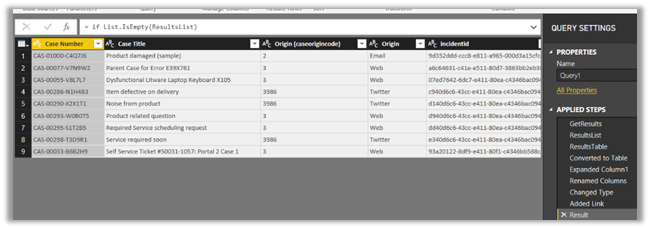
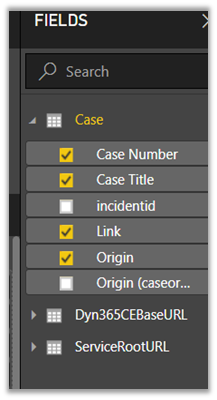
Click on Load Entities and select the Entity against which we want to write the report. Here we will be writing a report against Case entity (for e.g. Cases by Origin), so let us select the Case entity. For selecting the fields either we can make use of view or search and add the corresponding fields in Selected Fields Section.
Here we have selected the following 3 fields
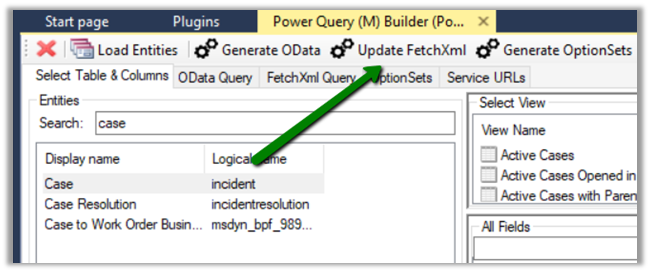
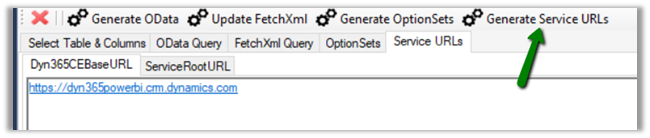
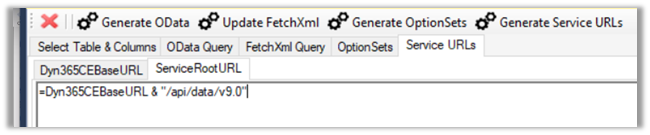
Click on Update FetchXML button.
This opens the FetchXML tab, where we can select the fields (note we have formatted value field added for Origin OptionSet field) and also select to add record URL or to use all the attributes of the entity.
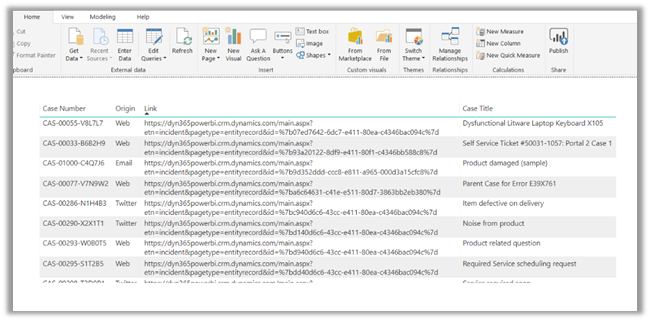
Here we have selected all the fields and also checked the option “Add Record URL”.
Click on Generate FetchXML, to generate the query.
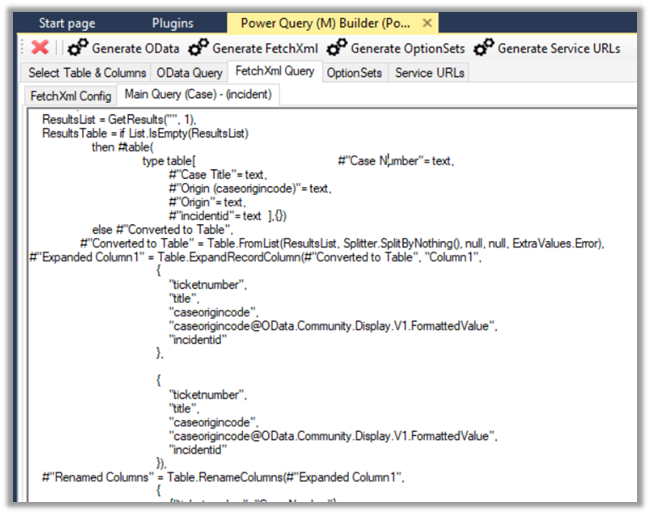
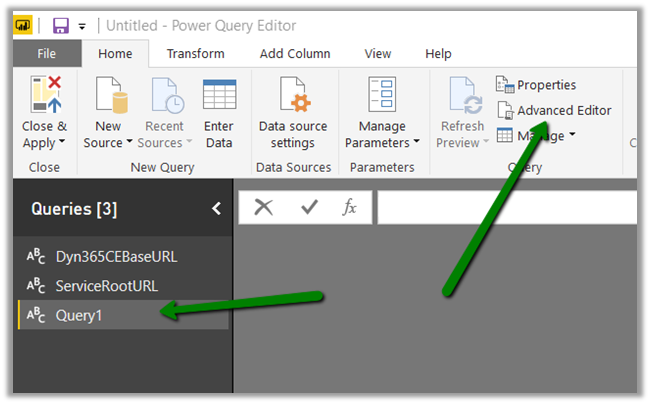
The generated main query
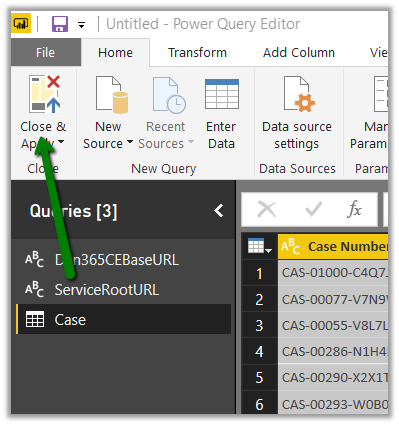
Now back in Power BI Desktop, open the query editor and create a new blank query with following name and value
Updated 8-Sep-2018 –> Please check the Power Query Builder tool of XrmToolBox. Thanks Scott Sewell for informing about this wonderful tool.
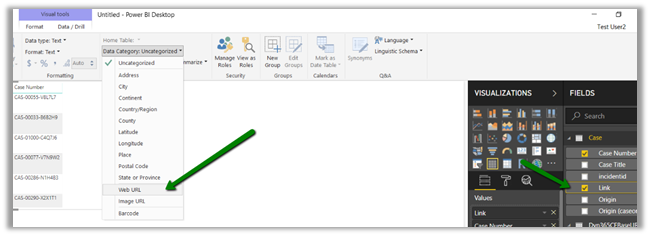
Suppose, we have created a Power BI Report which makes use of OptionSet field.
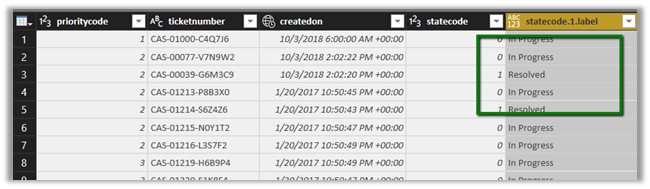
It is on incident entity and we have selected priority code and state code option set fields. The problem is that we only get the value for them, so to get the label either we can manually specify it or use the plugin Power BI Option Set Assistant. We’d see both the methods.
Let us take state code field first and specify label for them manually.
In the Query Editor, select New Query and specify following value and save it.
Select statecode and value to map them, specify left outer join for Join Kind as shown below
Select the new column added to the query and check the label.
We now have the label specified added as a new column to our query.
Here, for small set of values we can specify the label manually, however if there are too many values this might not be feasible and also if there are changes in OptionSet inside Dynamics 365 CE, we’d have to do it manually here, which makes it difficult to maintain.
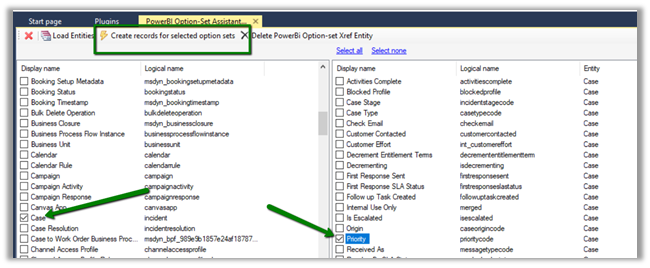
Select Priority field and click on “Create records for selected option sets”
Basically, it will create a new entity named gap_powerbioptionsetrefs entity, which will hold the records corresponding to each of the values of the optionset field selected.
Back in Power BI create a new query and select the gap_powerbioptionsetfrefs entity and save the query.
Now follow the same steps, select the main incidents query and perform merge queries operation as shown below