I am going through the Getting Started with Adobe Campaign V6 Pluralsight course by Otto Warner (which I would highly recommend) to understand the basics of Adobe Campaign.
The course covers V6 of the Adobe Campaign Classic. (the latest version is V7).
Adobe Campaign Classic is the original on-premise version of the product, the newer online-based is called Adobe Campaign Standard.
The below article list down all the differences between them

Below are some of the points that I have noted down from the course for quick reference
- Adobe Campaign provides marketing automation and outbound communication capability.
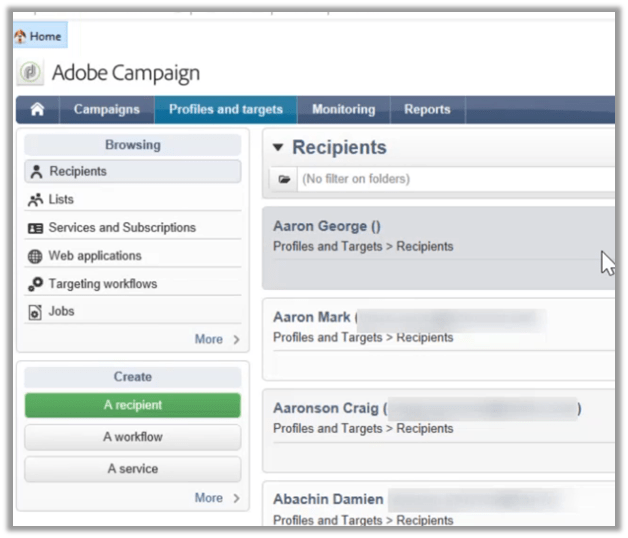
- Adobe Campaign Client Console which is a rich client needs to be installed in PC, which connects to the Adobe Instance.
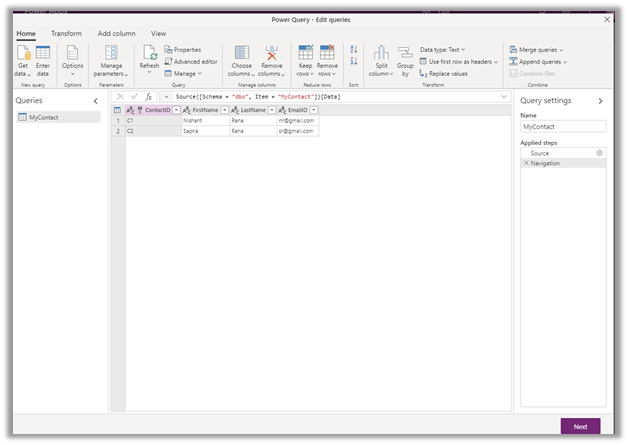
- Below is the screenshot of the client.

- Below are how the campaigns are organized within Adobe Campaign. It starts with Plan, which can have multiple Programs, which in turn can have multiple campaigns in it.
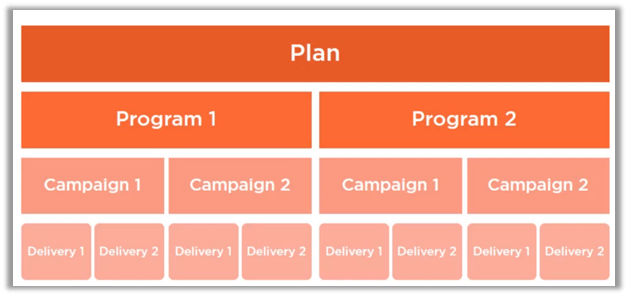
- Plan can be thought of as a calendar period, the program defines the actions to be taken with that calendar period and campaign centralizing all the aspects related to marketing campaign specifying target, delivery, etc.

- To create a plan, we can navigate to Campaigns tab in the client app, and select Create à Plans

- Below is how the new Plan screen looks like

- A new program can be added from within the Plan’s calendar.

- Or can be created from Create option as shown below

- The program screen looks similar to the plan.

- The below screen shows the Webinars program for the Plan – August 2017’s calendar view.

- A new campaign can be added from within the Program or we can use the Create option.

- The campaign has additional details like campaign template and main channels as shown below.

- Below is how the dashboard of the saved campaign looks like.

- The edit tab for the campaign allows assigning the campaign to a user.

- It allows provision for attaching the documents

- We can also manage the budgetary aspect of the campaign, which could be used for reporting.

- It also provides the Audit capabilities.

- The targeting and workflows tab is where the actual orchestration happens

- Below is the folder structure created for Plans (August 2017) and Programs (Webinar and Win-Backs) within the plan.

- Recipients are the records against which campaign will be executed.
- For recipients, custom fields can be added by admin.
- New recipients can be created manually or can be imported from different sources.

- Coming back to Campaign’s Targeting and workflows tab, we can see different components in the Targeting section, that can be used to define the workflow.
- Query and Read list step are used for specifying the base target, this is where the workflow would usually start.

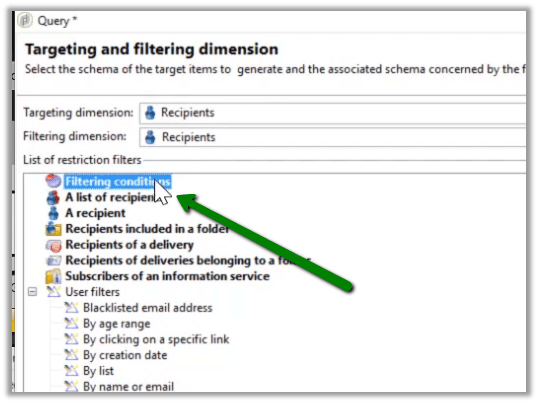
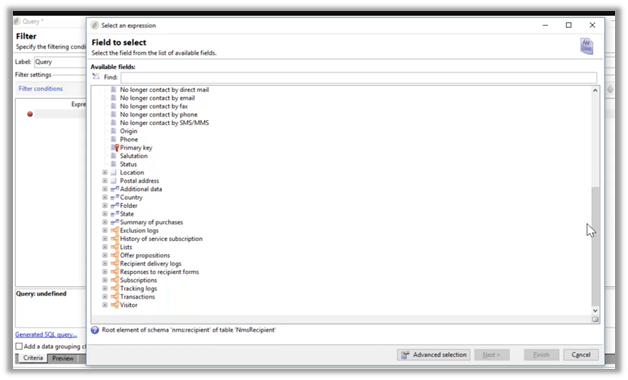
- For Query step, below are the different filters that can be applied

- Here user defined filters can also be applied.

- Filtering conditions restriction filter can be used to define filter conditions.
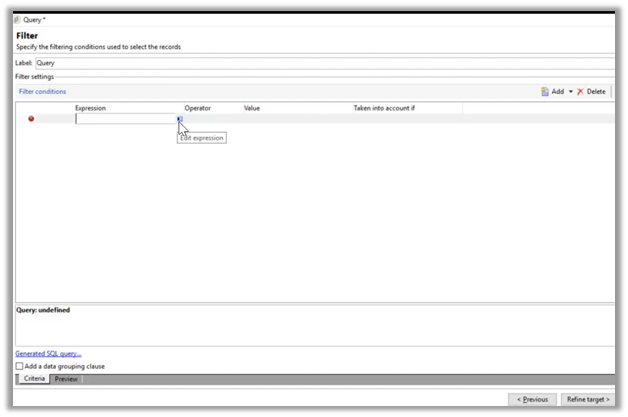
- The expression editor allows selecting different fields either from the same target or from the related records.
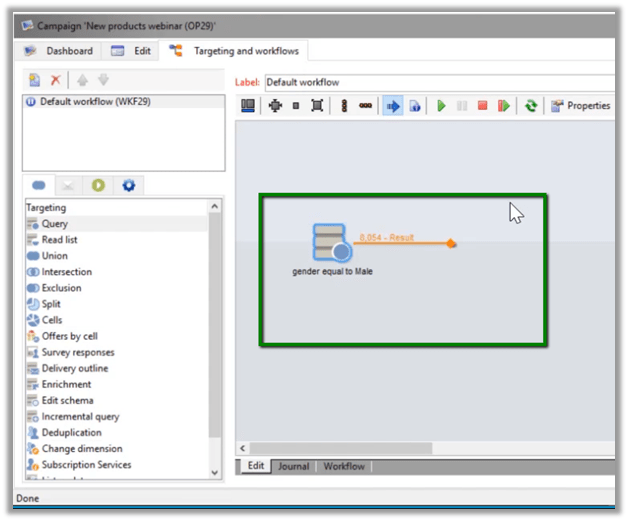
- Below is the filter condition defined “Gender equal to male”, here multiple filter conditions can be defined and grouped.

- Below is how the query step looks within the workflow panel.
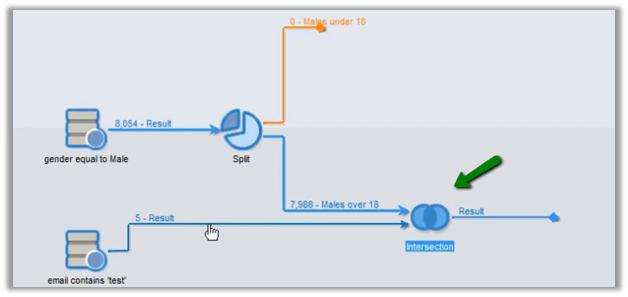
- The split step can be used to further divide the list. Say e.g. we want to split males base list into above 18 and below 18 years of age.


- Union step can be used to combine the result of multiple queries.

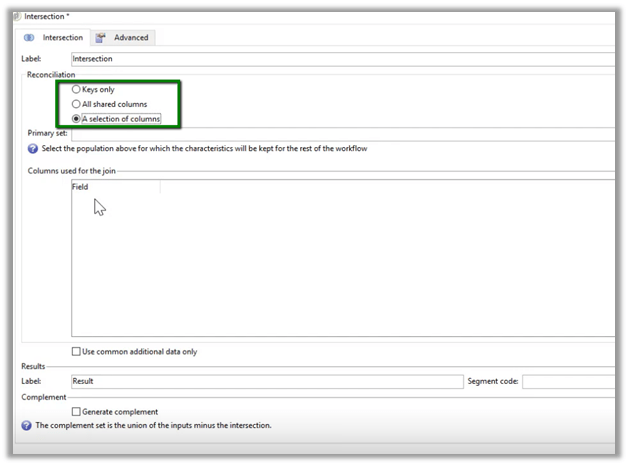
- With the intersection step, we can define reconciliation criteria either based on the key, shared columns, or specific columns.
- With the exclusion step, we can define what records to be removed from the primary set.


- Deduplication step as the name suggests, can be used to remove duplicate records based on criteria defined.


Here we looked into some of the basics of Adobe Campaign with regards to Plan, Program, and Campaign and how the targeting works.
Next, I’d learn about the delivery aspect and how to run the campaign and share my notes on the same.
Hope it helps..