Azure Data lake store gen 2 can be described as a large repository of data, structured or unstructured built on top of Azure Blob storage, that is secure (encryption – data at rest), manageable, scalable, cost-effective, easy to integrate with.
Also check out – setup Azure Synapse with Dataverse – https://nishantrana.me/2021/06/16/how-to-setup-azure-synapse-link-microsoft-dataverse/
- Export to Data Lake allows for continuous replication of CDS entities to Data Lake Storage Gen2, which involves initial write followed by incremental writes, which can be consumed by Power BI, Azure Data Factory, Azure Data Bricks, and Azure Machine Learning.
- Replication of standard and custom entities having change tracking enabled and create, update, and delete operations.
- Any changes in data and metadata are pushed automatically without the need of setting any refresh intervals.
Let us first create a general-purpose V2 storage account to access all of the Azure storage services like blobs, files, etc.
The storage account must be in the same Azure AD tenant.
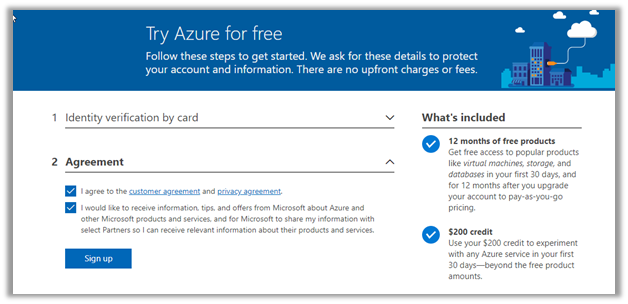
Login to Azure Portal (with admin account)
https://portal.azure.com/
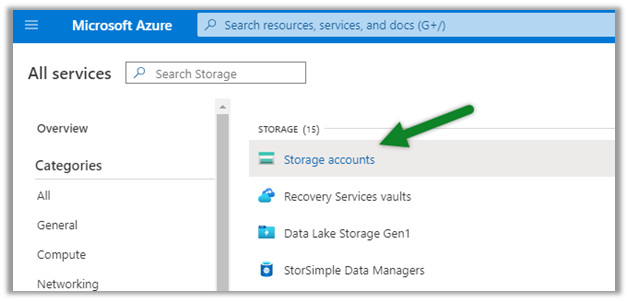
Search for Storage Accounts.
Here we have used a trial to create the storage account.
Leave the Account kind, Replication, and Blog Access as the default values while creating the storage account.
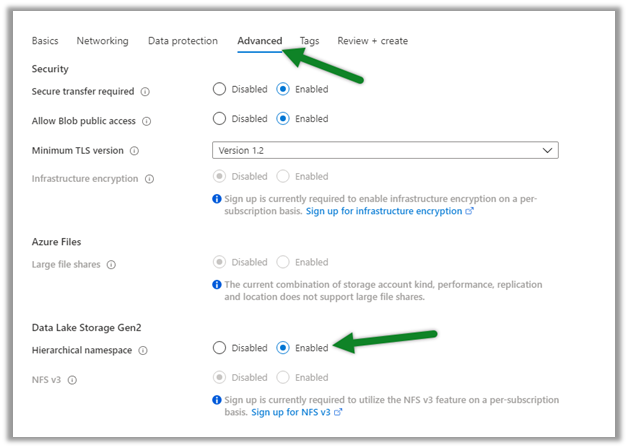
Before selecting Review + Create, navigate to the Advanced tab and enable the Hierarchical Namespace.

After validation is done and is successful, click on Create to create the storage account.

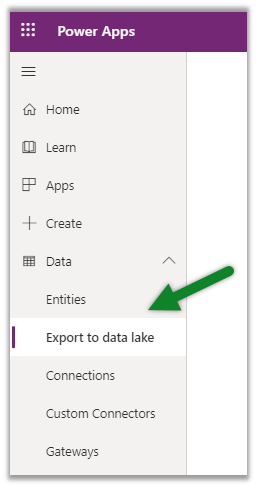
With the storage account created successfully, navigate to PowerApps select the option Export to data lake.
Select New link to data lake

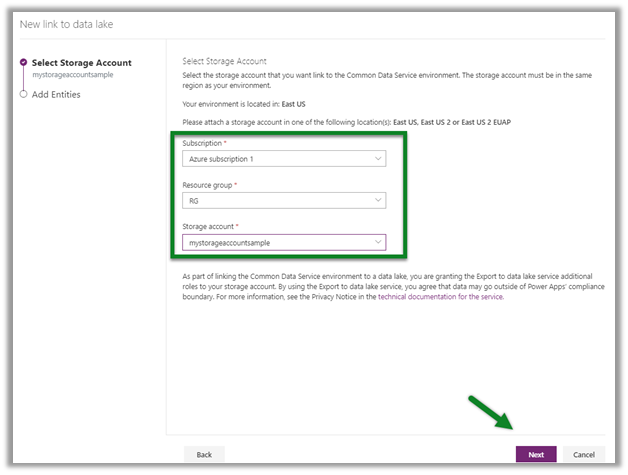
Specify the storage account created earlier.
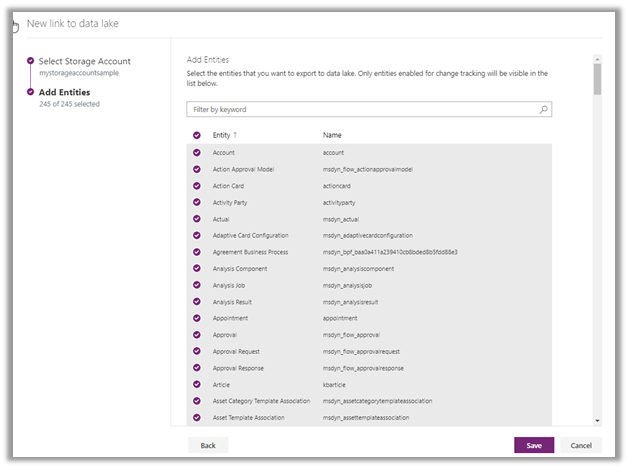
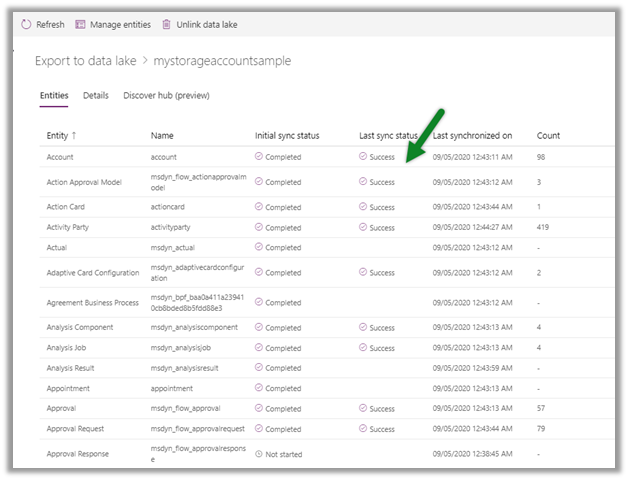
Select the entities to be exported to the data lake. Enable change tracking for the entities, as only these entities will be exported.
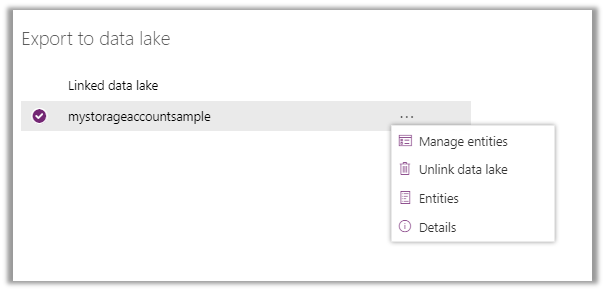
Clicking on save will link the CDS environment with Azure data lake storage.
It will create the file system in the Azure storage account having a folder for each entity selected.
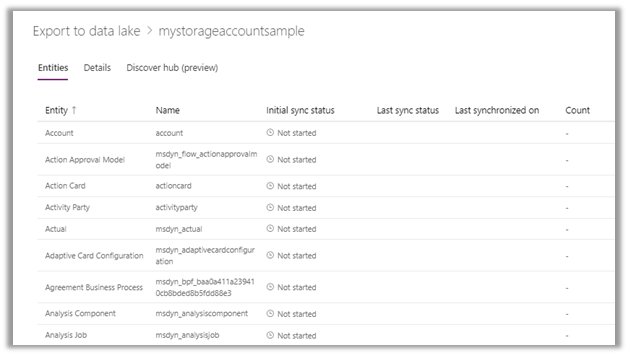
and will start the initial sync.
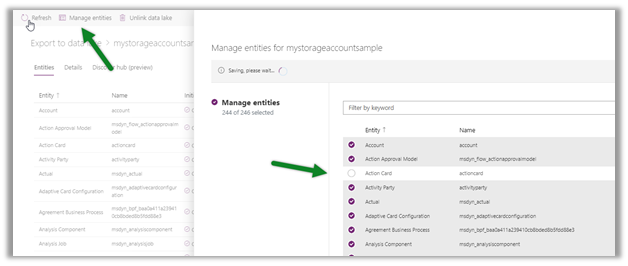
we can use the Manage entities option for adding or removing the linked entities.
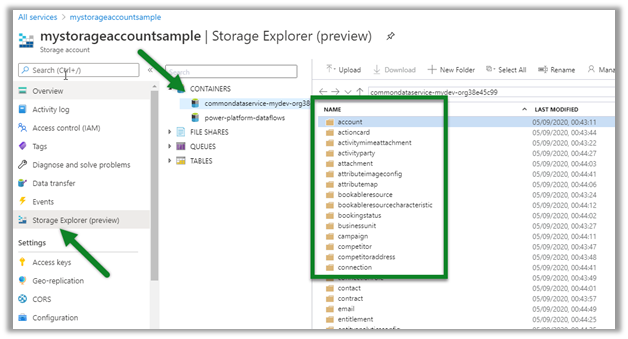
Inside Azure Portal, we can navigate to the storage account and select the Storage Explorer.
Expand commondataservice-environmentName-org-Id
container to view the details.
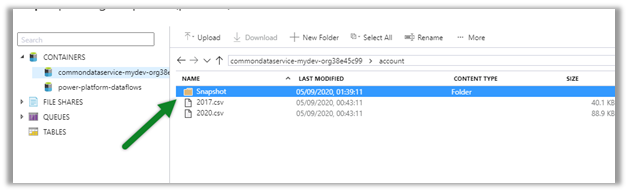
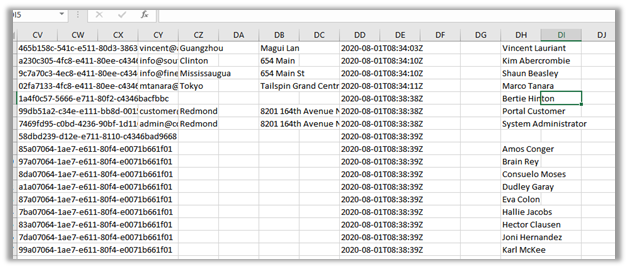
The CSV file will contain the data
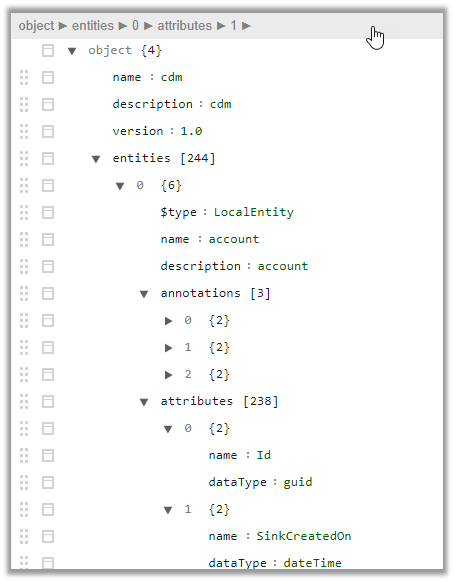
Here Model.json is the metadata file in the CDM folder
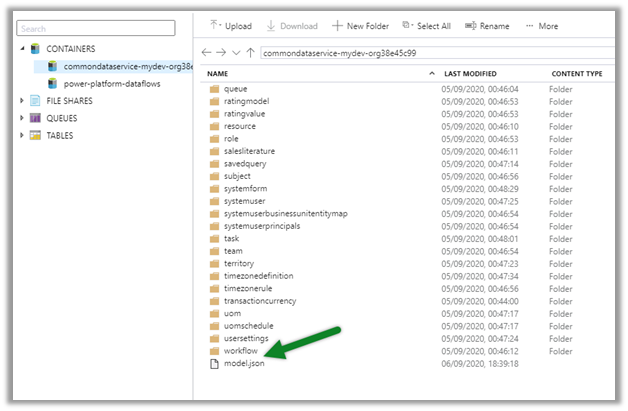
that describes the data in the folders, metadata, and location.
More details-
https://www.bluegranite.com/blog/10-things-to-know-about-azure-data-lake-storage-gen2
Posts on Azure Data Lake
Hope it helps.