Dynamics 365 Funda by Zohaib Uddin Khan
Author By: Zohaib Uddin Khan
Scenario:
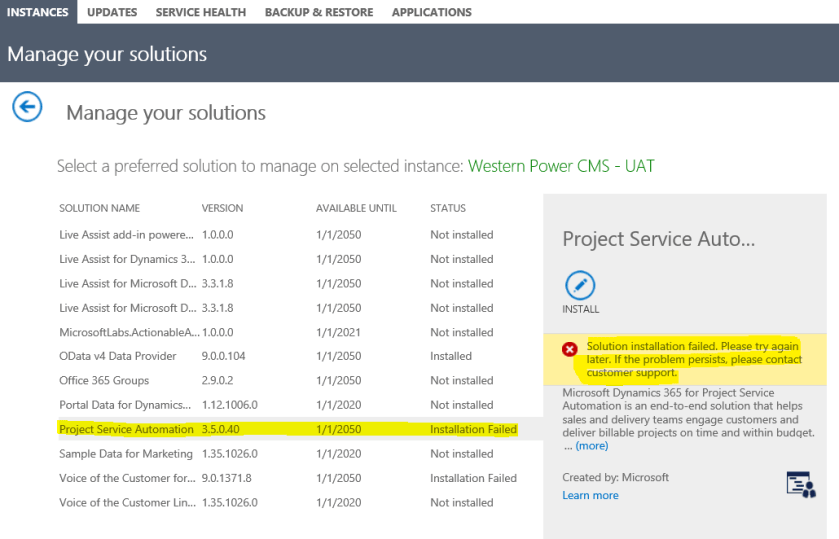
Let suppose you’re trying to install a managed solution (such as Project Services Automation, Field Services, Portal, etc.) through Admin Center and you’re facing ‘Solution Installation Failed‘.
Since, Admin Center don’t provide any reason for failure, apart from retry or contact the support which are not very productive.
Solution:
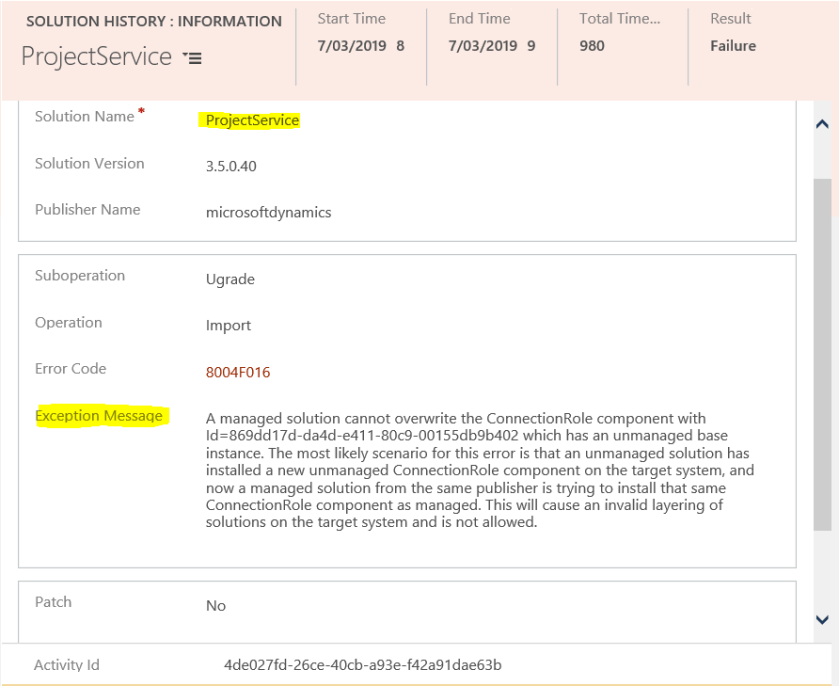
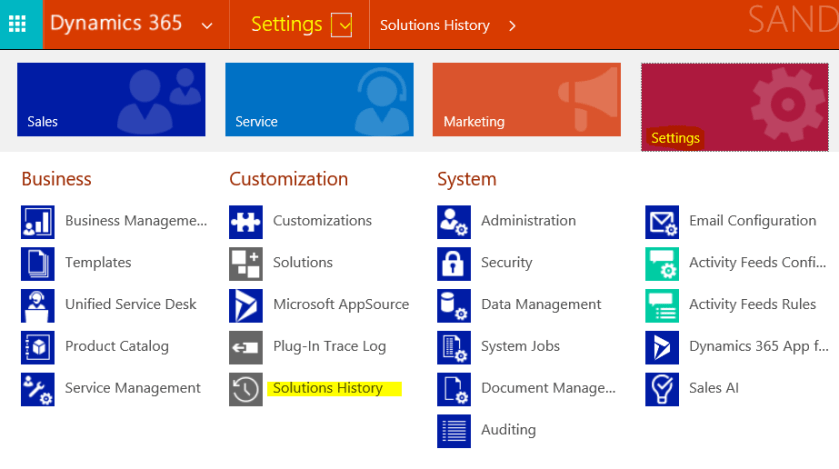
Go to Dynamics 365 Org – Settings – Customization – Solution History
Open the latest or related solution from ‘Internal Solution History’ view. And, reason for the failure of the solution is available under Exception Message. 🙂