Check the other articles of this series
In the previous post we covered the captureImagemethod of Xrm.Device for taking picture and attaching it to notes.
In this post, we’d look into the pickFile method of Xrm.Device
pickFile works for both Web Client and Mobile Client unlike captureImage which is only works for Mobile Client (Dynamics 365 for Phone and Tablet app)
pickFile method of Xrm.Device allows us to select files from the computer (web client) (through FileDialog box) and images (gallery) in the case of mobile clients. (the exception being Windows Tablet App), which then can be attached to notes.
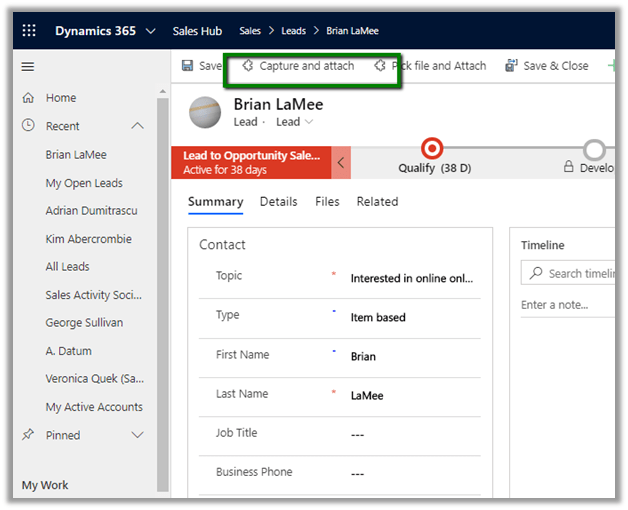
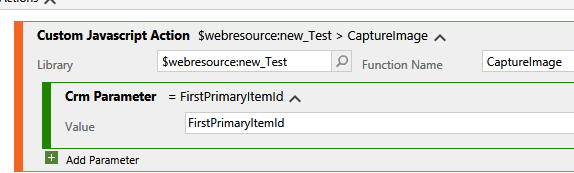
Here we have added a custom ribbon button named “Pick file and attach” on the Lead entity form.
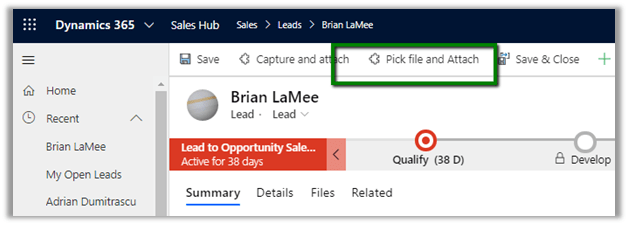
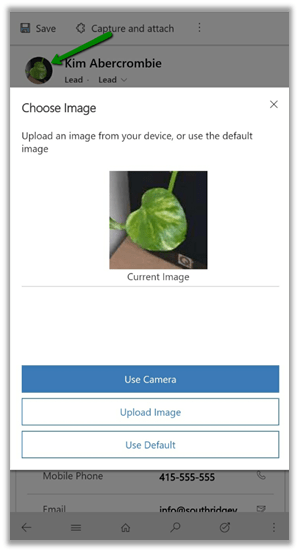
In the case of Web Client, the File dialog box opens
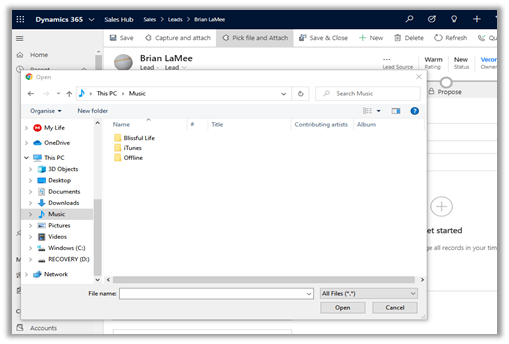
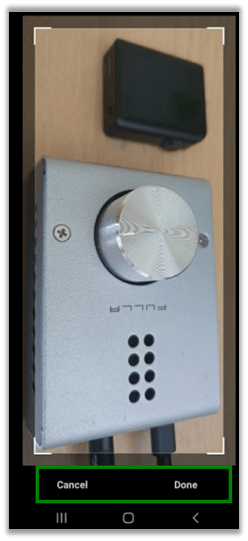
In the case of Windows Tablet App also, the file dialog box opens.

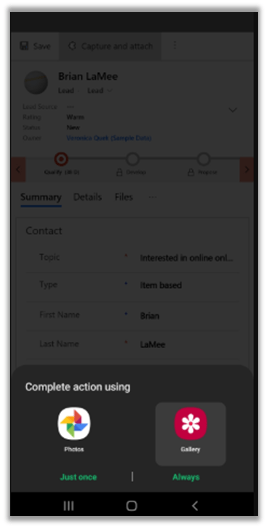
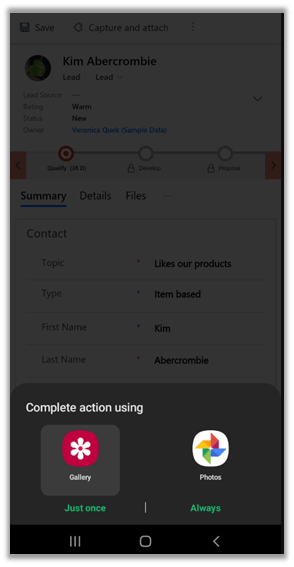
For Phone App for Android (and iOS), users can select the existing image from the gallery.
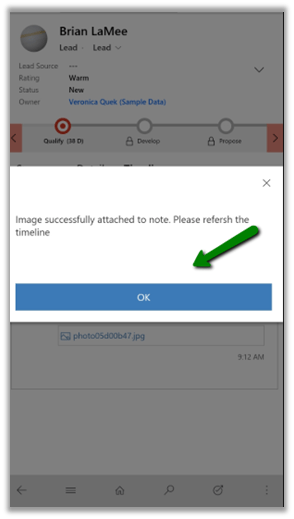
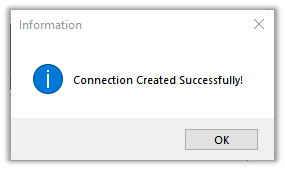
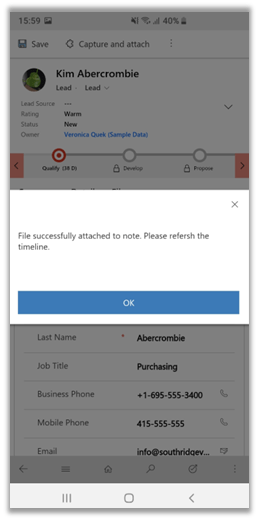
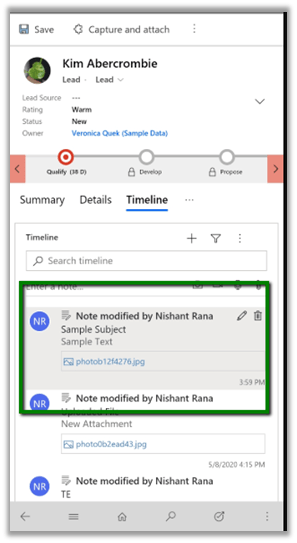
On successful attachment of file/image to notes, the user is presented with the below message.

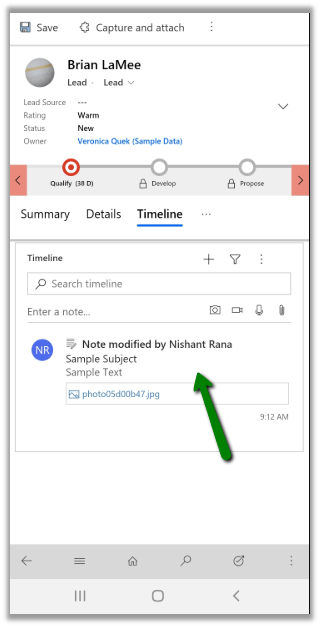
Users can refresh the timeline to see the attached file.
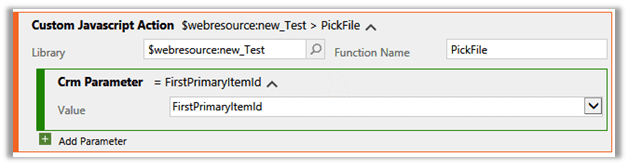
The sample code using the pickFile method
function PickFile(entityId) {

entityId = entityId.replace(/[{}]/g,'');
Xrm.Device.pickFile().then(

function (data) {

// attach the uploaded file as attachment to note
var entity = {};
entity.subject = "Sample Subject";
entity.documentbody = data[0].fileContent;
entity.filename = data[0].fileName;
entity.mimetype = data[0].mimeType;
entity.notetext = "Sample Text";

// lead entity sample
entity["objectid_lead@odata.bind"] = "/leads(" + entityId + ")";

Xrm.WebApi.online.createRecord("annotation", entity).then(
function success(result) {
var newEntityId = result.id;

var alertStrings = { confirmButtonLabel: "OK", text: "File successfully attached to note. Please refersh the timeline." };
var alertOptions = { height: 200, width: 300 };
Xrm.Navigation.openAlertDialog(alertStrings, alertOptions);

},
function (error) {
Xrm.Utility.alertDialog("Error occured while attaching file to notes. Please try again");
}
);

},
function (error) {
Xrm.Utility.alertDialog("Error occured while picking file. Please try again");
}
);
}
Add the Crm Parameter to pass the GUID of the record to the method.
Thus, using pickFile makes it easy for the end-user to capture and attach the file to notes through a click of a button.
Also check out the wonderful tool Notes Metadata Manager , which provides additional capabilities like adding metadata to the attachments, organise attachments using folder structure, drag and drop attachments, upload multiple attachments etc.
Hope it helps..