In the previous posts, we covered the Overview and Key Features of Kupp Code Analytics, the installation and setup process of the extension, its Intellisense capabilities, and the analytics capabilities.
In this blog post, we will cover deploying Web Resources and Plugin directly from Visual Studio using the Kupp Code Analytics extension, which makes the process more efficient and less error-prone compared to doing it manually.
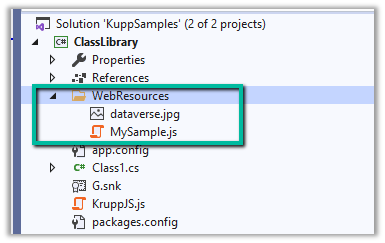
Suppose we have the following JavaScript and Image file that we want to deploy to our Dataverse / Dynamics 365.
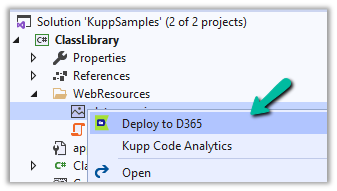
We can right-click the file and select the option “Deploy to D365“
In the Output window, we can see both the Web Resources created.

Now let us make changes to our JavaScript file – MySample.cs and click on Deploy to D365.
This time in the output window we can see the file getting updated instead of getting created.

We can see the Web Resources files created and updated for the connected environment inside the Maker Portal.

Similarly, we can deploy or update our Plugins from within Visual Studio. Here we need to make sure our Plugin Assembly is already registered.
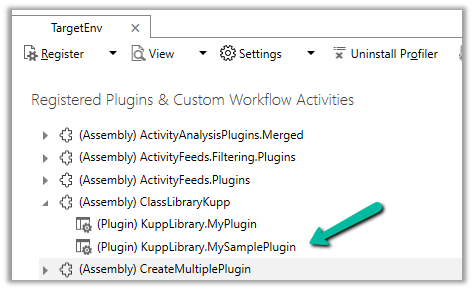
Below we have the following assembly already registered.

Let us update our Plugin Class and select the “Deploy to D365” option for the plugin project. We have added a new plugin class called MySamplePlugin.

As expected we can see our plugin updated from the Output window.

From Plugin Registration Tool we can see our plugin assembly updated.
Hope it helps..


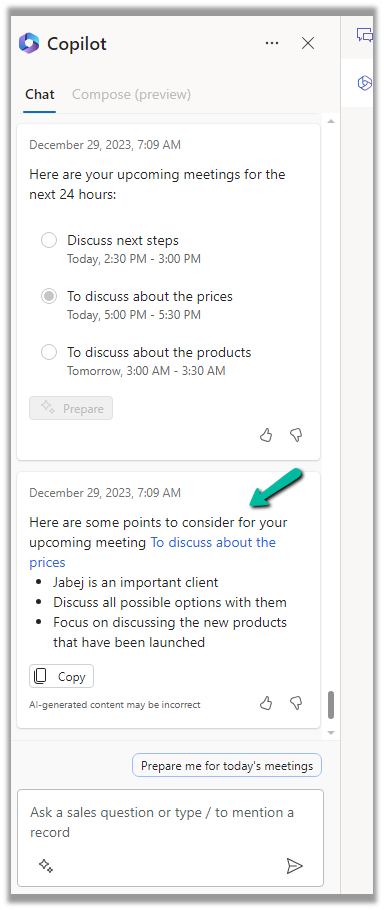
 or select the Sparke Icon and select “Prepare for upcoming meetings“