
Custom API (preview) allows us to define our custom messages that can be called from web services, similar to Custom Actions. Usually, we would be creating custom workflow actions just to create a new message, to which we can hook our plugin, without defining any logic in the workflow. For this scenario or pattern now we can use Custom API instead.
There are different ways of creating a custom API.
- Through the Maker Portal.
- Using Web API or Organization Service.
- Editing the solution files.
The 3 key entities involved here are
- CustomAPI
- CustomAPIRequestParameter
- CustomAPIResponseProperty
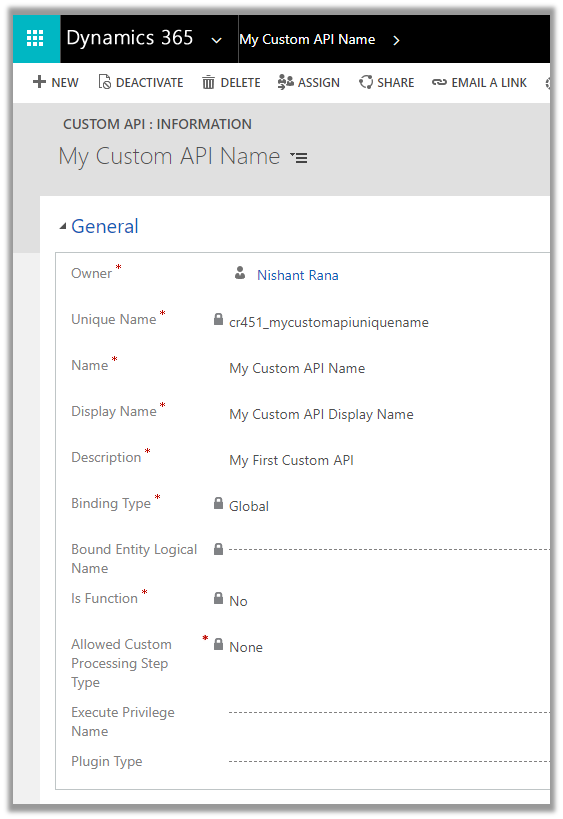
Let us try creating a CustomAPI through the maker portal.
Create a new solution, and click on New and select Custom API

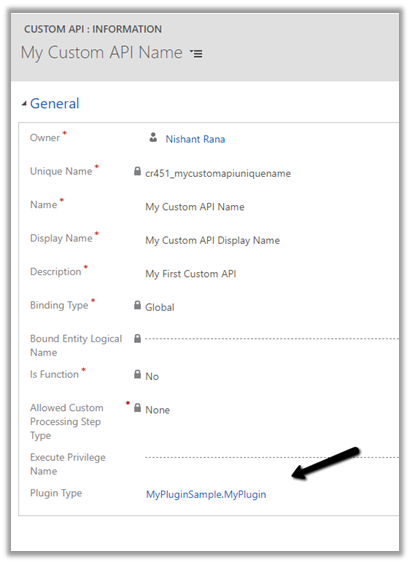
Let us start with a very basic custom action.
|
Unique Name |
This will be the name of the message. Should have the prefix same as solution’s publisher. |
|
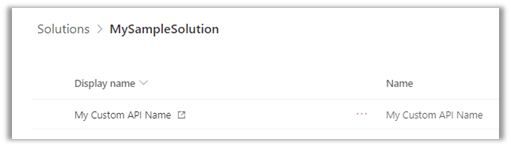
Name |
The name of the Custom API will show up inside the solution
|
|
Display Name |
Localized display name of the Custom API |
|
Description |
Localized description of the Custom API |
|
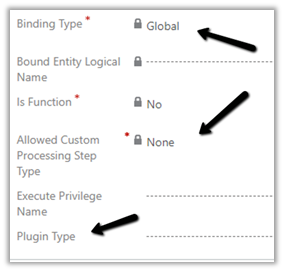
Binding Type |
|
|
Bound Entity Logical Name |
Logical name of the entity in case of binding type – Entity and EntityCollection. |
|
Is Function |
|
|
Allowed Custom Processing Step Type |
|
|
Execute Privilege Name |
|
|
Plugin Type |
Reference of the plugin registered for the Custom API |
So right now we have a very basic custom API registered of Global type, which doesn’t allow any steps to be registered and doesn’t need any privileges to execute
Let us write a sample plugin and associate with this new message.
Let us register the assembly
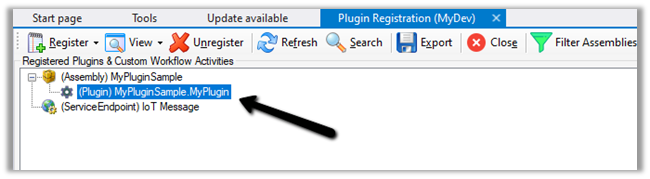
Now let us go back to our Custom API record and associate the Plugin registered.

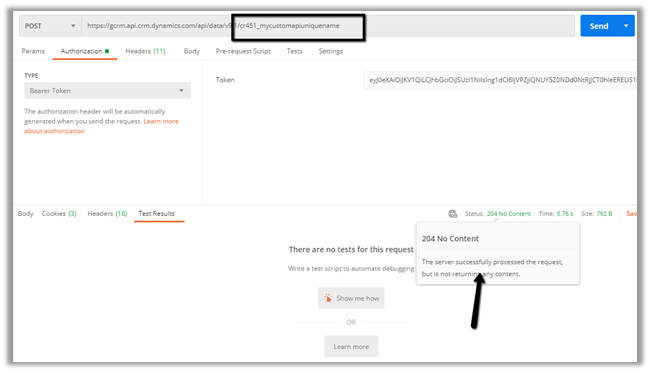
Let us trigger the plugin by calling the Custom API through the Postman.
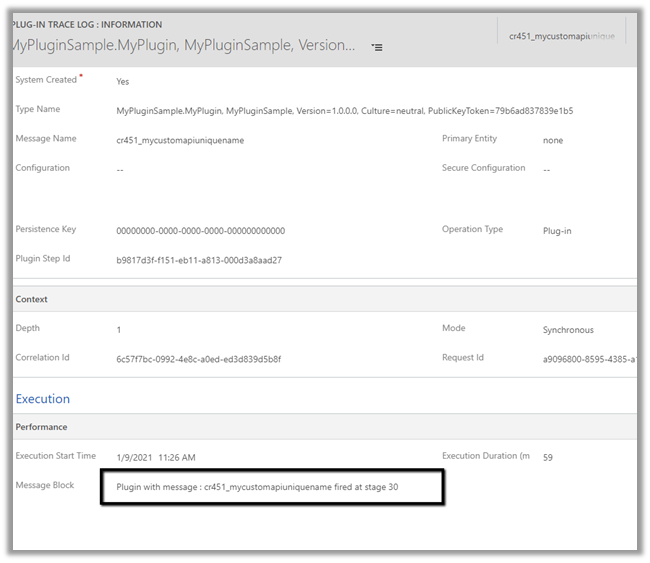
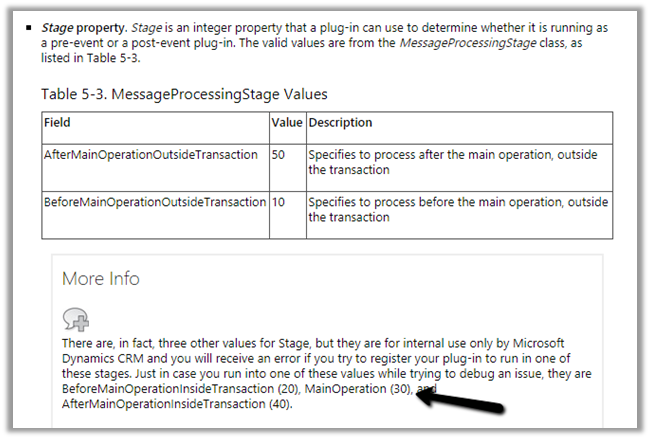
Let us check the plugin trace log inside Dynamics 365 App.
Get all details here
https://docs.microsoft.com/en-us/powerapps/developer/data-platform/custom-actions
Hope it helps..
Blog posts on 2021 Release Wave 1 – Dynamics 365
RECENT POSTS –
Why SQL4CDS Record Counts May Not Match Advanced Find for Date Filters (Dataverse / Dynamics 365)
While validating some Dynamics 365 Field Service data recently, we came across an interesting scenario where SQL4CDS and Advanced Find returned different record counts even though the date filters appeared to be identical. At…
How We Successfully Removed the Resco Woodford Managed Solution from Dynamics 365 Field Service
Recently, we needed to remove the legacy Resco MobileCRM (Woodford) managed solution from a Dynamics 365 Field Service environment. Although the uninstall initially appeared straightforward, when we attempted to uninstall the Woodford solution, Dynamics…
Unable to Delete Work Order Due to “The Time To Promised Must Be Later Than The Time From Promised” exception – Dynamics 365 Field Service
While attempting to delete a historical Dynamics 365 Field Service Work Order, we encountered the following error: Exception Message: The time to promised must be later than the time from promised. ErrorCode: -2147220891 HexErrorCode:…
Open a Power Automate Flow for Edit Without Fixing Broken Connections First
While reviewing Power Automate flows recently, we ran into an issue where we could not open a flow in edit mode When opening the flow, Power Automate displayed the “This flow will connect to”…
Dataverse Web API: Returning Record Data During Create Using Prefer: return=representation
When creating records using the Dataverse Web API, the default behavior is to return a successful response without including the record data in the response body. A standard create request does provide access to…
Testing the New RunJobForSandbox Option in Bulk Delete Jobs (Preview) – Dataverse / Dynamics 365
“Edit – 25 – June – 2026 – This only applies to sandbox environments not production. Can see Microsoft updating the details. Details ” Microsoft recently introduced a preview feature for Dataverse Bulk Delete…
Using RetrieveDependenciesForDeleteRequest to find and delete hidden dependencies (Dataverse/ Dynamics 365)
Please refer to the post below, which provides a clear explanation of how RetrieveDependenciesForDeleteRequest works and how it can be used to identify dependencies.
Troubleshooting Hidden Dependency Errors in Dynamics 365 and Dataverse
Recently, while cleaning up some old customizations in Dynamics 365, we came across an interesting dependency issue that was not immediately obvious from the user interface. What initially looked like a simple Business Process…
Capture UTM Parameters in Dynamics 365 Marketing Forms Using JavaScript (Dynamics 365 Customer Insights)
When running marketing campaigns, UTM parameters help us understand where our leads are coming from. They help us track whether a lead came from Google Ads, Facebook campaigns, email campaigns, or some other source.…
Hidden Required Fields Causing “Please ensure all required fields are filled out” Error While Disqualifying a Lead in Dynamics 365 / Dataverse
While working on a Lead Disqualification scenario in Dynamics 365, we ran into a strange issue. When trying to Disqualify a Lead, Dynamics 365 was showing the generic error message: “Please ensure all required…
Something went wrong. Please refresh the page and/or try again.
Discover more from Nishant Rana's Weblog
Subscribe to get the latest posts sent to your email.


11 thoughts on “How to – Use Custom API to create custom messages in Dynamics 365”