Update – use context instead of Xrm.Page
Also,
https://nishantrana.me/2020/01/20/best-resources-to-start-with-power-apps-code-component-pcf/
Go through below articles to get a better understanding
- https://debajmecrm.com/2019/04/26/in-depth-end-end-walkthrough-develop-your-custom-controls-using-power-apps-component-framework-and-use-it-on-your-crm-interface/
- https://danishnaglekar.wordpress.com/2019/05/18/create-custom-controls-using-powerapp-component-framework/
- https://docs.microsoft.com/en-us/powerapps/developer/component-framework/overview
Below is the quick step by step guide to get started (sort of Hello World example)
- Install NPM (that comes with Node.js)
- Install Visual Studio 2017 or later or Download .NET Core 2.2 along with Visual Studio Code.
-
Create the new folder for the project, and in Developer Command Prompt for VS 2017 navigate to the folder and run the below command to create a new component project
pac pcf init
– -namespace <namespace for the component>
– -name <name of the component>
– -template <component type>

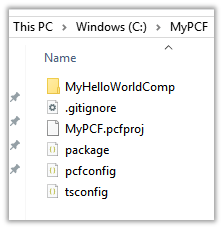
It adds the following files in the folder.
- Next run npm install command to install the project dependencies.

- Open the ControlManifest.Input.xml file created inside the folder created with the control’s name.

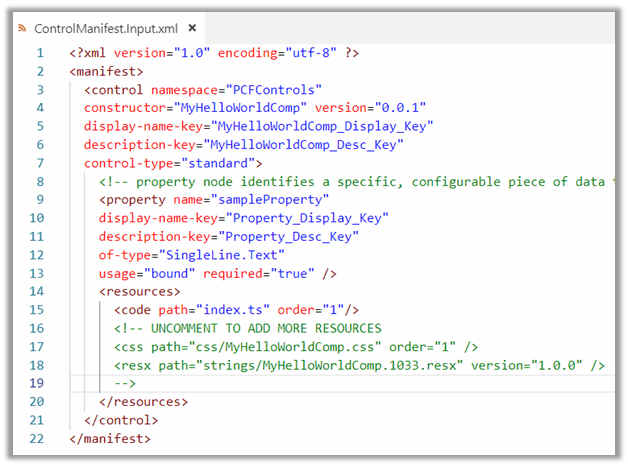
- Here we have opened it in Visual Studio Code, for this simple example purpose let us not change the default values.
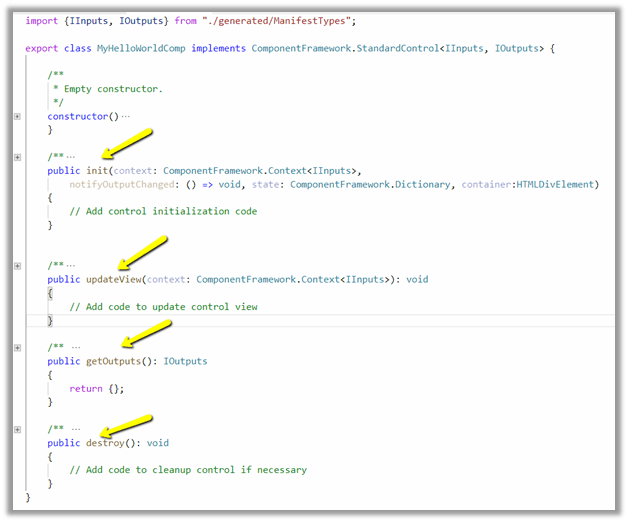
- Open the index.ts which wherein we’d be writing code for our custom control
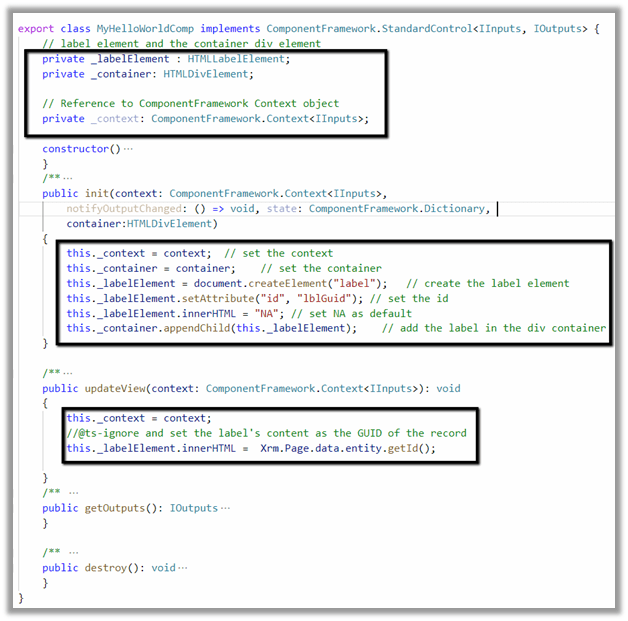
- Add the following line of code to add a label control that will display that GUID of the record.
- Run npm run build command to build the control

- To test the control run npm start command
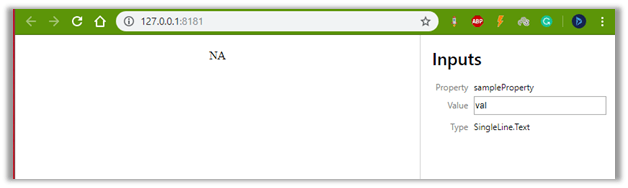
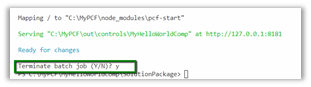
*Use ctrl + c è to terminate the job.
- Create a new folder to hold the solution

- Run the below command to define the publisher name and prefix and initialize the solution files creation
pac solution init – -publisherName [publisher name] – -customizationPrefix [publisher prefix]


- Run the below command to add reference to our custom control in the solution
pac solution add-reference – -path [path to pcfproj file]
i.e. reference of the below path.


- This creates the file with extension cdsproj
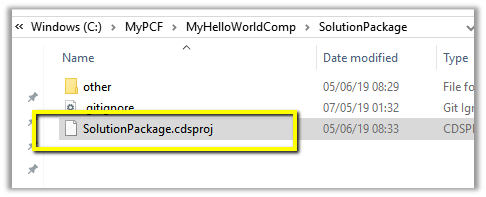
-
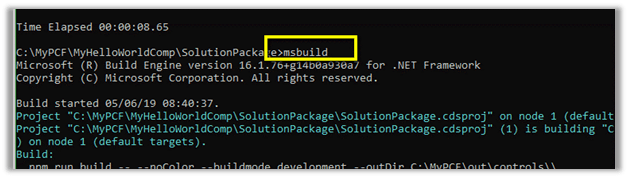
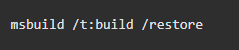
To generate Zip File run the below command in the Developer Command Prompt for Visual Studio 2017
- MSBUILD /t:restore
- MSBUILD
- MSBUILD /t:restore

- This adds the Solution zip in the bin Debug folder.

- To get both managed and unmanaged solution, update the cdsproj file

- We can see both managed and unmanaged solution created.

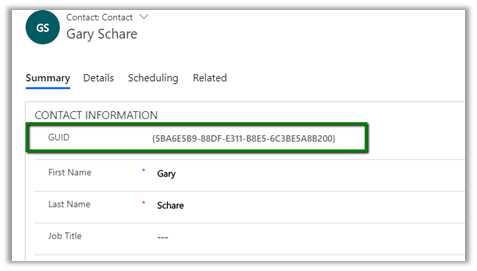
- Import the solution in Dynamics 365 CE and open any of the entity’s form. Here we have created a new text field named GUID in the Contact form and have set our custom control for that field.
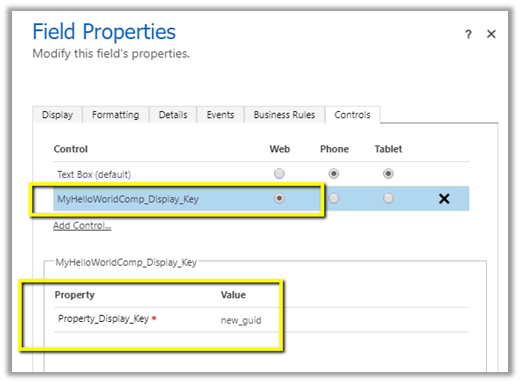
For reference à

- After publishing the changes, we can see the GUID being displayed in the form.
- To update the control, change the version for it in the ControlManifest.Input.xml

Followed by
- npm run build
- msbuild
- Importing the new solution file generated
In a nutshell below are the high-level steps à
1. Install npm
2. Install PowerApps CLI
3. Install Visual Studio 2017 or later
4. Create a new folder for the project.
5. Navigate to the folder in Developer Command Prompt and run the following command to create the component project
pac pcf init –namespace <component namespace> –name <component name> –template <component type>

6. Install the project dependencies using below command
npm -install
7. Update ControlManifest.Input.xml
8. Update index.ts
9. Build the project
npm run build
10. Use the below command to test the component
npm start
11. Create a folder for holding the solution zip and related files. Navigate to that folder and run the below command.
pac solution init – -publisherName [publisher name] – -customizationPrefix [publisher prefix]

12. Add reference of the custom component in the solution
pac solution add-reference – -path [path to pcfproj file]

13. To create the Solution Zip File
MSBUILD /t:restore
MSBUILD
14. Import the solution file and use it inside Dynamics 365 CE.
lastly – Don’t forget to check the wonderful PCF Gallery
https://pcf.gallery/
Hope it helps..
Discover more from Nishant Rana's Weblog
Subscribe to get the latest posts sent to your email.


Hi Nishant,
Awesome blog article. A quick question. I’ve taken an existing github repository files for multi-tagging which only had the manifest, css and index typescript files. I then followed your steps and created a proj file and did the npm install. I then updated the manifest and index with the code I got and then built it.
It was when I went to build the solution in the SolutionPackage folder with:
pac solution init – -publisherName [publisher name] – -customizationPrefix [publisher prefix]
That I got this error:
Error: A required argument –publisher-name is missing.
Not sure what I’m doing wrong here. Any help would be greatly appreciated.
LikeLiked by 1 person
Hi Michael,
Check this meanwhile
https://docs.microsoft.com/en-us/powerapps/developer/component-framework/import-custom-controls
may be command has changed to
pac solution init –publisher-name –publisher-prefix
Regards,
Nishant Rana
LikeLike
Thanks Nishant,
I resolved this by using the their alias
–publisherName is:
–pn
–customizationPrefix is:
–pp
Thanks for all your help!
LikeLike
Awesome 👍
LikeLike
HI Michael, it will give error if reserved words are used as publisherName and customizationPrefix. The fullname in the command will also work.
LikeLike
publisherName and customizationPrefix are no longer used in the latest version of the PCF CLI. It’s now publisher-name and publisher-prefix
LikeLike
Hi Michael, you need to give publisher name and prefix name- refer to my video for complete developing
LikeLike
Hi Nishant,
Thanks for wonderful article. I have followed all the steps till the end and when I deployed my control it is not working. Do we have steps to troubleshoot the control somehow . Please suggest.
Thanks
LikeLike
Hi Nishant – great work again, gave me the inspiration I needed.
I have a Control working based on these suggestions.
But when I am referencing the Xrm.* interface as you did to get data from the form the reference is not available to me. What am I doing wrong?
Thank you again!
LikeLike
I had the same issue with referencing Xrm. You have to have a commented //@ts-ignore in order to ignore the issue with XRM. I thought the comment wasn’t necessary as well but I put the comment in out of desperation and it worked. Did some research and a commented out @ts-ignore actually performs a use.
LikeLike
Use context instead of Xrm.Page https://nishantrana.me/2019/10/22/using-pcf-custom-control-builder-xrmtoolbox-plugin-to-update-existing-control-in-dynamics-365-powerapps/
LikeLike
I am new to PCF controls and struggled to lot to create a first PCF application, Finally I followed the steps available here, Thank Nishant it works fine for me. I got confident both creating and importing the PCF into D365. Love it..
LikeLike
Hi Nishant, thank you so much for your instructions on creating a PCF control. I was following Microsoft’s docs on creating a PCF control and those instructions needed some updating. So I’m glad I found your instructions.
Will you create instructions on using the PCF gallery? Thanks!
LikeLike