Using the Content Access Level for KB Articles in Customer Self-Service Portal


Suppose we have already configured Portal, created contacts and associated KB article to the Portal.

Now the scenario we want to implement is we want a particular user to have access to all the KB article and another user to only specific KB Articles.

For this, we will make use of Content Access Level concept of the portals.

Content access level can be assigned to KB Article and can also be assigned to the Contact Users.

There are 3 content access levels OOB, we can also create our own content access levels.

We have 2 users in our portal, one user we have assigned Default content access level and to another user, we have assigned Premium Users content access level.

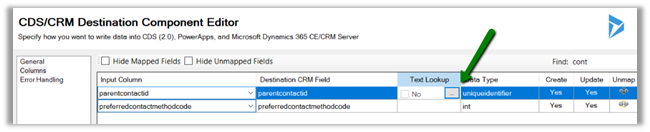
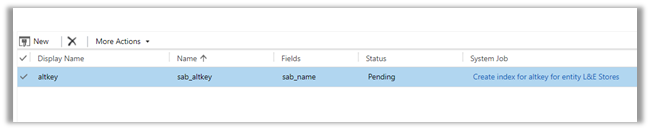
Now let us associate content access level to the KB Article.

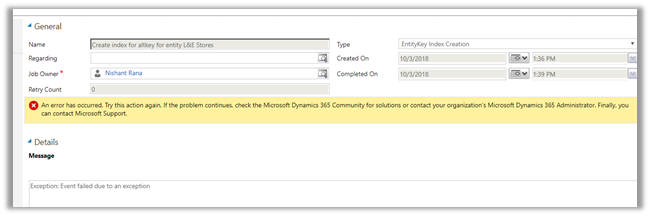
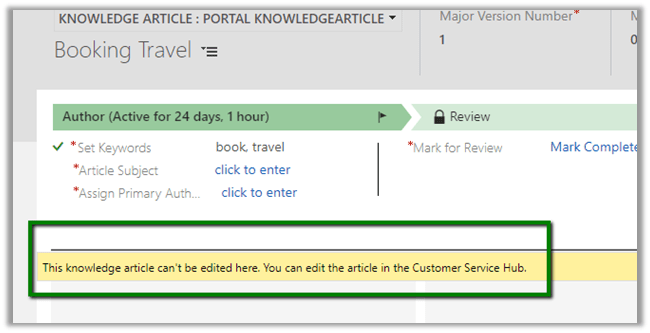
If we try to edit the KB Article in the Web, we will be presented with the following information

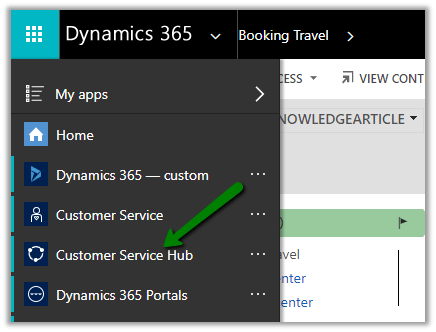
Let us open the Customer Service Hub

The other challenge we will face here is the default and the only form being displayed inside the Customer Service Hub for the KB Article doesn’t include the section or sub-grid for Content Access Level.

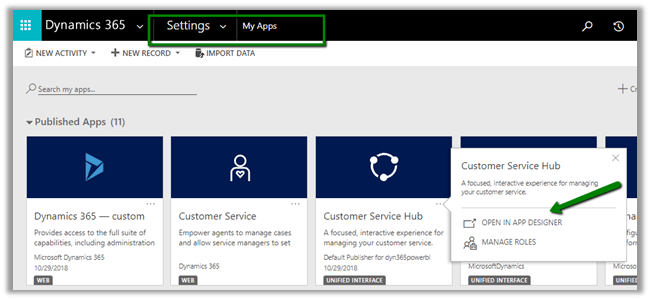
To add the Portal Interactive Experience Form, open the Customer Service Hub app in app designer (Settings à My Apps) and add the form, followed by Publish.

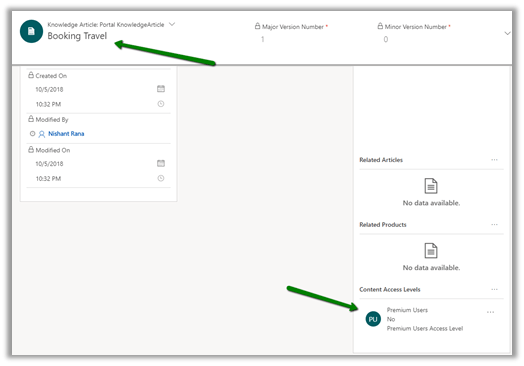
Now let us update our KB Article and associate content access levels.

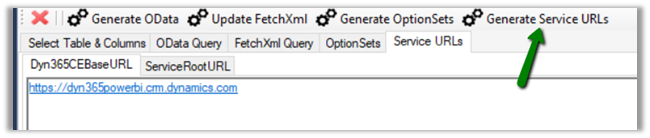
Now the most important step, enabling the Content Access Levels for the website.

Navigate to Portals à Site Settings and set Value field as True.

With all the required configuration done, let us search for the keyword booking in the portal for both the users.

  • User 1 (on the left)à Default Users CAL and User 2 à Premium Users CAL
  • Booking Travel KB Article à Premium Users CAL.

The article is accessible only to User 2.

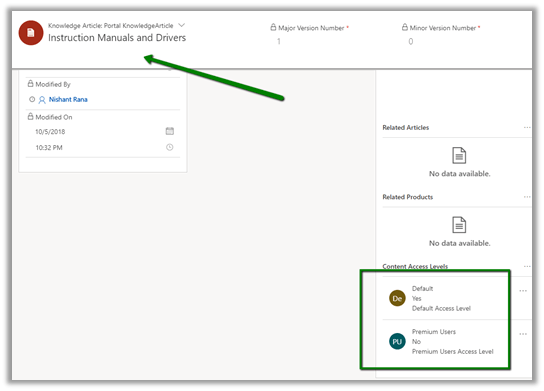
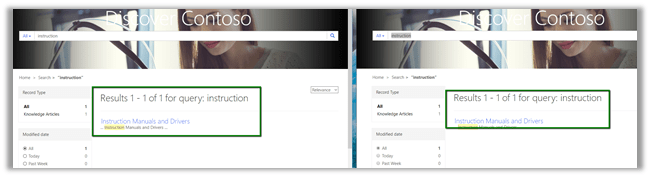
Now search for Instruction Manuals and Drivers KB Article which has both Default and Premium Users CAL.

As expected the article is accessible to both the users

More articles on Portals

https://nishantrana.me/2017/03/07/portal-blog-post-list/

Hope it helps..

Audit Information not getting retrieved using SSIS/KingswaySoft Adapter


Update – 29 Oct 2018 –-> We are getting the same issue in one of the entities and it has audit enabled. We have a raised a support ticket for it. Will update the post with the solution.

A few days back I wrote about how we can use CDS/CRM Source component of KingswaysSoft Adapter to get the audit information.

https://nishantrana.me/2018/10/08/using-kingswaysofts-cds-crm-source-component-to-get-audit-information-in-dynamics-365-ce-ssis/

Recently while writing a package for getting audit details against one of the entities, we realized that the records were not getting retrieved and also, we were not getting any error or exception. The package kept on running.

Setting timeout in the CRM Connection Manager also didn’t stop the package, it kept running without retrieving the records.

After spending a good amount of time, we realized the silly mistake that we had made. We were running the package against the entity for which Audit was not enabled.

Thanks to KingswaySoft Support team for their relentless support.

Ideally, we should have been more careful before running the package against that entity, and also it will be helpful if the tool can also check if the audit is enabled for an entity before beggning the execution and if the audit is not enabled inform back the user or at least return 0 rows and complete its execution successfully.

Hope it helps..

How to – Use OverriddenCreatedOn or Record Created On field to update Created On field in Dynamics 365


While working in data migration project, when creating records in the target system, we would want the “created on” field to hold the original value instead of it being set to the actual value when it was created in the target system, which is set by the system or the platform itself.

Suppose we are having the “created on” field in our source SQL Server Table and we are creating the lead records in our target Dynamics 365 organization using KingswaySoft’s CRM Destination Component.

Here we have mapped the CreatedDate of our source table to overrriddecnreatedon field of Lead entity.

On executing the package, back inside Dynamics 365, we can see the following values for Created On and Record Created On (overrriddecnreatedon) field for the lead records.

Record created on will have the time when the record was created in Dynamics 365 and Created On field will have the values that we passed from our source SQL Table.

Get all the details here

https://blogs.msdn.microsoft.com/emeadcrmsupport/2012/08/01/the-truth-about-override-created-on-or-created-by-for-records-during-data-import/

Hope it helps..

Advertisements

Using Alternate Key to set Lookup in SSIS (KingswaySoft)


Alternate Keys which were introduced with CRM 2015 Update 1, gave us the ability to Upsert and Update records, by defining one or more fields as Alternate Key and use that field(s) instead of relying only on Primary Key.

Alternate Keys can also be used for setting or updating the lookup instead of GUID.

CDS\CRM Destination Component in KingswaySoft SSIS Integration Toolkit allows us the option of specifying the Alternate Key for updating the lookup field.

Suppose we have Contact entity with following Alternate Key defined in it

  • Key1 on field last name
  • Key2 on 2 fields emailaddress1 and last name

Within the CDS/CRM Destination Component Editor for the lookup field, click on ellipsis for the Text Lookup column. Here we have selected parent contact field inside Lead Entity.

Inside Text Lookup Editor, select the option “Choose Target Field(s)”, in lookup method select Alternate Key and we will see both our alternate keys listed there.

  • Key1 on field lastname

  • Key 2 on emailaddress 1 and last name

One thing I have observed that it doesn’t list the alternate key if it is defined by using more than 2 fields. Looks like it is by design.

Hope it helps..

Solved – Alternate Key not getting created on solution import in Dynamics 365


Recently, we moved our Solution from Development to Test. Then on running one of the SSIS Packages we got the below error

The specified key attributes are not a defined key for the entity [4] CRM service call returned an error:

On opening the Entity for customization, and checking for the key, we saw that it was in the Status Pending.

On opening the system job, there was no detail for the error.

We normally get this error, if there are records already available that have duplicate values for that alternate key field. However, in this case, there we no record as this entity was being moved first time in the Test.

Well to just fix this we thought of manually reactivating the key

However, that threw a new error that “Reactivate entity key is only supported for failed job.”

To fix this go to Settings à System Jobs à search for the failed system job and delete them

Now we will see the status as Failed

This time it will allow running the reactivation.

Finally,

Hope it helps..

Advertisements

Creating Power BI Report using Power Query (M) Builder plugin of XrmToolBox


Power Query(M) Builder XrmToolBox Plugin developed by Ulrik Carlsson and Mohamed Rasheed makes it very easy to develop Power BI Reports targeting Dynamics 365 CE.

Just listing down the basic steps below for quick reference à

Install the Power Query (M) Builder plugin from XrmToolBox

Click on Load Entities and select the Entity against which we want to write the report. Here we will be writing a report against Case entity (for e.g. Cases by Origin), so let us select the Case entity. For selecting the fields either we can make use of view or search and add the corresponding fields in Selected Fields Section.

Here we have selected the following 3 fields

Click on Update FetchXML button.

This opens the FetchXML tab, where we can select the fields (note we have formatted value field added for Origin OptionSet field) and also select to add record URL or to use all the attributes of the entity.

Here we have selected all the fields and also checked the option “Add Record URL”.

Click on Generate FetchXML, to generate the query.

The generated main query

Now back in Power BI Desktop, open the query editor and create a new blank query with following name and value

Dyn365CEBaseURL https://[org].crm.dynamics.com i.e. URL of the CRM Organization.

We can use the Generate Service URLs button to get this URL from within the plugin.

Similarly create a new blank query as

Get the value from the ServiceRoolURL tab from within the plugin.

Create one more Blank Query and click on Advanced Editor and copy the main query generated earlier and paste it.

Click on Done.

We can see the result generated for us in the Query Editor window

Click on Close and Apply

Back in report editor select the fields or any other visualizations to create the report

To format the URL, select the Link field and go to Modelling tab and in Data Category select Web URL to enable the links.

Thus, we are done with our report. Next steps would be to publish them, add them in dashboard, Embed them within Dynamics CE, Refresh them etc..

Hope it helps..