When we automate emails in Dataverse using Power Automate, we deal with something called Activity Party. It manages the participants of an email—whether they are To, CC, BCC, or the Sender. Normally, we use the partyid field to point to a Dataverse record like a Contact, Lead, User, or Queue.
Every participant in an email is stored as a row in the Activity Party table.
Key fields include:
partyid → Reference to the actual record (Contact, Account, User, Queue, etc.)
participationtypemask → Role (1 = Sender, 2 = To, 3 = CC, 4 = BCC)
addressused → The raw email address used
Normally, if a Contact or User is referenced in partyid, Dataverse automatically pulls their primary email.
But there are situations where this is not enough. That’s where addressused becomes important.
Multiple Email Addresses on a Record – A Contact, Lead, or User might have more than one email (work, personal, secondary). By default, Dataverse always uses the primary email field. But if we need to send an email to a specific alternate address, we can set it directly in addressused.
Unresolved Recipients – There are times when we need to send an email to someone who doesn’t exist in Dataverse at all—for example, an external consultant, new partner, or temporary vendor.
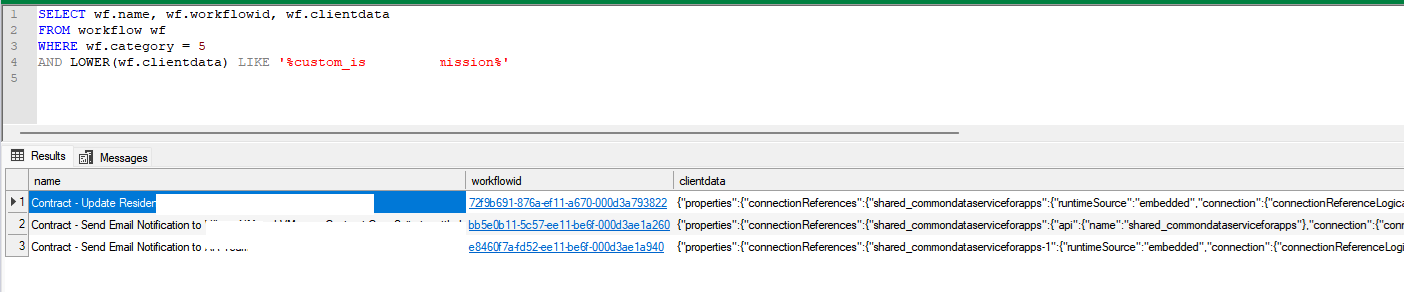
Recenlty we had to send email to particular email address not stored as actual record in CRM, below is how we specified the email address in the Add a new Row (Email) action of Power Automate.

"to": [
  { "partyid@odata.bind": "/contacts(11111111-2222-3333-4444-555555555555)" },
  { "addressused": "external.partner@example.com" }
],
"cc": [
  { "addressused": "manager@example.com" }
]
More on activity party
Hope it helps..