ARC and SLA Migration tool (Preview) in Dynamics 365 – 2020 Release Wave 2


With 2020 Release Wave 1, new experience was added for administrators which uses Power Automate for defining rules, conditions, and actions for SLA and Automatic create and update records rule.

https://nishantrana.me/2020/02/26/automatic-record-creation-and-update-rules-enhancements-in-dynamics-365-customer-service-2020-release-wave-1/

Now 2020 Release Wave 2 provides a tool to migrate the existing rules and SLA from classic app to the Customer Service Hub that uses Power Automate.

Other blog posts on 2020 Release Wave 2

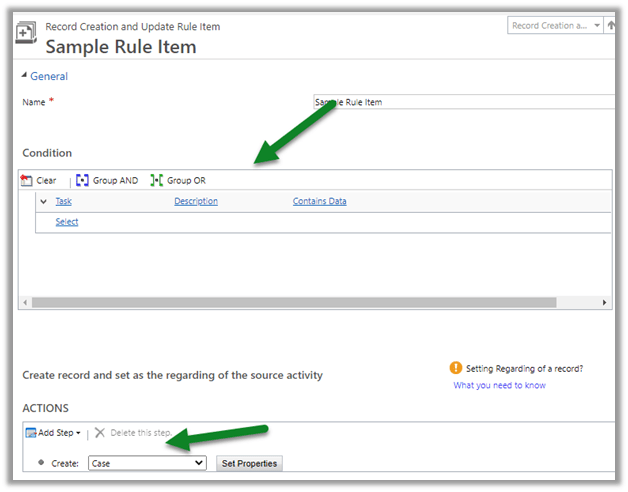
Say e.g. we have below rule created for Task in the classic or legacy experience.

For the rule item, for simplicity, we have kept the condition as a description field containing data.

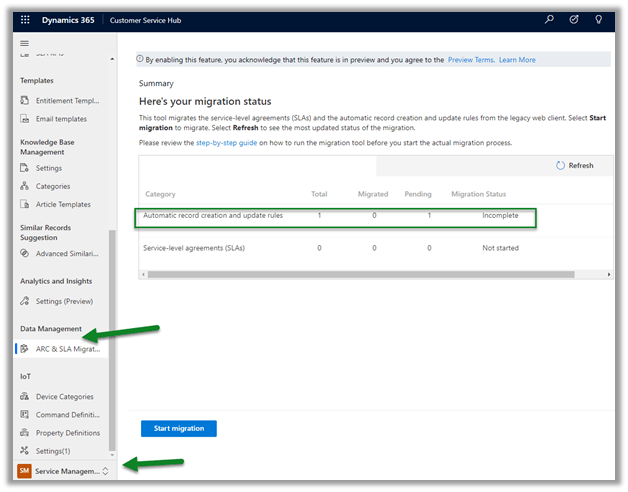
Now let us open the Customer Service Hub, and navigate to Service Management Area – ARC and SLA Migration tool

There we can see the 1 rule that we had created listed.


Let us click on the Start Migration button to start the migration.

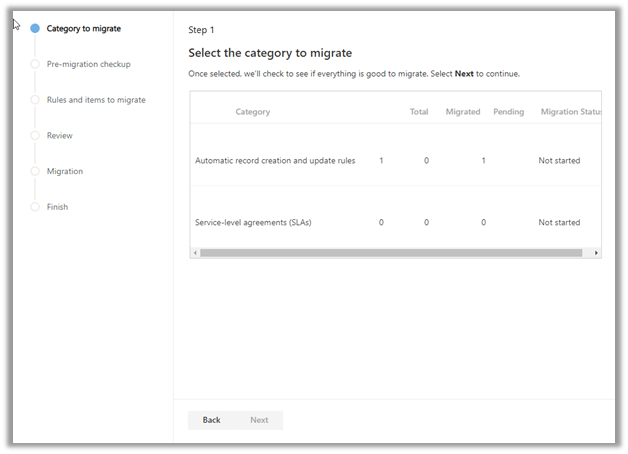
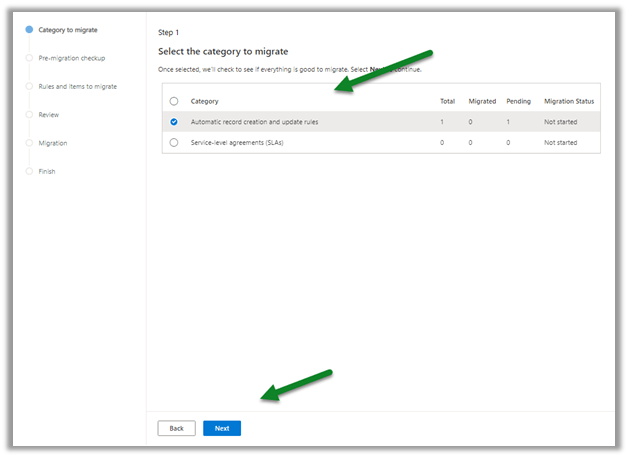
Let us select the category and click on Next.

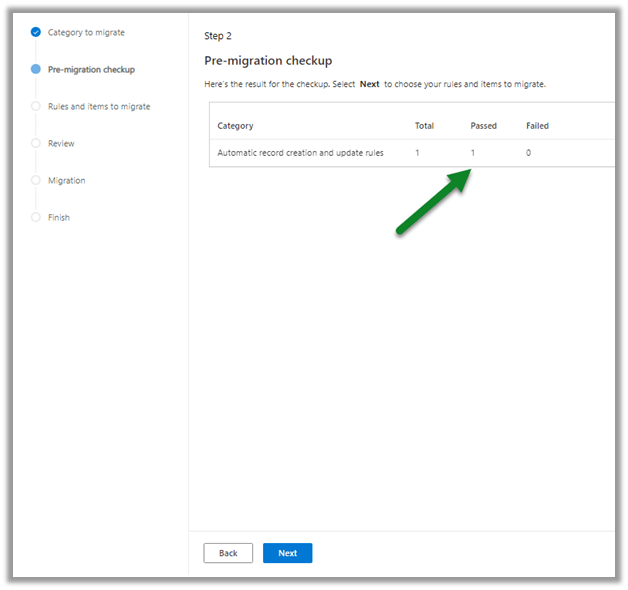
The next step is pre-migration check

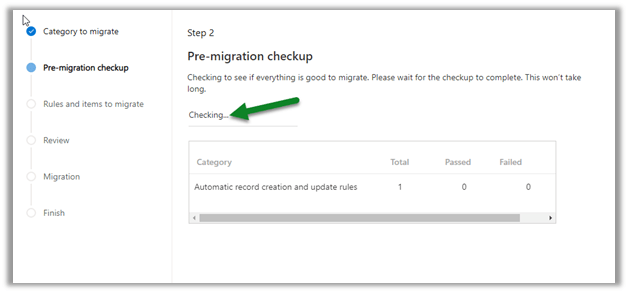
It shows as passed after the check

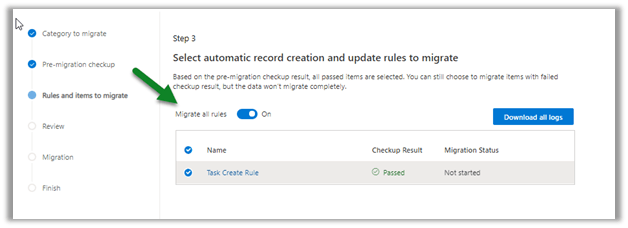
The Rules and items to migrate give the option to select the rules to migrate.

The next screen gives the option to review the selection before starting the migration.

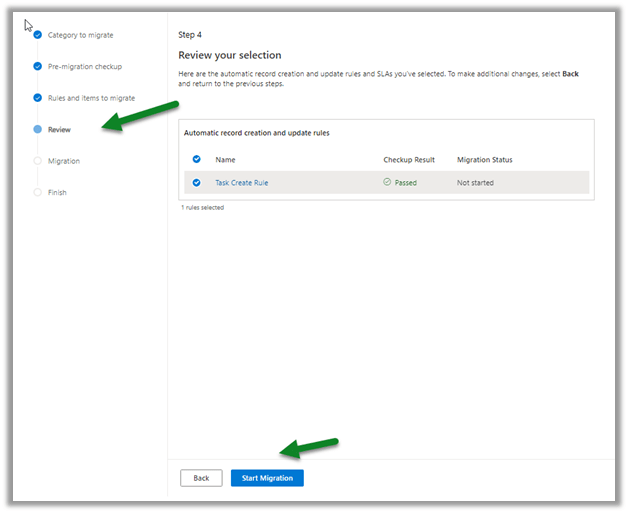
Clicking on Start migration starts the process.

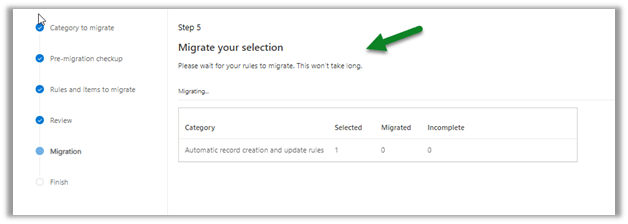
Below we can see the migration completed.

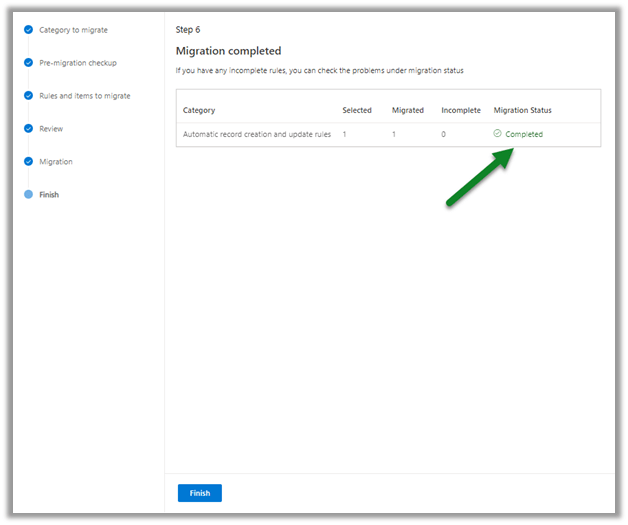
Once completed, we are presented with the below summary screen

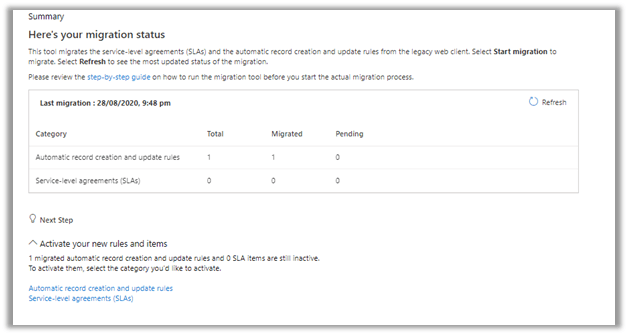
The new rule has the suffix migrated added to its name.

We can open the rule to check its definition. (and activate it)

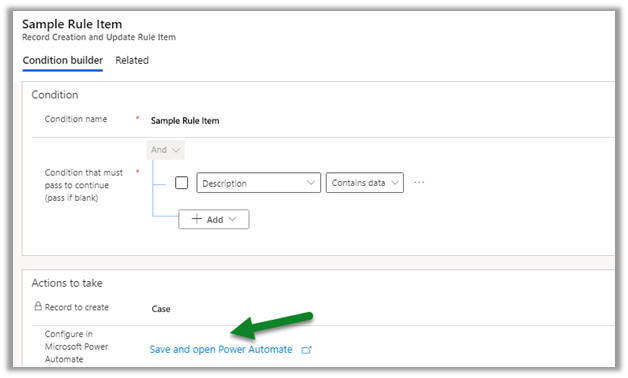
As expected we have our rule updated to use the Power Automate.


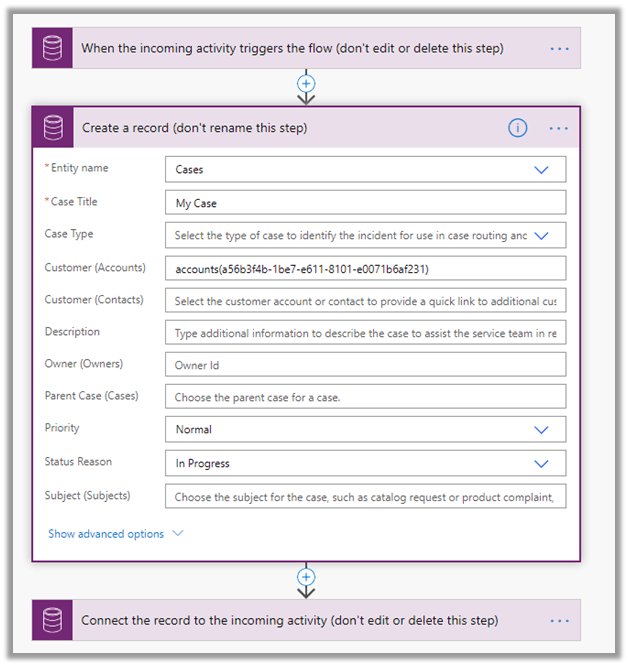
Below is the rule created in legacy experience.

Note: –

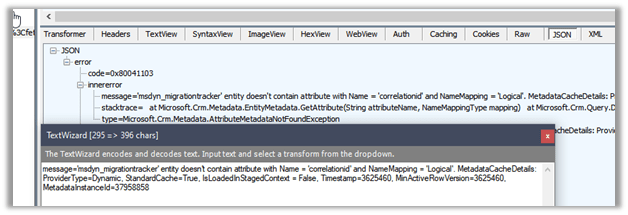
Earlier we got the below error message, which was quickly resolved by Microsoft after it was reported to them.

message=’msdyn_migrationtracker’ entity doesn’t contain attribute with Name = ‘correlationid’ and NameMapping = ‘Logical’. MetadataCacheDetails: ProviderType=Dynamic, StandardCache=True, IsLoadedInStagedContext = False, Timestamp=3625460, MinActiveRowVersion=3625460, MetadataInstanceId=37958858

Dynamics 365 2020 release wave 2 –https://docs.microsoft.com/en-us/dynamics365-release-plan/2020wave2/

Hope it helps..

Log Canvas Power App telemetry data in Azure Application Insights | Power Apps


priyeshwagh777's avatarD365 Demystified

Here’s how you can register your Canvas Power App in your Azure’s Application Insights and log telemetry data into Azure.

Some basic info about what all you can see in Application Insights is –

  1. Count of Users who used the app
  2. Events logged, Sessions logged
  3. Device info
  4. Region info

It’s quite simple to set it up! Let’s take a look –

Registering in Application Insights in Azure

First, make sure you do have an Azure Subscription. Let’s look at how you can register an Application Insight record.

  1. Look for Application Insights in Azure in the search bar
  2. Then, among other records, you can register a new one which will identify with your Canvas Power App
  3. Review all that you entered and move ahead
  4. It’ll be deployed pretty quickly within a few minutes unlike some heavy Azure resources
  5. Upon completion, you can navigate to the resource and see the details

    Zoomed…

View original post 374 more words

Approvals – Power Automate & Dynamics 365


app

Assign approvals to any user in the Tenant – Power Automate

We recently implemented Approvals, and we required that any user in the tenant should be able to provide approval. For one of the users, we got the below error while testing the flow. UserNotMemberOfCdsSecurityGroup This was because we were using the Security Group to control access to Dataverse Environment. So adding the user to the…

Fixed – ‘InvalidApprovalCreateRequestAssignedToNoValidUsers’. Error Message: ‘Required field ‘assignedTo’ contained no valid users in the organization’.

We would get the below error while using Approvals in Power Automate “BadRequest. The request failed. Error code: ‘InvalidApprovalCreateRequestAssignedToNoValidUsers’. Error Message: ‘Required field ‘assignedTo’ contained no valid users in the organization’” This error occurs if we are trying to send the approval to the user which doesn’t exist in the organization or to the external users.…

Fixed – Error code: ‘UserNotMemberOfCdsSecurityGroup’. Error Message: ‘The user ‘xyz’ cannot be created in Microsoft Dataverse because the account is not a member of group ‘abc’

We would get this error within Power Automate Approval Flow if we are using Security Group to control access to Dynamics 365 Environment and are sending Approval to a user who is not a member of that security group. Below is the User within the Tenant but is not member of the My CRM Group…

Approvals in Microsoft Teams / Power Automate

Approvals App for Teams was introduced early this year. To see it in action, let us start by first adding the Approval app in Teams. Search for the app. And click on Add. The Approval app shows all the Approvals Received and Sent within teams, which can be filtered based on status. We can also…

How to – Use markdown to format approval emails – Power Automate and Dynamics 365

Let us update our previous flow, to use markdown to format the approval email. Check other posts on Approvals – https://nishantrana.me/2020/08/31/approvals-power-automate-dynamics-365/ Markdown is the lightweight mark-up language for adding formatting elements to the plain text. Refer the Markdown cheat sheet We’d update the Details property of Start and wait for an approval action. Below we…

How to – Use Approval/Reject Type – Everyone must approve – Power Automate and Dynamics 365

Let us update our previous flow from approval/reject type – First to respond to Everyone must approve type. Check other posts on Approvals – https://nishantrana.me/2020/08/31/approvals-power-automate-dynamics-365/ For First to respond, either Approval or rejection by any of the approver completes the request. In case of Everyone must approve, if any of the approvers rejects the request…

How to – Use markdown to format approval emails – Power Automate and Dynamics 365


Let us update our previous flow, to use markdown to format the approval email.

Check other posts on Approvals – https://nishantrana.me/2020/08/31/approvals-power-automate-dynamics-365/

Markdown is the lightweight mark-up language for adding formatting elements to the plain text.

Refer the Markdown cheat sheet

We’d update the Details property of Start and wait for an approval action.

Below we have added some sample text that uses markdown syntax.

Below is how it renders in the outlook web access OWA.

And inside the Power Automate Approval Center.

Below we have used markdown syntax for defining the table.

Inside OWA.

Inside the Power Automate approval center.

And within the Power Automate mobile app

Kindly refer to the below table that lists down inconsistencies among different clients.

https://docs.microsoft.com/en-us/power-automate/approvals-markdown-support#client-support

Also check out –

https://www.about365.nl/2020/02/27/power-automate-approvals-markdown-or-html/

https://sharepains.com/2019/07/09/using-markdown-in-microsoft-flow-approval-actions/

Hope it helps..

Advertisements

Custom Responses in Approvals – Power Automate and Dynamics 365


Let us update our previous flow to use Approval Type – Custom Responses, using which we can define our custom response options (instead of limiting ourselves to Approve and Reject)

Check other posts on Approvals – https://nishantrana.me/2020/08/31/approvals-power-automate-dynamics-365/

Here we have updated the Start and wait for an approval action’s Approval Type from

Approve / Reject – First to respond

to

Custom Responses – Wait for one response.

We have defined below custom responses – Accept, Reject, and Need more details.

We have updated the Condition to check for Need more details

Let us save, check, and run the flow.

The approvers are presented with the custom responses

Here among the users to who the request is assigned, the flow will complete if any of the approvers responds, it will not wait for all the approvers to respond.

Now let us update it to use Custom Responses – Wait for all
responses.

Here the flow will wait for responses from all the approvers before moving to the next action.

Lastly, if we define more than 5 responses,

Outlook and OWA have a limitation of only showing the first five responses in the actionable message as shown below.

Within the Power Automate approval center and Power Automate mobile application we do not have this limitation.

Power Automate approval centre:

Power Automate mobile application:

Hope it helps..

Advertisements

Parallel Approvals – Power Automate and Dynamics 365


Let us update our previous flow to include parallel approvals.

Check other posts on Approvals – https://nishantrana.me/2020/08/31/approvals-power-automate-dynamics-365/

The difference between Approve / Reject Type – Everyone must approve and parallel approvals would be that using parallel approvals we could wait for responses for all the approvers, be it approve or reject.

In case of Everyone must approve, if any of the approvers rejects, the request is considered rejected and it will not wait for other approver’s response, and for the request to be considered approved all the approver needs to approve it.

Let us add a new action Add a parallel branch after Apply to each.

Let us keep only test user 1 in the first branch and in the other branch add a Start and wait for an approval action.

We have updated both to be approval type First to respond, set Assigned to the property to test user 1 and test user 2 for the respective branches.

And also we want to evaluate the responses from both the approvers before taking further action, so we have deleted the condition action from the first branch.

Let us add a new Condition action, with 2 AND conditions, i.e. if the first user approves and the second user rejects which corresponds to the respective Start and wait for an approval action.

Here if the condition is fulfilled we update the description of the case record.

Let us save, check, and trigger the flow.

After test user 1 has approved, we can still see the flow waiting for user 2 to respond.

The flow completes successfully after the response is received from both the approvers. Here user 2 rejects the request.

As expected, we can see the description field updated as defined in the update the record action.

Hope it helps..