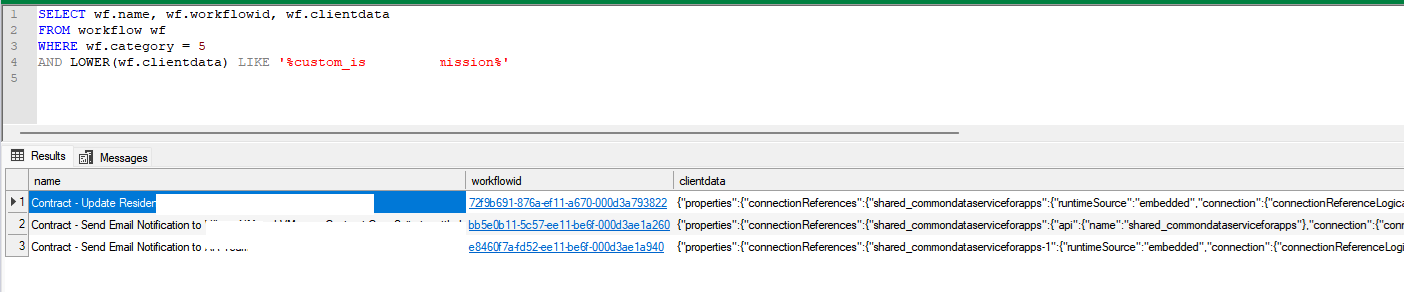
Sometimes we need to find all the flows where a specific Dataverse field is used — maybe before renaming it, removing it, or just checking its usage. Manually opening each flow is slow, but we can do it in seconds with SQL 4 CDS.
For e.g. we want to search for flows that use the field: custom_mysamplefield
For this we can make use of the below query, run it in SQL 4 CDS (XrmToolBox).
SELECT wf.name, wf.workflowid, wf.clientdata
FROM workflow wf
WHERE wf.category = 5
AND LOWER(wf.clientdata) LIKE '%custom_mysamplefield%'
Here table workflow stores flows and workflows details, category = 5 refers to cloud flows, clientdata contains the flow’s JSON Definition.
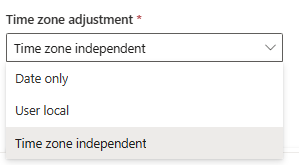
In our Dataverse environment, we had a field named custom_sampledate configured as a DateOnly type with User Local behavior. At some point, we changed its behavior to Time Zone Independent, assuming it would prevent confusion across time zones.
At first glance, everything seemed fine. But over time, users in time zones like New Zealand (NZ) started reporting an issue: for older records created before the change, the dates were now showing up as one day earlier than what they had originally entered.
This was because, when we changed the field’s behavior from User Local to Time Zone Independent, Dataverse stopped interpreting the date based on the user’s local time zone. Instead, it began treating the stored value exactly as-is, which caused trouble for values that were originally entered as User Local, especially from users in forward time zones like NZ.
Dataverse stores DateOnly fields as a datetime behind the scenes, with the time part set to 00:00:00.000. The behavior setting (User Local vs. Time Zone Independent) affects how this raw value is interpreted and displayed. Before the behavior was changed, NZ users (UTC+13/UTC+12) were entering dates into a User Local field. Dataverse automatically converted their local midnight time to UTC when storing it.
For example:
A NZ user enters 2025-04-03
Dataverse stores it as 2025-04-02 11:00:00 UTC
Later, when the field behavior was switched to Time Zone Independent, that same stored value was no longer adjusted for the user’s time zone. It got displayed as is as 2025-04-02 which was one day earlier than intended.
However, the new records entered after the change didn’t show the issue, because after the behavior was set to Time Zone Independent, any newly entered values were saved and displayed exactly as the user typed them—without conversion.
To correct this mismatch without losing data, we followed the below approach:
Created a temporary DateOnly field named custom_sampledate_temp, set to Time Zone Independent behavior.
Copied all values from the existing custom_sampledate field into custom_sampledate_temp.
Deleted the original custom_sampledate field (after backups).
Recreated custom_sampledate with the same schema name, but set it back to User Local behavior.
Copied data back from the temp field into the new custom_sampledate field.
Changing a DateOnly field from User Local to Time Zone Independent, might look harmless—but it can cause subtle issues, especially across global teams. We need to careful before we make this change, as apart from UI this could result changing the JavaScript, Cloud Flows and Plugins where we have used that field to reflect correct date.
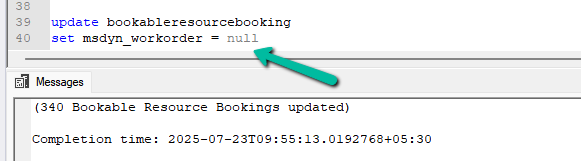
Recently we were cleaning some of the work orders and related records in one of our environments. However when trying to delete the bookable resource booking record, we were getting the below error. Deleting booking records is required if we want to delete the associated work order record.
We verified all the processes – workflows, SLA, and also checked the system’s plugin code, but could not figure out what was causing this error.
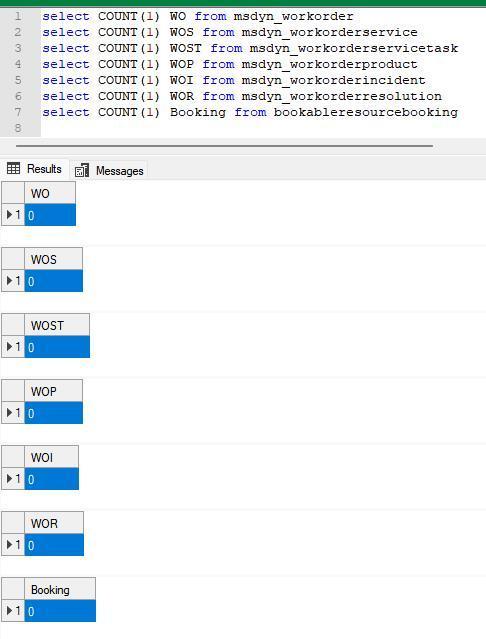
Eventually, to delete the booking records, we cleared the associated work orders first for them.
This then allowed us to delete the work orders and associated records
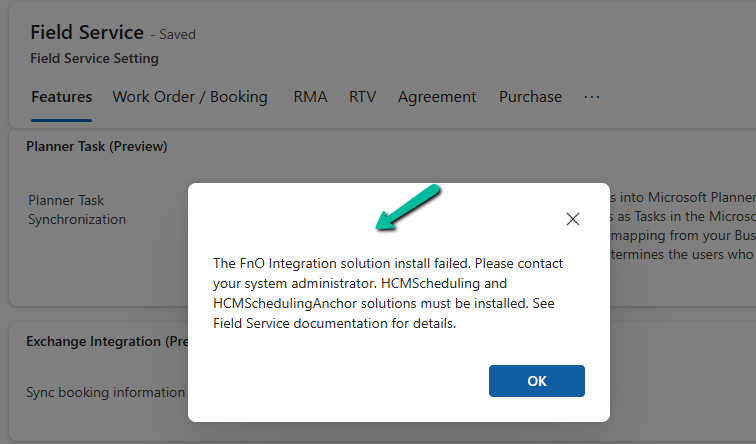
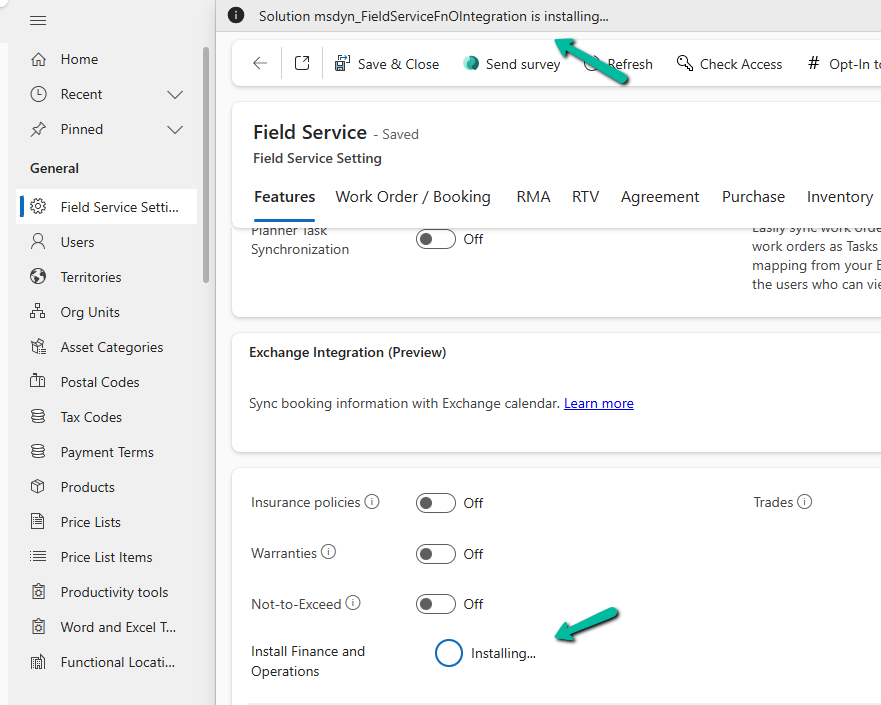
“The FnO Integration solution install failed. Please contact your system administrator. HCMScheduling and HCMSchedulingAnchor solutions must be installed. See Field Service documentation for details.”
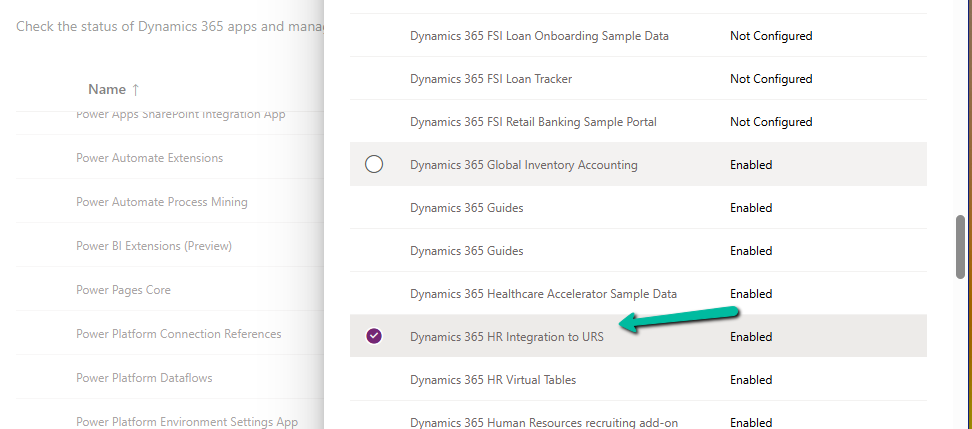
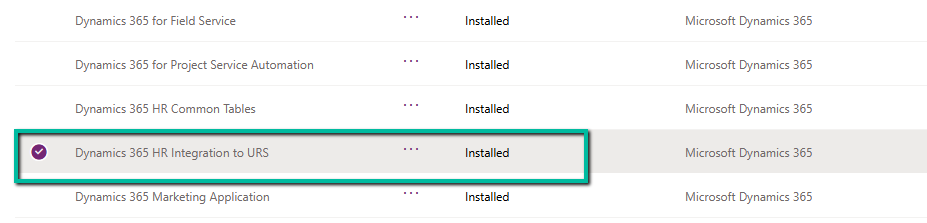
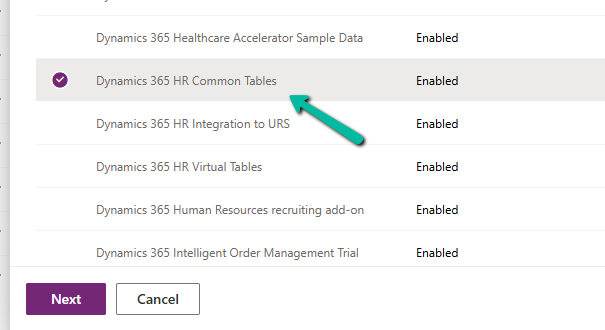
To fix it, we need to install the “Dynamics 365 Human Resources integration to URS” app.
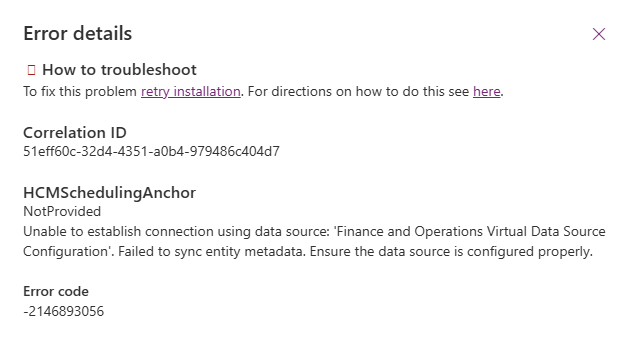
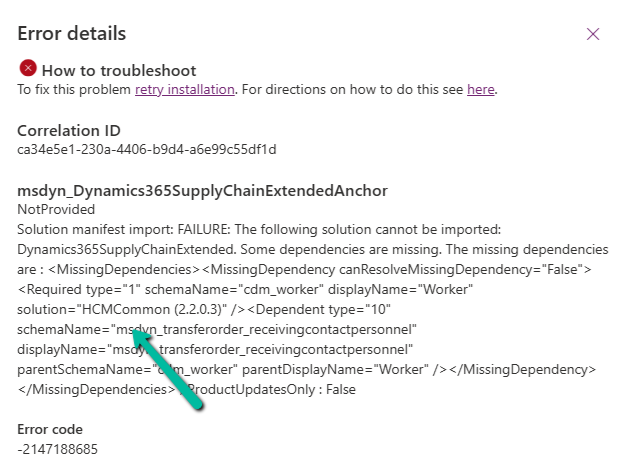
However, while trying to install Dynamics 365 HR Integration to URS app, we got the following error –
HCMSchedulingAnchor
NotProvided
Unable to establish connection using data source: ‘Finance and Operations Virtual Data Source Configuration’. Failed to sync entity metadata. Ensure the data source is configured properly.
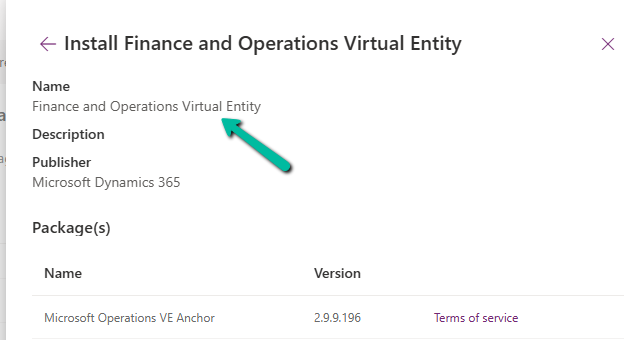
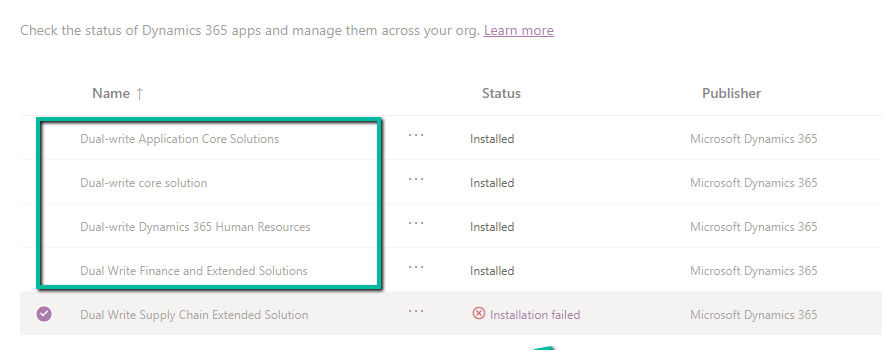
The fix was to install the Finance and Operations Virtual Entity app first.
After installing Finance and Operations Virtual Entity, we were able to install the Dynamics 365 HR Integration to URS app successfully.
That finally allowed us to install the FnO Integration (msdyn_FieldServiceFnOIntegration) in our Environment.
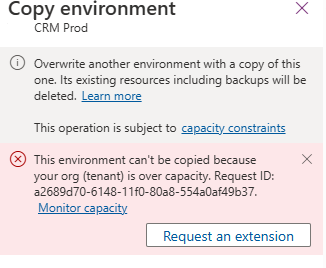
When trying to overwrite another environment with a copy of Prod, the system prevented the operation due to exceeding tenant capacity limits.
This copy operation is subject to environment and storage capacity constraints.
We raised a Microsoft Support Ticket and learned that we can resolve this issue by either purchasing additional storage or requesting free temporary storage to complete the copy operation.
We need to raise another support ticket for temporary storage, that includes below details
The amount of storage we need
The duration for which it should be available
The reason for the request
The maximum duration that can be requested is 6 months.
The maximum storage that can be requested is 200 % of what is purchased.
Thanks to Microsoft, within few mins of raising the support ticket we were provided the additional temporary storage.
We got our environment extended for 6 months with 200 GB additional capacity that allowed us to complete our copy environment.