D365 V9{Upgrade}: Client API Change for openEntityForm


Ajit Patra's avatarAjit Patra

Prior to D365 V9, we were using Xrm.Utility.openEntityForm() to open an existing record or to open a create form of an entity providing some additional parameters. However, in D365 V9 as it has been deprecated, we need to use Xrm.Navigation.openForm() to perform the same operation.

Here’s an example of the change in API along with it’s parameters.
D365 V8:


D365 V9:

While creating a new record, we can pass values to the attributes using an object which is optional. Please see below sample:

Hope it helps!!

View original post

Upgrade to new Xrm client API object model (v9) smoothly using XrmToolBox plugins


We are currently in process of upgrading Dynamics from version 8.2 to 9.0. One of the major change is updating our current JavaScript to the new Xrm Client API Object Model.

https://docs.microsoft.com/en-us/dynamics365/get-started/whats-new/customer-engagement/important-changes-coming#some-client-apis-are-deprecated

https://docs.microsoft.com/en-us/dynamics365/customer-engagement/developer/clientapi/understand-clientapi-object-model

Below are the most useful tools à

Install the plugin, connect to your organization and click on Retrieve Jscript Webresources, it will list all the JScript Web resources found.

Click on Scan

It will list down all the issues found.

One common change that we need to do across all our JScript is to pass the ExecutionContext from Form as well as Fields (and Ribbon) events. Script Finder makes it extremely easy to find them out.

Click on Find Scripts usage and it will generate a report with all the details as shown below

Now we can follow the generated report and directly make the change to the form, field, and ribbon instead of searching for it manually.

Happy Upgrading !!

D365 V9{Upgrade}: Ribbon button changes


V9 Ribbon Changes

Ajit Patra's avatarAjit Patra

If we have custom Ribbon button and custom JS code to perform some action on click of it or to simply display/hide Ribbon button based on some condition in JS code in version prior to D365 V9, then following changes need to be done to make them work in D365 V9.

  1. Using Ribbon Workbench, add a new parameter to the command/enable rule/display rule of type CRM Parameter:aa
  2. Select the value of CRM Parameter as PrimaryControl:bb
  3. After making above changes Click on Publish.cc
  4. Then coming to JS code, pass executionContext as parameter to the method used in command/enable rule/display rule.dd

NOTE: Here, we talked about only ribbon button related changes wrt D365 V9. Other client API changes still need to be done as part of upgrade activities as mentioned here.

Hope it helps!!

View original post

How to – Deal with OptionSet inside Power BI in Dynamics 365 CE


Updated 8-Sep-2018 –> Please check the Power Query Builder tool of XrmToolBox. Thanks Scott Sewell for informing about this wonderful tool.

Suppose, we have created a Power BI Report which makes use of OptionSet field.

It is on incident entity and we have selected priority code and state code option set fields. The problem is that we only get the value for them, so to get the label either we can manually specify it or use the plugin Power BI Option Set Assistant. We’d see both the methods.

Let us take state code field first and specify label for them manually.

In the Query Editor, select New Query and specify following value and save it.

= #table({“value”,”label”},{{0,”In Progress”},{1,”Resolved”}})

Select the main query and click on Merge Queries

Select statecode and value to map them, specify left outer join for Join Kind as shown below

Select the new column added to the query and check the label.

We now have the label specified added as a new column to our query.

Here, for small set of values we can specify the label manually, however if there are too many values this might not be feasible and also if there are changes in OptionSet inside Dynamics 365 CE, we’d have to do it manually here, which makes it difficult to maintain.

So, let us use the wonderful PowerBI OptionSet Assistant plugin from our favorite XRMToolBox

Install the plugin

Click on Load Entities and select Case Entity.

Select Priority field and click on “Create records for selected option sets

Basically, it will create a new entity named gap_powerbioptionsetrefs entity, which will hold the records corresponding to each of the values of the optionset field selected.

Back in Power BI create a new query and select the gap_powerbioptionsetfrefs entity and save the query.

Now follow the same steps, select the main incidents query and perform merge queries operation as shown below

Expand the column to select the label field

Our final query à

Hope it helps..

How to – Upgrade from Dynamics CRM 2016 On-Premise to Dynamics 365


First – check if you are eligible for the Fast Track program

https://nishantrana.me/2020/05/15/dynamics-crm-on-premise-to-online-migration-program-microsoft-fasttrack/

Be aware of Version Compatibility –

https://docs.microsoft.com/en-us/previous-versions/dynamicscrm-2016/developers-guide/gg328109%28v%3dcrm.8%29#version-compatibility

https://docs.microsoft.com/en-us/dynamics365/customerengagement/on-premises/developer/introduction-solutions

Upgrade the existing CRM 2016 On-Premise Server to CRM 2016 (8.1) for its solution to be compatible with Dynamics 365 Online using cumulative updates.

https://support.microsoft.com/en-gb/help/3142345/microsoft-dynamics-365-onpremise-cumulative-updates

If upgrading from previous version i.e. prior to CRM 2016, use “Migrate by using a new instance of Microsoft SQL Server” approach

https://technet.microsoft.com/en-us/library/hh699669.aspx

https://technet.microsoft.com/en-us/library/hh699747.aspx

Once updated to compatible CRM 2016 On Premise (8.1), go to settings à customizations and export the existing solutions or create a new solution, add all the required solution components to it as unmanaged which will be imported to the new Dynamics 365 online environment.

Create a new Dynamics 365 Online Environment and synchronize it with your existing Active Directory

https://blogs.msdn.microsoft.com/crm/2013/07/18/how-to-synchronize-crm-online-with-your-active-directory/

With solution ready and imported to new Dynamics 365 Online, next step is migration of data.

Consider using a data migration tool like KingswaySoft.

Check out their Migration Starter Pack.

https://www.kingswaysoft.com/blog/2016/09/16/Announcing-Migration-Starter-Pack-for-CRM-Online-and-CRM-On-Premise

or Scribe

https://www.scribesoft.com/solutions/dynamics-365/

Use following tools to update the JavaScript to Version 9.0 of XrmToolBox.

https://www.xrmtoolbox.com/plugins/XrmToolBox.Dynamics365V9JavascriptValidator/

  • Script Finder (to update the form and fields for passing the executionContext)

https://www.xrmtoolbox.com/plugins/MsCrmTools.ScriptsFinder/

https://community.dynamics.com/crm/b/develop1/archive/2017/11/11/executioncontext-hits-the-big-time

Update JavaScript to use Web API.

https://github.com/jlattimer/CRMRESTBuilder

SQL Based report, if possible, needs to be converted to use Fetch XML. Use the following tool to speed up the process.

http://www.sql2fetchxml.com/

If the reports are too complex, plan to use Power BI reports.

https://technet.microsoft.com/en-us/library/dn708055.aspx

Plugin and Custom workflow needs to be updated to run in an isolated environment i.e. sandbox along with references to the latest SDK assemblies.

https://docs.microsoft.com/en-us/dynamics365/customer-engagement/developer/plugin-isolation-trusts-statistics#web-access

https://www.nuget.org/packages/Microsoft.CrmSdk.CoreAssemblies/

If the existing On-Premise is integrated to other applications, make sure they can still talk with new Dynamics 365 Online.

Recurring jobs if needed, can be deployed to Azure as Azure WebJobs.

https://docs.microsoft.com/en-us/azure/app-service/websites-dotnet-deploy-webjobs

Use Hybrid Connection to talk with On-Prem resources.

https://docs.microsoft.com/en-us/azure/app-service/app-service-hybrid-connections

These were some of the points I could quickly think of. Please share your thoughts and experiences in comments. I’d update this list.

Do check out :

Microsoft Dynamics CRM (on-premises) to Microsoft Dynamics
Online Migration Guide

https://download.microsoft.com/download/6/D/6/6D67BDEA-1D67-42B4-A52A-CF13CD547CB5/OPtoCRMOnlineMigration.pdf

Hope it helps..

Advertisements

My notes on Dynamics 365 Data Export Service


Recently we configured Data Export Service in our Production environment. The idea was to export the data to Azure SQL DB that can be used for Power BI report.

https://nishantrana.me/2017/03/19/configuring-data-export-service-in-microsoft-dynamics-365/

Pros:

  • Easy to configure.
  • Takes care of incremental changes.
  • Easy to check the status

Cons:

Issues with the Failed records.

For e.g.

We have around 200K records failed for one entity as shown below.

There is preview feature added for retrying the sync for the failed records.

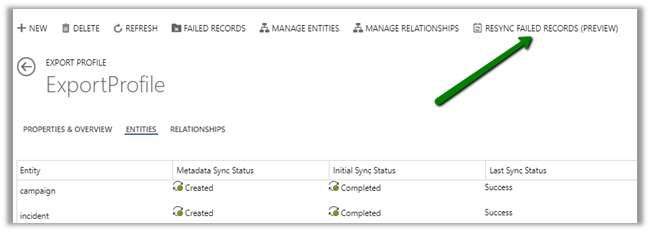
Clicking on Resync Failed Records didn’t help much here as we didn’t see any change in the count of failed records.

And now we are getting the below message for it.

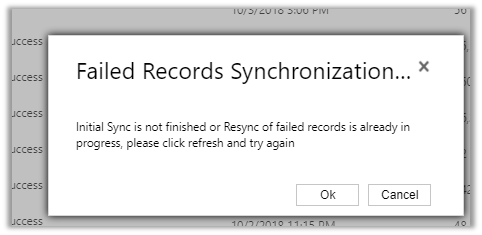
It has been more than 24 HOURS when we had started the Failed Records Synchronization.

This feature being still in preview, we can expect few things not working.

So how do we deal with failed records, how do we figure out the reason for them failing so that we could correct it and retry our export ?

For this we can use the Failed Records feature of Data Export Service to get the logs of the failed records

It will give us a Blob URL, which is valid for 24 hours, to which we can connect through Azure Storage Explorer and check the logs.
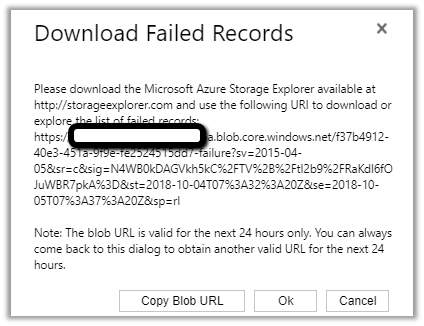
Copy the Blob URL

Download the Azure Storage Explorer

https://azure.microsoft.com/en-us/features/storage-explorer/

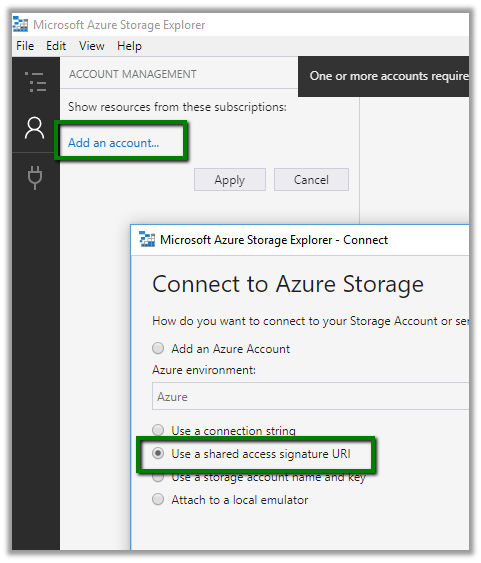
Open Azure Storage Explorer, select the Account section and click on Add an Account.

Select “Use a shared access signature URI” option and click on Next.

Paste the copied Blob URL

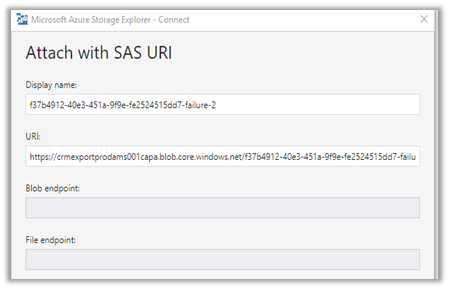
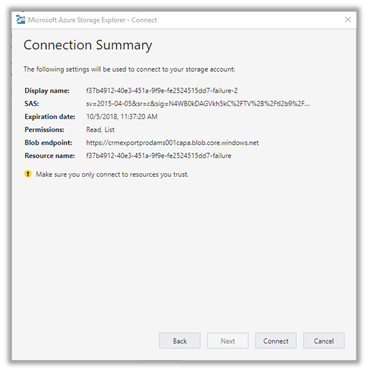
Click Next to get the connection summary and click Connect.

After connecting we should be able to see the log

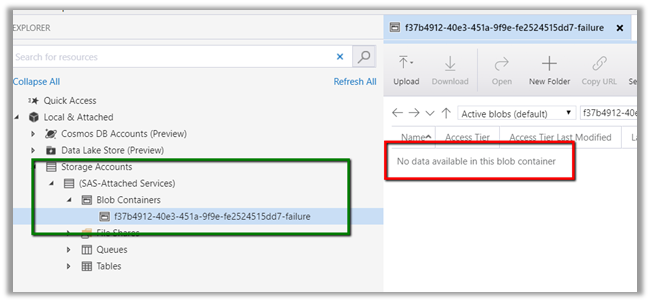
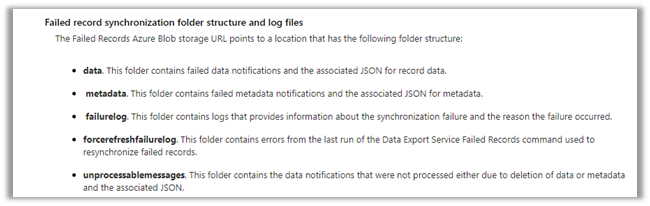
However in our scenario, the blog container was always blank. Ideally it should have the following information

One more limitation that we need to be aware of is that Activity type entities are not supported.

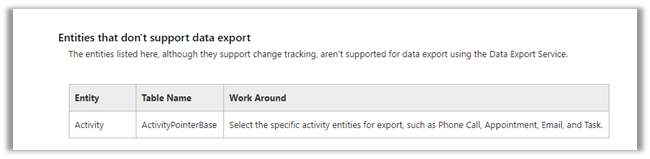
https://technet.microsoft.com/en-us/library/mt744592.aspx#Anchor_17

And also if we delete one of the entities from the export profile and plan to add it later to the same profile or to a new profile, we need to delete its table and corresponding user defined type from the Azure SQL DB else we will get the exception.

https://technet.microsoft.com/en-us/library/mt744592.aspx#Anchor_14

Considering how easy it is to configure and takes care of the incremental data, this feature is well worth considering, however it is the failed records things that could prove a challenge, if we don’t have the logs for them or we are not able to fix them as we do not have much control over the things when compared to writing a custom code or using some tool like KingswaySoft Adapter.

Hope this helps..