Scan business cards in Dynamics 365 for Sales – 2019 Release Wave 2 (Unified Interface)


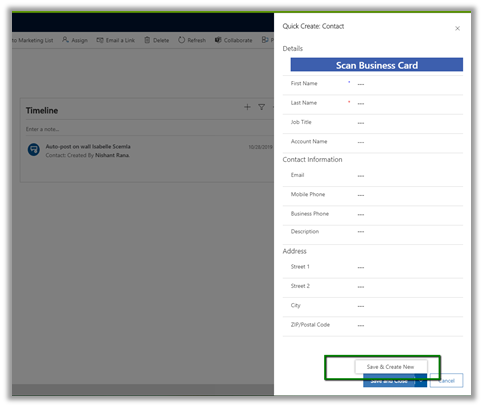
The scan business card feature added as part of release wave 2, allows salespeople to quickly scan business cards using the Quick Create Form. The scanner reads the information from the card and populates the corresponding mapped fields in the record.

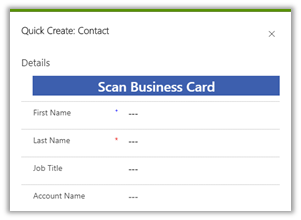
Out of the box, it is available in quick create form of lead and contact entity.

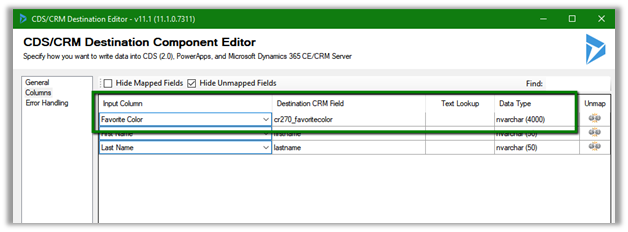
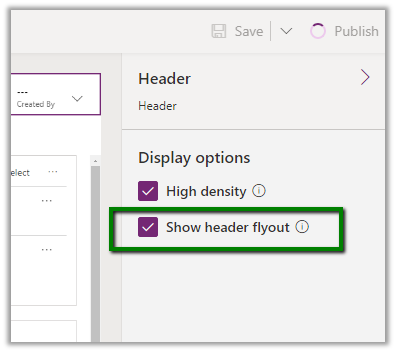
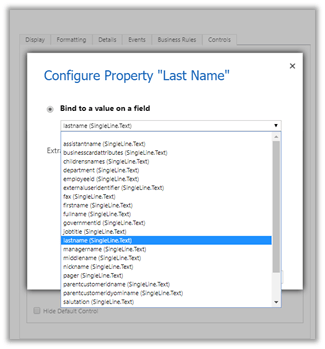
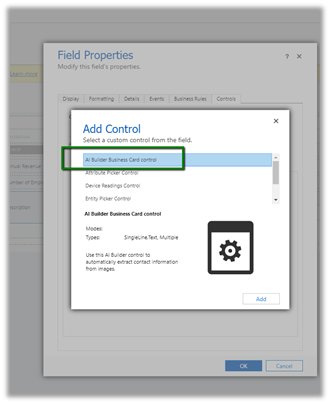
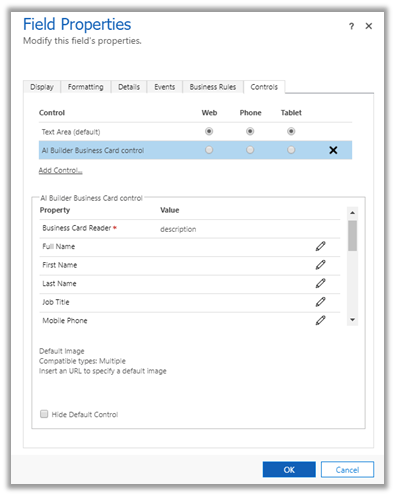
To specify the mapping for the business card control fields, navigate to Settings – Customizations and open the Quick Create form and select the Business Card Control and go to the Controls tab for its properties.

Click on the edit icon for the field and specify the mapping.

To enable for entities other than lead and contact, open the quick create form of that entity for customization and select either single or multiple lines of text field as a placeholder and add the business card control to it.

Followed by appropriate mapping of properties to the fields of that entity.

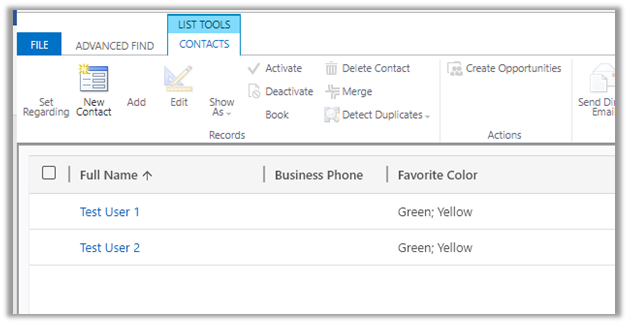
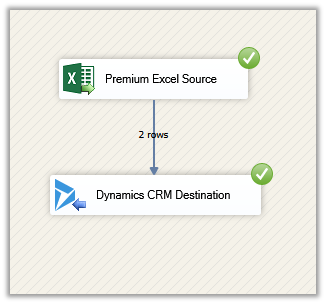
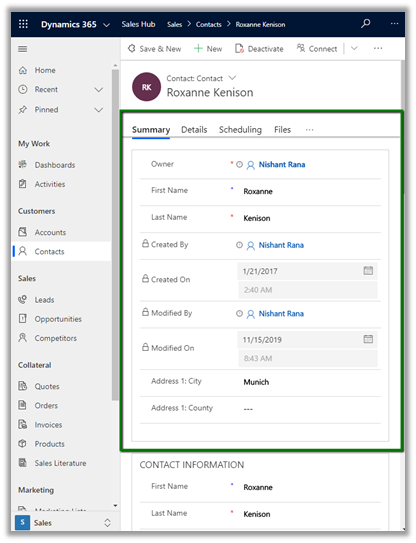
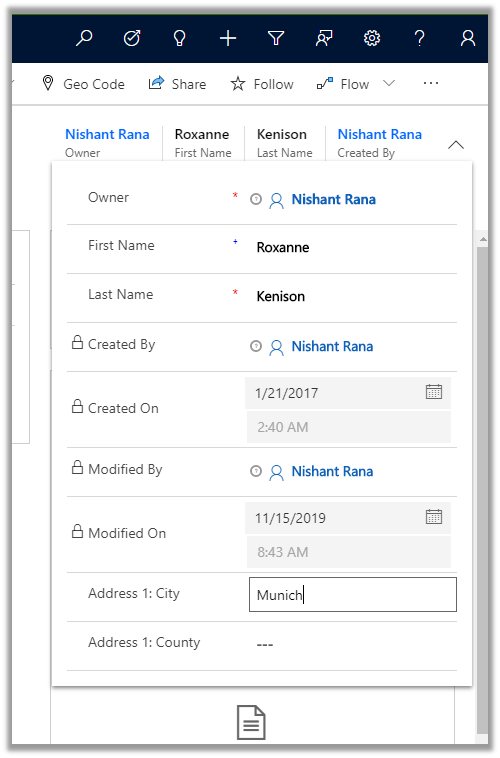
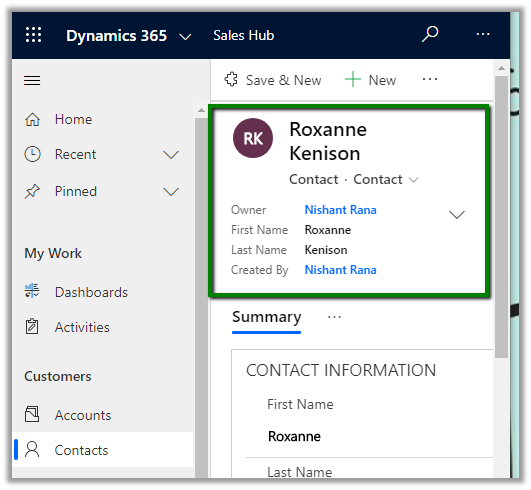
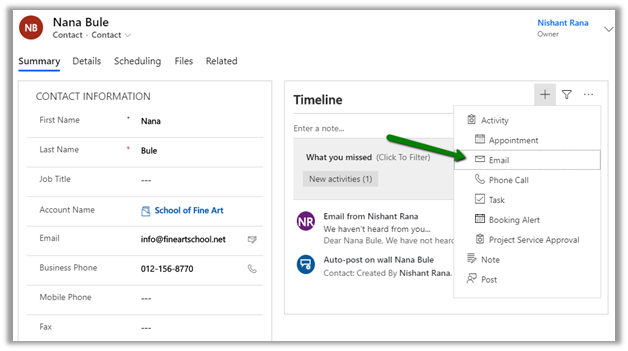
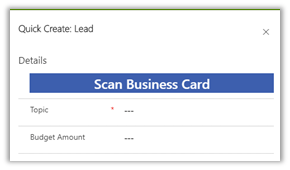
To see it in action let us create a new lead record using it’s quick create form. On click on the Scan Business Card button and selecting an image we get the values populated on the form.

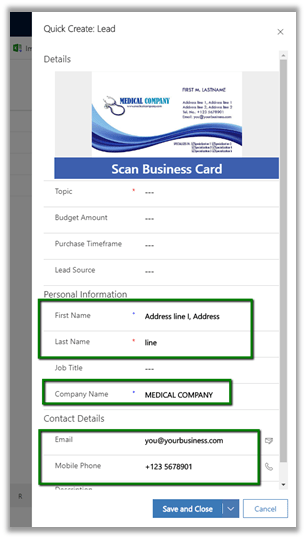
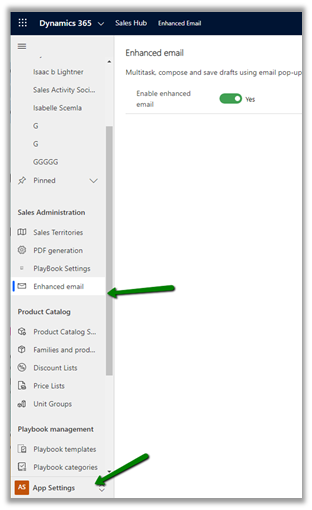
Make sure to enable the free trial of AI Builder.

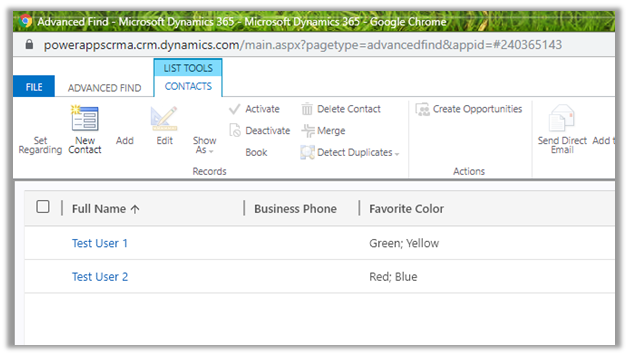
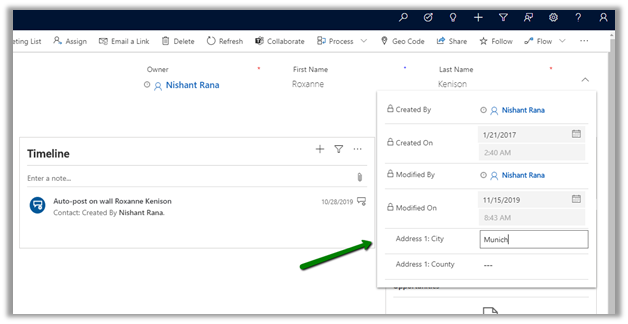
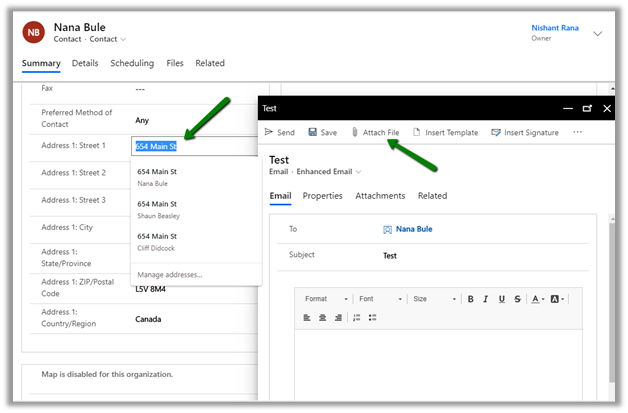
We can see the business card attached/saved with the record.

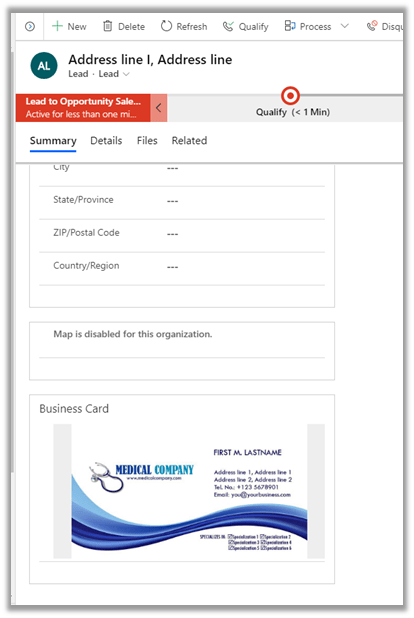
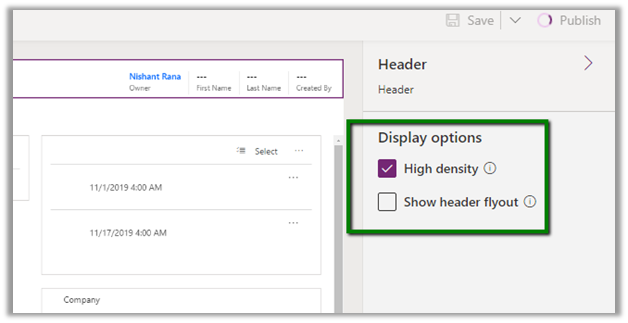
This behaviour can be configured.

Navigate to Sales Tab of System Settings

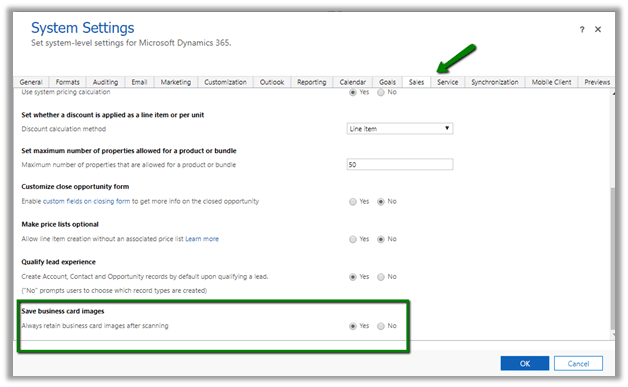
Few points to consider here

  • This feature is only available in North America and the EMEA region for now.
  • The mapping of address fields is not supported currently.
  • The users need to have a Common Data Service User role to use the control.

Hope it helps..

Open webresources Modal or Inline using Xrm.Naviagtion.naviagteTo in Dynamics 365 Unified interface


Debajit's avatarDebajit's Dynamic CRM Blog

Release wave 2 have released some wonderful features and one of them is the capability to open a webresource as modal or inline. I bet this is going to ease the life of lot of consultants who were traditionally using Xrm.Navigation.openWebResource or Xrm.Utility.openWebResource (deprecated) to open webresource and hear about the perennial client complaint of why it is not modal.

Introducing to you, the newest star on the rise – Xrm.Navigation.navigateTo

So let’s see how we can open the webresource as modal. Detailed documentation can be found here – https://docs.microsoft.com/en-us/powerapps/developer/model-driven-apps/clientapi/reference/xrm-navigation/navigateto

Sample code below.

var qs = "param1=1&param2=2"; var pageInput = {     pageType: "webresource",     webresourceName: "trng_/pages/newapitest.html",     data: encodeURIComponent(qs) }; var navigationOptions = {     target: 2, // 2 is for opening the page as a dialog.     width: 400, // default is px. can be specified in % as well.     height: 300, // default is px. can…

View original post 331 more words

How to – Migrate multi-select option sets in Dynamics 365 – SSIS (KingswaySoft)


Let us take a very simple example to understand how to migrate the multi-select option set in Dynamics 365.

Few points to consider before we use Multi-select option set

https://nishantrana.me/2018/04/27/limitations-of-multi-select-option-sets-in-dynamics-365-ce/

Here we will take excel as our source.

Create a new SSIS package, add the Excel Source component and Dynamics CRM Destination component in the Data Flow.

https://www.kingswaysoft.com/products/ssis-productivity-pack

https://www.kingswaysoft.com/products/ssis-integration-toolkit-for-microsoft-dynamics-365

Specify the source file path.

Here Favourite Color column will be mapped to multi-select option set field

Source excel file

The field in CRM

Within the Dynamics CRM Destination, specify the mapping. As the field is of nvarchar type in CRM we need to make sure that we are passing multiple values to it separated by a semicolon.

The way we map the normal option-set field is quite different than the multi-select

https://nishantrana.me/2018/09/20/easily-map-optionset-using-crm-optionset-mapping-editor-in-ssis/

Let us run the package.

After successful execution, we can the records created with the options specified.

Now let us take another scenario, where we have text or label specified instead of values in the source

On successful execution

We can see the records created.

Thus, we can specify either values or labels separated by a semicolon (if multiple) for migration to work seamlessly with the multi-select option set.

We need to make sure there are no spaces after the semicolon else we would get the exception

Error message

To get started with SSIS with Dynamics 365

https://nishantrana.me/2018/11/26/ssis-and-microsoft-dynamics-365/

Hope it helps..

Advertisements

High Density Headers in Dynamics 365 – 2019 Release Wave 2 (Unified Interface)


New high-density headers have been introduced for Dynamics 365 Entity Forms as part of 2019 Release Wave 2 for Unified Interface.

Let us try to understand various settings available for it

Log in to

https://make.powerapps.com/

select the environment, and select Data à Entities à Forms

Click on Edit Header Density to open the properties section for the Header. This setting is only available in the new form model app form designer.

Let us first uncheck High density option and see how it renders in the Contact Main Form.

Result:

  • The first 3 fields appear on the form within the Header section and the remaining 6 fields appear in the flyout section of the header.
  • The editable fields are rendered as editable and read-only fields as read-only.

On resizing the browser, the fields in the header are rendered in the Summary tab.

Now let us check with only High-density option enabled

Result:

Only the first 4 fields appear, there is no fly out section and all the fields are read only.

On resizing the browser, the fields in the header are rendered properly.

Now let us check with both the options enabled

Result:

The 4 fields appearing in the form are still read-only.

However, we can see all the fields being available in the flyout section both editable as well as read-only.

On resizing the browser, the fields in the header are rendered properly

Along with the flyout section

Thus, based on the total number of fields and types of fields i.e. read-only or editable, we can select the appropriate options of rendering for the Header in the new Unified Interface.

Meanwhile, the headers in our legacy web client

Legacy_001

Hope it helps..


Save and New Button in Quick Create Form – 2019 Release Wave 2 (Unified Interface)


With 2019 Release wave 2, now we have Save and New button available in Unified Interface.

However, for now, it is limited to the Quick Create Form.

For our main form, for both legacy web client and unified interface form, the Save and New button is not available in the command bar.

  • Unified Interface –

  • Legacy Web Client –

Let us try unhiding the button using our favorite XrmToolBox Plugin – Ribbon Workbench.

Select the Save & New button on the form and click on the Customize
Button.

Remove the below display rules and publish the changes

  • Mscrm.HideOnCommandBar
  • Mscrm.HideOnModern

We now have the button available in our legacy web client’s form.

And also, it is working as expected.

We can also use the shortcut CTRL + Shift + S
to save the form and open a new form for our legacy web client form.

We also have the button appear in our new Unified Interface however it throws the below script error.

The below answer from Linn Zaw explains the reason for it not working in Unified Interface.

Below is the screenshot of the form (with Save & New button) in CRM 2011 before it was hidden in the product starting from CRM 2013 with the introduction of the new command bar.

Hope it helps..

Advertisements

Contextual Email Communication in Dynamics 365 for Sales – 2019 Release Wave 2 (Unified Client)


The new capability allows salespeople to write an email in the context of the record. Email opening in the non-blocking pop window allows salespeople to refer to the data without navigating away from it, easily attach documents and can leave the drafts record open.

The existing experience à

Clicking on the email

takes us to the new entity create form

To enable the new experience, navigate to App Settings and apply the Enhanced email

Now with new enhanced email, we can easily refer/copy values from the main record, attach files, insert templates, etc.

We can also navigate to other records, with the popup email windows still open.

Below we have navigated to the account record and we still have our email window open.

A salesperson can also have multiple active draft emails open simultaneously.

Thus, the new enhanced contextual email feature makes working with email much more intuitive / productive for the salesperson

Hope it helps..