Microsoft Azure / Cloud Computing – Introduction


Cloud Computing enables companies to consume a complete resource – such as virtual machine, storage, or an application as a utility – just like electricity – rather than having to build and maintain computing infrastructure in-house.

Cloud provider provides the cloud infrastructure which is shared across multiple clients. Clients can select which service to use and only need to pay for that service, which is billed on-demand.

Cloud provider takes care of high availability (disk failure, power supply) and disaster recovery (natural or human disaster like fire, flood, etc.)

Advantages of using cloud computing

Rapid elasticity, only pay for the services used, reliability, economics of scale, etc.

Azure Regions Interactive Map

https://build5nines.com/map-azure-regions/

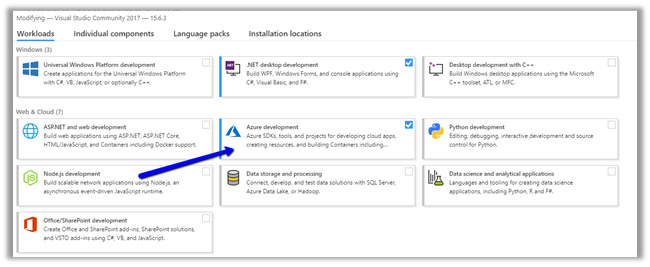
Types of Cloud Computing Services.

  • IaaS – Infrastructure as a service – Azure Virtual Machines, Azure Storage.
  • PaaS – Platform as a service – Azure Functions, Logic Apps, Azure Automation.
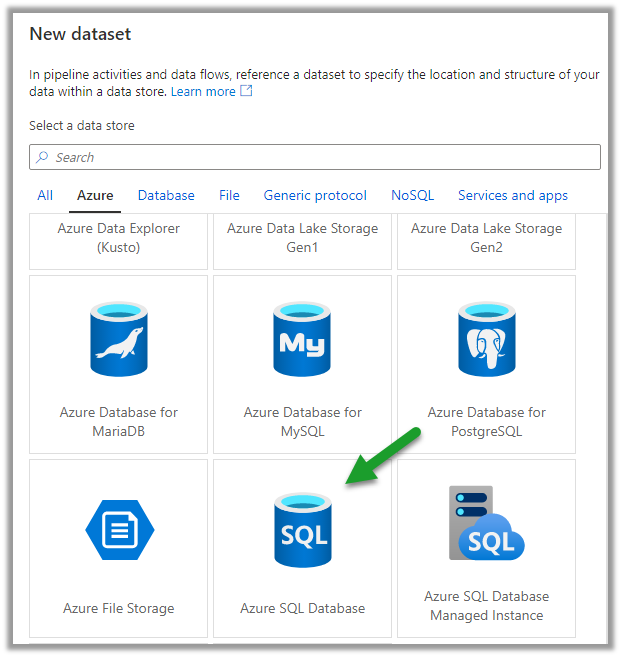
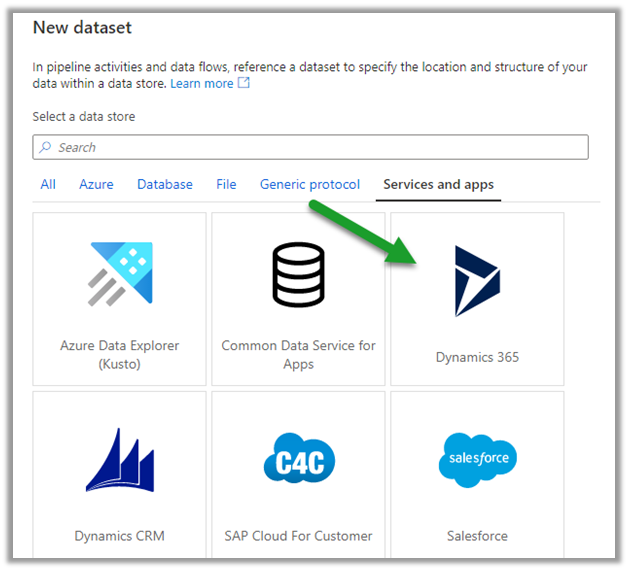
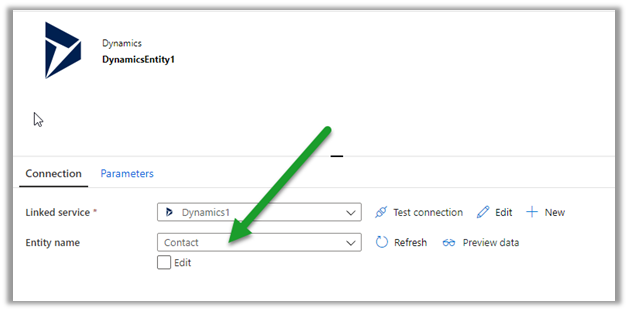
  • SaaS – Software as a service – Dynamics 365, SharePoint, Power Platform.

Types of Cloud computing deployment models.

Hope it helps..

How to – Use Azure Data Factory V2 to load data into Dynamics 365


Let us take a simple example where we will set up an Azure Data Factory instance and use Copy data activity to move data from the Azure SQL database to Dynamics 365.

Login to Azure Portal.

https://portal.azure.com

Search for Data factories

Create a new data factory instance

Once the deployment is successful, click on Go to resource

Inside the data factory click on Author & Monitor

Click on Author in the left navigation

Create a new Pipeline

And drag the Copy data activity to it

Go to the Source tab, and create a new dataset.

Below is our Azure SQL database with contacts table which will be our source here.


Select Azure SQL Database as the source dataset.


Create a new linked service to specify the connection properties.


Specify the details to connect to the Azure SQL Database.


We have selected the contacts table here.


Similarly, let us define a new dataset for Sink which will connect to our Dynamics 365 Instance.


Select the Dynamics data set and specify the linked service.

Specify the details of the Dynamics 365 instance to connect to.

We have selected contact entity as the destination.

Within the Mapping tab, we can specify the fields to be mapped.

Below is how we have specified the mapping.

Click on Validate and after successful validation, click on Debug to run the pipeline.

Within the Output window, we can see the status.

After the successful run, we can see the contact records created inside Dynamics 365.

We can specify a trigger for the pipeline as shown below.

Publish All will publish the changes to the data factory.

Hope it helps..

Advertisements

How to – Use Azure AD Conditional Access to block access by country (Dynamics 365)


In the previous post, we covered conditional access based on the device platform, here we’d look into how we can use the network location to block the access.

We can either use IP ranges or Countries / Regions for defining the location.

Login into the Azure Portal

https://portal.azure.com/

Navigate to Azure Active Directory – Security – Named locations to define the location.


Here we are adding a new countries location record.


For the new location, we have selected India and UAE.


Next click on Conditional Access to define a new policy.


For Users and groups, we have selected a user named testuser1.


For Cloud Apps or actions, we have selected Common Data Service.


For Conditions, we have specified Locations condition with the Restricted Locations record that we had created earlier.


For Access Controls, we have selected Block access.


Enable and create the policy.


Before the policy was enabled, test user1 was able to access Dynamics 365.


After enabling the policy if we try accessing Dynamics 365 from either UAE or India location, we’d get the below message.


Same for the Dynamics 365 for Phones app.


Test user 3 to which policy doesn’t apply can still access Dynamics 365.


Hope it helps..

Advertisements

Using Azure Bot Service to create Bot


Using Microsoft Bot Framework

Azure Bot Service is an integrated environment that allow us to easily register, build, deploy our bots. It provides the required components and hosting environment for creating bots through Bot Builder SDK using either C# or JavaScript and connector service to connect to various channels.

Login to Azure Portal.

https://portal.azure.com

Search for Web App Bot

We have selected Basic Bot template.

After the Bot Web App is created, we have the option to either Download Bot Source Code to keep developing using Visual Studio or we can open it in online code editor.

Online Code Editor allows to update the source code within the App Service Editor

As the basic bot app template uses the Language Understanding Intelligent Services, we can log on to the Luis

https://www.luis.ai/welcome

There we can see the app.

With all the corresponding Intents, Entities and Utterances.

To test the bot either we can either download the emulator for testing locally or can test online using Web Chat.

Select Test in Web Chat

After we have tested it, next we add channel to our Bot, here we will add Skype.

Below are some of the configuration that can be applied for Skype.

Messaging gives the option of enabling the messaging, Calling let us to enable calling, groups allows us to add the bot to groups and Publish option allows to publish the bot and also submit it for review if it to be used by more than 100 contacts as shown below.

Clicking on Save publishes the bot and we can see the Skype added as one of the channels.

Click on Skype icon to add it to skype.

Add to contacts will add it to Skype and can start our conversation.

Hope it helps..

Changing the target runtime version of Azure Functions


Azure Functions 2.x runtime is based on .NET Core 2 from .NET Framework 4.7 in 1.x. So, any application migrating from 1.x to 2.x needs to make sure that they are using and referring the compatible code and libraries.

We can also update our Azure Functions to target the appropriate runtime using the below steps à

Inside Azure Portal, select the Function App, click on Application Settings within Platform Features tab.

We can specify the version number for the APP SETTING NAME – FUNCTIONS_EXTENSION_VERSION

~ tilde à indicates that the latest version of that major version.

Get all the details here

https://docs.microsoft.com/en-us/azure/azure-functions/functions-versions

Hope it helps..

Fixed – Publish as Azure Web Job Option missing in Visual Studio 2017


While trying to publish one of our console application to Azure as Web Job we couldn’t find the “Publish as Azure WebJob..” option

It was because Azure development tools were recently uninstalled from the system.

To install it, go to Windows à Program and Features à Select Visual Studio 2017 and click on Modify.

And select Azure Development for installation

Select Azure Cloud Services tool.

After installation it will ask for restart.

After restart we’d see the option added in our Visual Studio.

Hope it helps.

Advertisements